Exercise 1: Create a new map

Lesson 2: Using the Resulting SDF Files

Exercise 3: Edit the schema

AutoCAD Map 3D Tutorials > Tutorial: Managing Data From Different Sources > Lesson 2: Using the Resulting SDF Files >
Exercise 2: Connect to the New SDF Data
Connect to the SDF file you created.
NoteThis exercise uses the
map you created in the previous exercise, and the SDF file you saved
in Lesson 1: Converting Drawing Layers to Feature
Classes.
To connect to the new SDF file
- In Display
Manager, click Data
 Connect
To Data.
Connect
To Data.
Switch to Display Manager to connect to data.
- In the Data Connect dialog box, under Data Connections By Provider, click Add SDF Connection.
- Click
 next to Source
File under Add A New Connection.
next to Source
File under Add A New Connection. - Open
the SDF file you created in the last exercise.
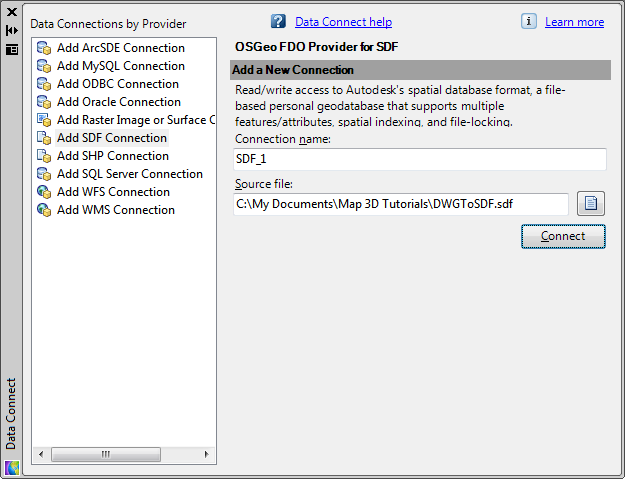
Connect to the SDF file you just created.
- Click Connect.
- Select
all the feature classes.
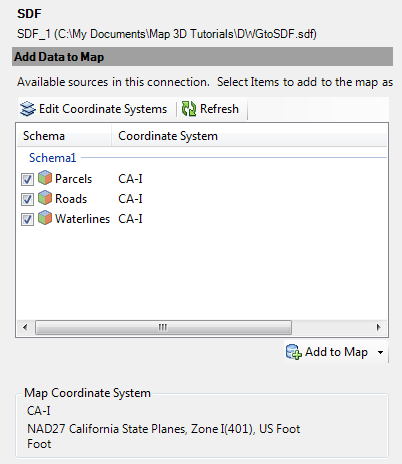
Each layer from your original map is listed as a separate feature class.
- Click Add To Map.
- Close the Data Connect window.
To continue this tutorial, go to Exercise 3: Edit the schema.