Exercise 2: Attach a drawing file
From AutoCAD Map 3D 2009
Exercise 1: Drag and drop a source file
Lesson 1: Use Multiple Sources
Exercise 3: Query in data from the drawing
Exercise 2: Attach a drawing file
You can use Display Manager to attach an AutoCAD drawing file.
NoteThis exercise uses the BuildMap1.dwg map you created in
the previous exercise.
To attach an AutoCAD drawing file
- If
you have not already done so, copy the \Program Files\AutoCAD Map 3D 2009\Help\Map
3D Tutorials folder to My
Documents.NoteThe location of My Documents varies, depending on your operating system. For Microsoft Windows XP, it is usually C:\MyDocuments. For Microsoft Vista, it may be C:\Documents and Settings\Administrator\My Documents\Map 3D Tutorials.
- In the BuildMap1.dwg file, in the Task Pane, click the Display Manager tab.
- Click Data
 Add
Drawing Data Attach Source Drawings.
Add
Drawing Data Attach Source Drawings.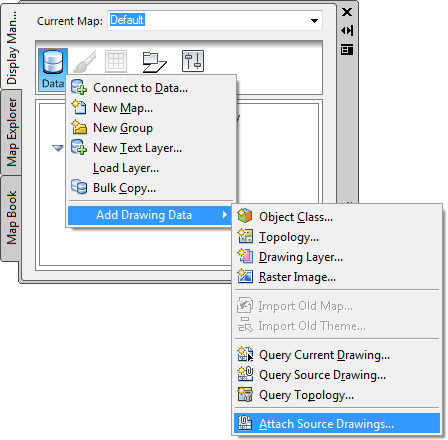
Use Display Manager to attach a drawing file.
- In the Define/Modify Drawing Set dialog box, click Attach.
- Navigate
to the folder in My Documents where
you copied the sample files and select Counties.dwg. NoteThe location of My Documents varies, depending on your operating system. For Microsoft Windows XP, it is usually C:\MyDocuments. For Microsoft Vista, it may be C:\Documents and Settings\Administrator\My Documents\Map 3D Tutorials.
- Click Add and then click OK.
- In
the Define/Modify Drawing Set dialog
box, click OK to attach the drawing file
to your map.
When you attach a drawing, it is not listed in Display Manager and it does not appear in your map. You must “query in” objects from the drawing to use in your map. You will do that in the next exercise.
- Click File menu Save to
save your work.
To continue this tutorial, go to Exercise 3: Query in data from the drawing.