High-Speed Capture LabVIEW Diagram
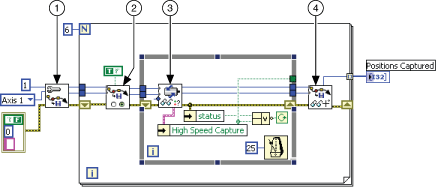
The following block diagrams demonstrate using NI-Motion to perform a high-speed capture, both with and without RTSI.
 |
Tip Refer to NI-Motion\Documentation\Examples\NI-Motion User Manual\ for the LabVIEW VIs for these examples. |
|
|
| 1 Configure High-Speed Capture | 3 Read per Axis Status |
| 2 Enable High-Speed Capture | 4 Read Captured Position |
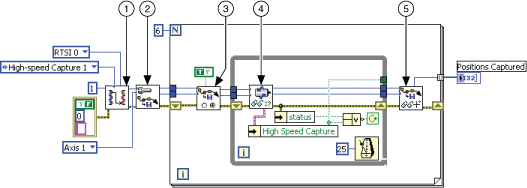
To trigger the high-speed capture from a RTSI line, set the Destination parameter in Select Signal to High Speed Capture 1, as shown in the following block diagram.
|
||
| 1 Select Signal | 3 Enable High-Speed Capture | 5 Read Captured Position |
| 2 Configure High-Speed Capture | 4 Read per Axis Status | |

