Step 3 Use Pan and Zoom
From Visual LANSA Logical Modeler
Step 3. Use Pan and Zoom
In this step, you will learn how to use the Pan and Zoom facility. The Pan and Zoom facility is used to control what part of the model is displayed.
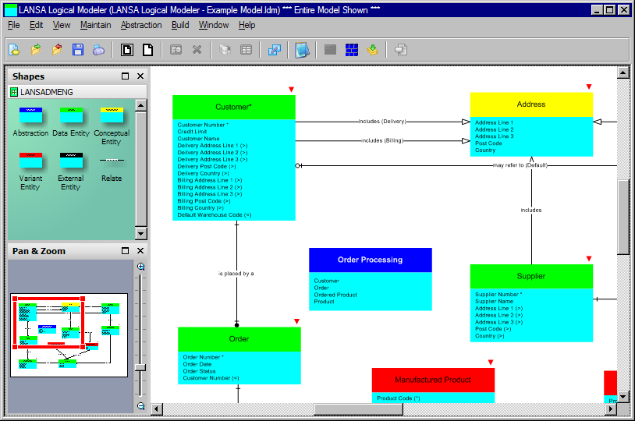
At this point, a diagram of the entire model should be displayed. Although objects within the model have text associated with them, the text can be hard to read, due to its small size. Using the Pan and Zoom facility can greatly increase the model's readability.
1. Click the ![]() Whole Page button on the toolbar or select the menu and choose the option. This will ensure that the whole model is displayed, enabling you to work easily with the Pan and Zoom facility. Note that the Pan and Zoom window displays a diagram of the entire model at all times.
Whole Page button on the toolbar or select the menu and choose the option. This will ensure that the whole model is displayed, enabling you to work easily with the Pan and Zoom facility. Note that the Pan and Zoom window displays a diagram of the entire model at all times.
2. Position the cursor slightly above and to the left of the entity in the top-left corner of the Pan and Zoom diagram. Click and hold down the left mouse button.
3. While holding down the mouse button, drag the mouse down and to the right. You will see a red border being stretched by the mouse movement. Stop when the red border is approximately half the width of the Pan and Zoom diagram.
Release the mouse button. The diagram will be updated appropriately. The diagram will show the objects surrounded by the red border, similar to the following example:
4. Once a zoom has been activated in this way, the red border can be moved around the diagram in the pan and zoom window, preserving the zoom magnification level.
5. To try this, position the cursor in the middle of the red border. A cross-hair cursor is displayed. Hold down the left mouse button and move the mouse to drag the red border to another part of the Pan and Zoom diagram. Release the mouse button to update the model diagram.
Tip:The Pan & Zoom Window can be undocked