Step 4 Assign an Identifying Element
From Visual LANSA Logical Modeler
Step 4. Assign an Identifying Element
In this step, you will create the Identifying Element for the entity. Only one element may be selected as the identifying element. For the Customer entity, the Customer Number is the identifying element.
1 Select the Customer Number element and click the ![]() Set Identifier button on the toolbar.
Set Identifier button on the toolbar.
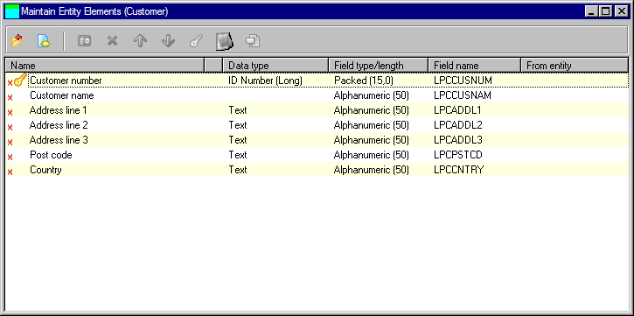
Note that a key image appears next to the element. This denotes that Customer Number is the identifying element of Customer.
2. Select the Customer Name element and click the ![]() Set Identifier button.
Set Identifier button.
Note that the key image is removed from Customer Number and assigned to Customer Name.
3. Click the ![]() Set Identifier button again - the key image is removed from Customer Name.
Set Identifier button again - the key image is removed from Customer Name.
4. Select Customer Number again and click the ![]() Set Identifier button to make it the identifying element of Customer.
Set Identifier button to make it the identifying element of Customer.
At this stage, the Maintain Entity Elements window should appear something like this:
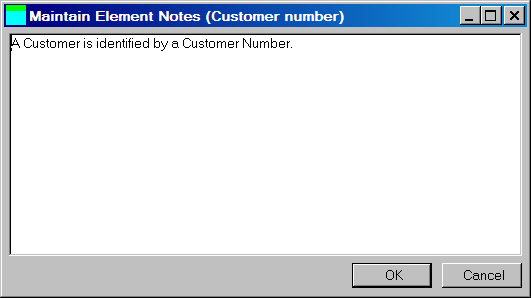
5. Select the Customer Number element and click on the ![]() Notes toolbar icon. The Maintain Elements Notes dialog will be displayed.
Notes toolbar icon. The Maintain Elements Notes dialog will be displayed.
a. Add some help text to the Customer Number.
b. Press to close the dialog.
6. Click the ![]() Close toolbar button to close the Customer Entity Elements window.
Close toolbar button to close the Customer Entity Elements window.
The Customer diagram shape will be updated and should look something like this:
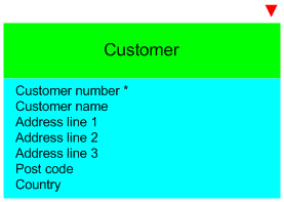
Note that Customer Number is suffixed with an asterisk. The * denotes that Customer Number is Customer's identifying element.
7. Try moving the Customer shape around the diagram.
8. Use the Pan and Zoom facility to enlarge the view of the diagram.
9. Switch between the Elements, Build Status and Collapsed views for Customer.
Note that there is an inverted red triangle above the top-right of the entity. This indicates that the entity has validation errors.