Fill in the Time Sheet
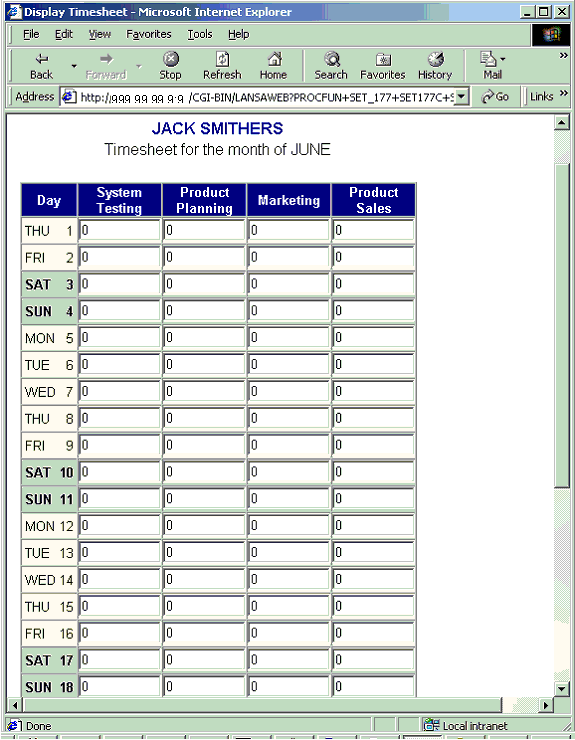
When you click on a month in the email this page is displayed:

Scroll to see more days. Fill in the time sheet. When you are finished click on the Submit Timesheet button on the bottom of the page.
Notes and suggestions
The browselist used in this example (S_177TIMS) is built entirely using HTML. It has only one non-hidden field, #S_177BMCP. A page component has been defined for this field which has only one line:
<RDML COMPONENT="&FLD_S_177BCMP">
This makes the browselist entry dynamic as its contents will vary depending on the value of the field #S_177BCMP. Before adding the entry to the browselist the value of #S_177BMCP is changed to the component name we wish to add. For the first browselist entry, the component name is changed to S_177TSTART to add the <TABLE> tag, then to #S_177COLHDG to add the column headings (in this case, the project descriptions) followed by the #S_177TDATA with all the days and input fields and finally #S_177TEND which adds the </TABLE>.
When you click on a month in the email this page is displayed:

Scroll to see more days. Fill in the time sheet. When you are finished click on the Submit Timesheet button on the bottom of the page.
Notes and suggestions
The browselist used in this example (S_177TIMS) is built entirely using HTML. It has only one non-hidden field, #S_177BMCP. A page component has been defined for this field which has only one line:
<RDML COMPONENT="&FLD_S_177BCMP">
This makes the browselist entry dynamic as its contents will vary depending on the value of the field #S_177BCMP. Before adding the entry to the browselist the value of #S_177BMCP is changed to the component name we wish to add. For the first browselist entry, the component name is changed to S_177TSTART to add the <TABLE> tag, then to #S_177COLHDG to add the column headings (in this case, the project descriptions) followed by the #S_177TDATA with all the days and input fields and finally #S_177TEND which adds the </TABLE>.