Compiling the first dll
This tutorial got written by VaDe for the Wiki (http://www.maxinmontreal.com/wiki/index.php5?title=Part_A:_Compiling_the_first_dll).
Step 1
Download MSVSE 2008 here: http://www.microsoft.com/express/download/ - Install with custom settings; there is no need to change anything.
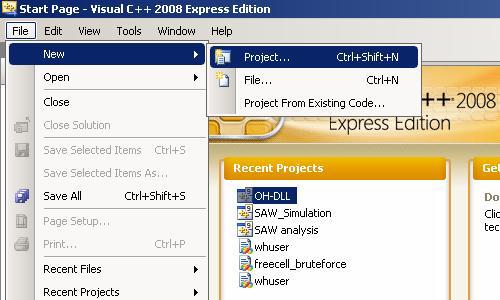
Step 2
Create a new project: File -> New -> Project.
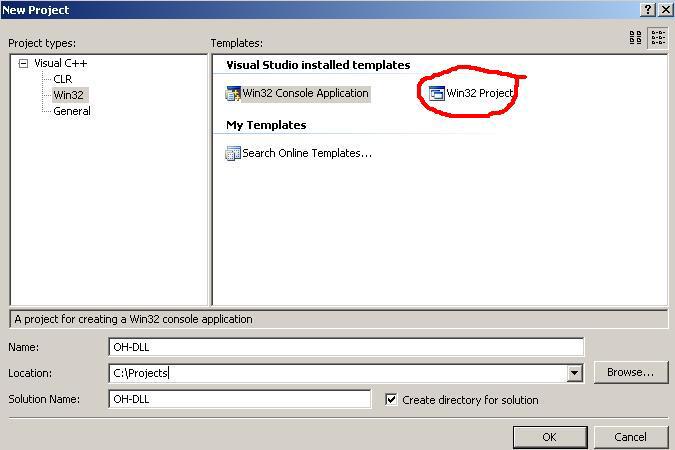
Step 3
Choose Win32 Project Application, you can choose any name/directory you want for your project, but I suggest you stick with OH-DLL and C:\Projects for this tutorial
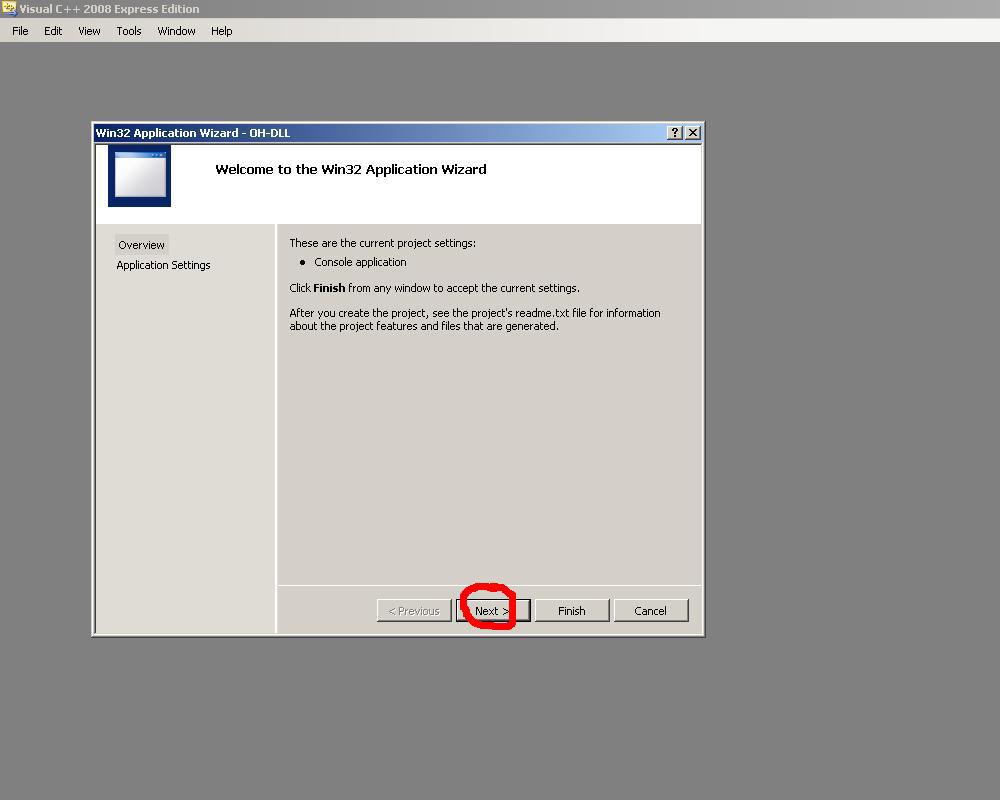
Step 4
Don’t click the "Finish" button yet, but click on "Next".
Step 5
Select "DLL" and "Empty project" on the following screen and click the "Finish" button now.

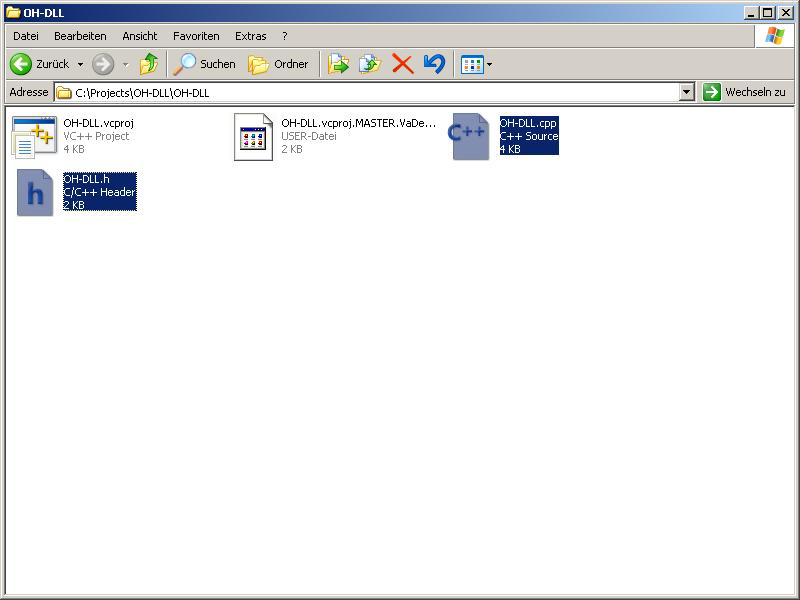
Step 6
Download and copy the attached files into the project folder, as you can see on the screen it should be C:\Projects\OH-DLL\OH-DLL. The files are available at the Wiki: http://www.maxinmontreal.com/wiki/index.php5?title=Image:OH-DLL.rar.
Step 7
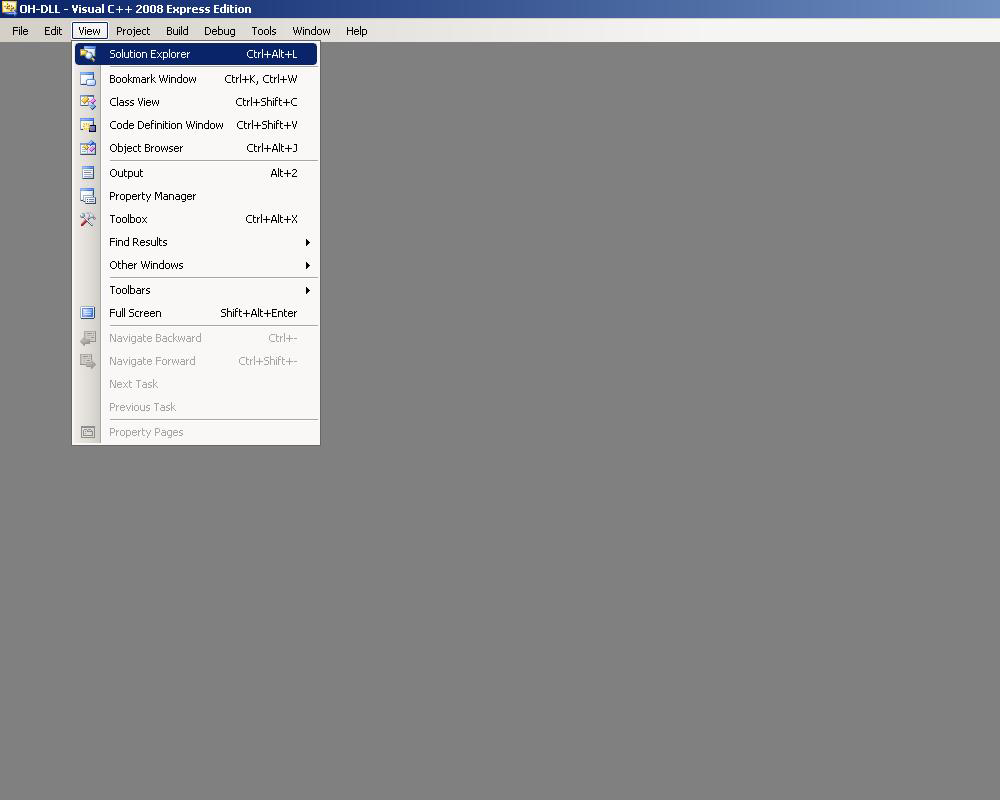
- Open the Solution Explorer: View -> Solution Explorer
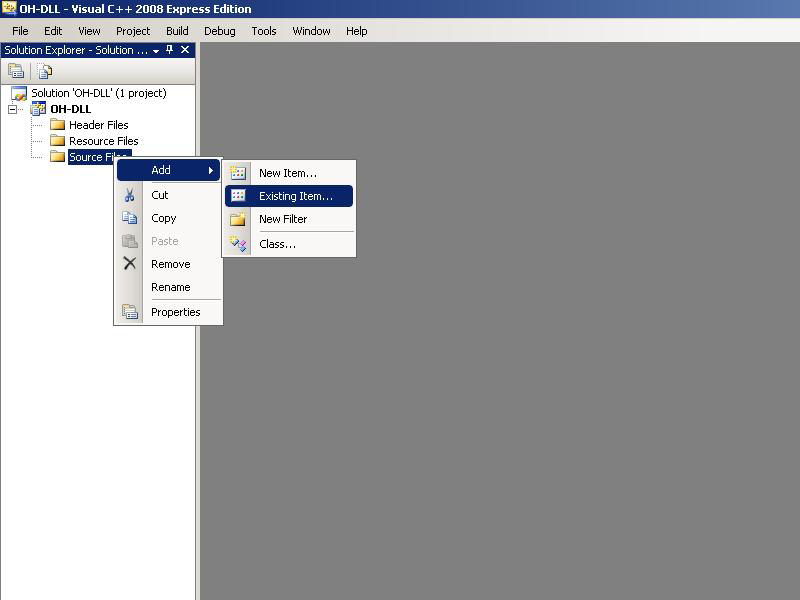
- Add the files to the project, select the "Source File" folder in the Solution Explorer -> Add -> Existing Item
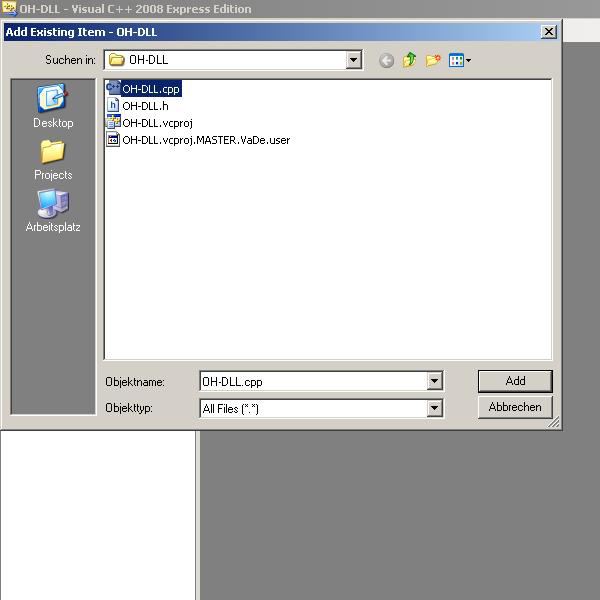
- Mark "OH-DLL.cpp" in your project folder and click add
- Select the "Header File" folder and add the header file the same way
Step 8
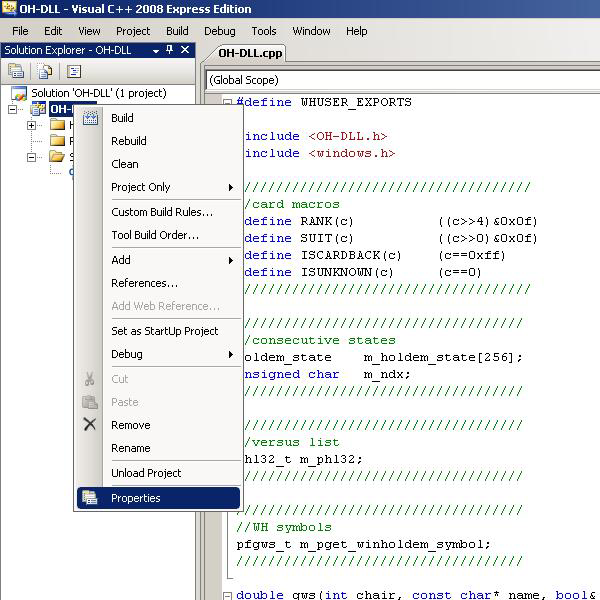
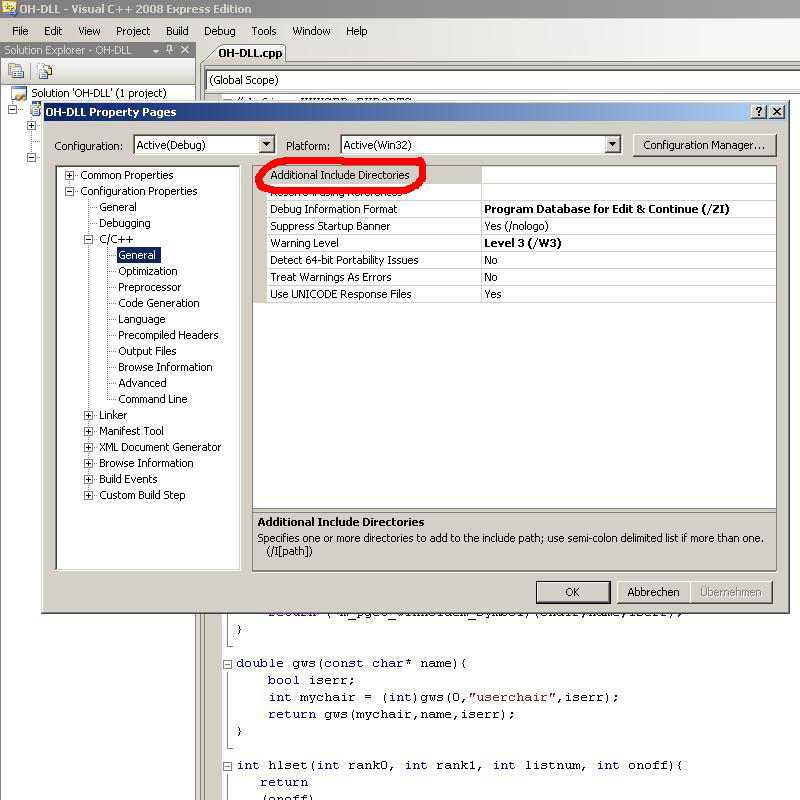
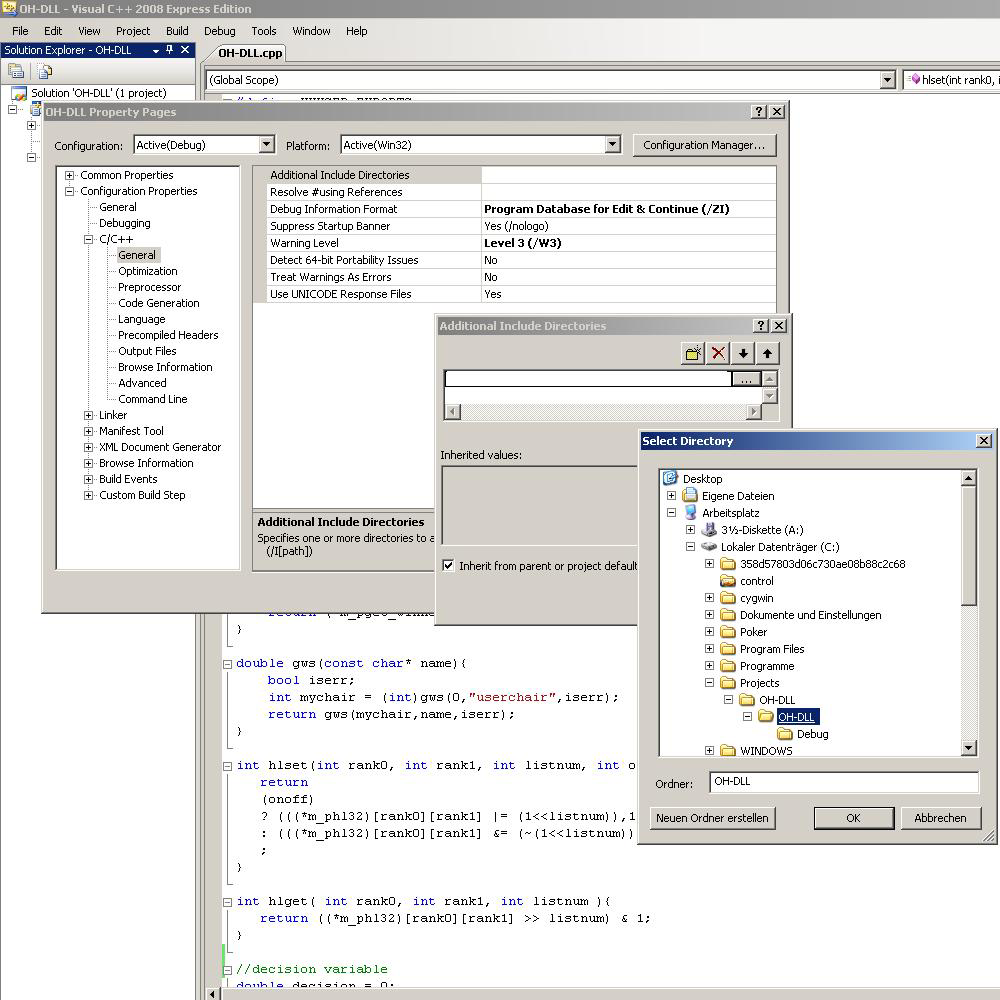
- Now we need to change some options, right-click on the main tree OH-DLL, select Properties
- Open the "C/C++" tree, select "General", select Additional Include Directories
- Add the project folder here, c:\projects\oh-dll\oh-dll
Step 9
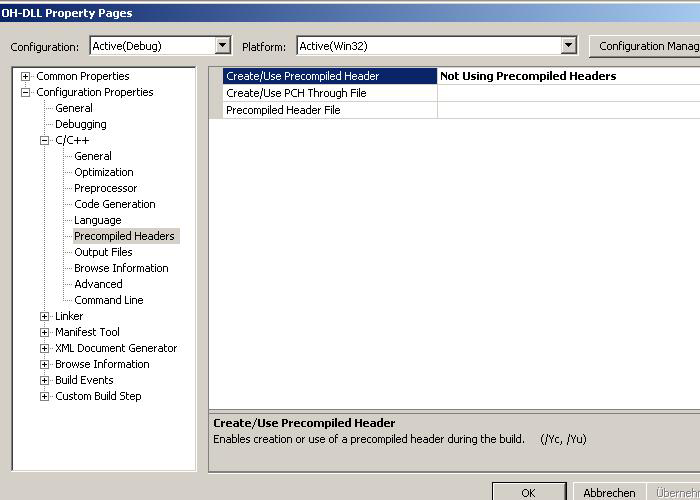
Select "Precompiled Headers" in the "C/C++" tree and select "Not Using Precompiled Headers".
Step 10
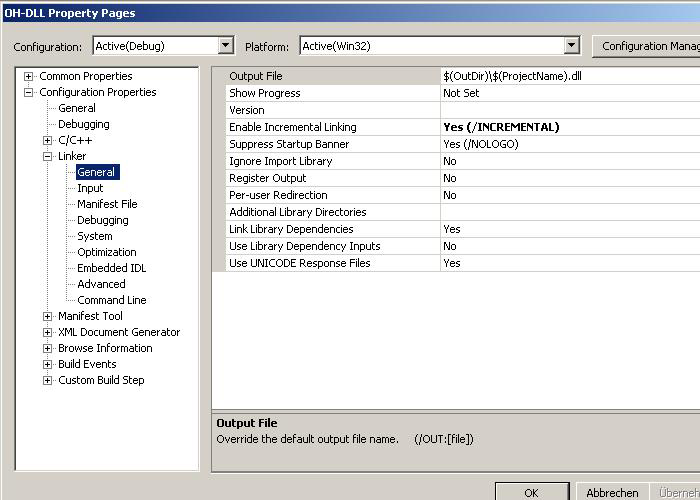
In the "Linker" tree under "General" you can change the destination of the dll Output File if you need.
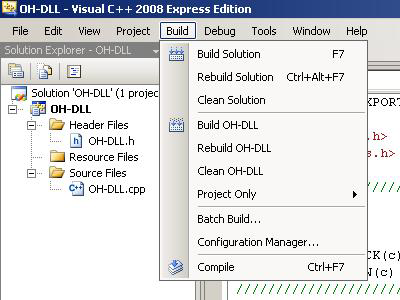
Step 11
You are ready to compile the dll, click on Build -> Build Solution or simply "F7".
Document generated by eLyXer 1.2.5 (2013-03-10) on 2014-12-28T22:30:13.531000