Hash Point Records
Description
The purpose of Hash Point records is to define the pixels within a region that are used in a hash calculation. The “Hash0” transform always uses all pixels in a region to calculate its hash, so these records are only relevant for regions that use “Hash1”, “Hash2”, or “Hash3” transforms.
There is a one to one correlation between the “Hash1”, “Hash2”, or “Hash3” transforms and the group 1, 2 and 3 Hash Point records. For example, a region that calls for a “Hash2” transform will use the pixels specified by the group 2 Hash Point records in the hash calculation.
The points defined for a Hash Point group must fall within the boundaries of the regions that you are calculating a hash for. Hash Points that fall outside of the region will be ignored, as they are invalid. For example, if you have card regions that are 10x20 pixels, then hash points (11,15) and (8,22) will be ignored, whereas hash points (5,5) and (9, 18) will be used in the hash calculation.
Manipulating hash point records using OpenScrape
There are two ways to create new Hash Point records:
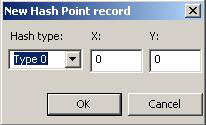
1.Select the “Hash Points” category in the record tree display on the Table Map Editor window, and click the “New” button. A window will be displayed that allows you to enter the hash point group and the X and Y parameters:
2.Somewhat less intuitively, but ultimately easier to use, is to select the “Hash Points” category in the record tree display on the Table Map Editor window, and click the “Edit” button. A window will be displayed that allows you to select the hash point group, a sample image, and then interactively define the Hash Points for that group:
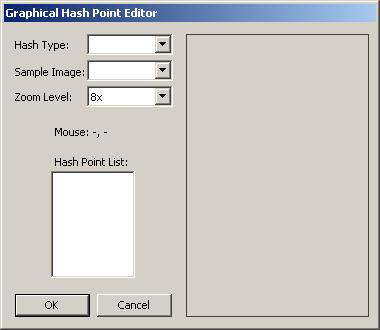
When you select a Hash Point group from the “Hash Type” control, the “Hash Point List” box will populate with all the Hash Points currently defined for that group. In this case, the box is empty, as we have not yet defined any Hash Point records for group 1.
After selecting an Image record in the “Sample Image” control (note you need to have Image records created first for this to work), the right side of the window will display that image and overlay the Hash Points for the selected group, like so:
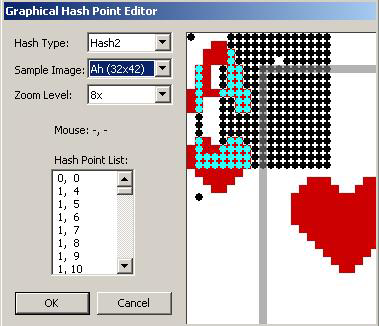
The zoom level of the sample image can be adjusted with the “Zoom Level” control. Adding Hash Points can be done interactively by left-clicking on the sample image where the point is needed. Right clicking on an existing point in the sample image will remove it from the group.
Clicking the “OK” button will then make the changes (adds and deletes) to the Table Map Hash Pointe record list. To edit an existing Hash Point record, select the record in the record tree display on the Table Map Editor window, and click the “Edit” button. A window will be displayed that allows you to edit the hash point group and the X and Y parameters. To delete an existing symbol record, select the record in the record tree display on the Table Map Editor window, and click the “Delete” button. A window will be displayed asking for verification of this action. An entire group of Hash Points can also be edited and/or deleted by selecting the “Hash Points” category in the record tree display on the Table Map Editor window, and clicking the “Edit” button. This will bring up the Graphical Hash Point Editor window, as described above.
Note: The Insert and Delete keys can also be used as a shortcut for adding and deleting individual Hash Point records.
Technical Reference
In the Table Map (.tm) file, these records will be preceded with the characters "p$". Hash point records have the following format:
p<n>$ <x> <y>
<n> is the group (1-3) that this hash point record belongs to <x> and <y> are the coordinates of the point, relative to the region’s rectangle, the top left corner of which is 0,0.
Document generated by eLyXer 1.2.5 (2013-03-10) on 2015-03-18T20:55:11.609000