Add drawing(-s) 
Using this button, you can add new drawings to the project. A window appears on your screen, on which you can select the drawing you wish to insert.
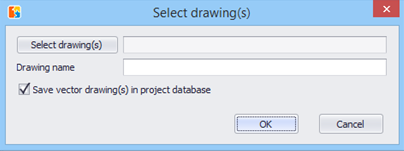
You may select vector files, such as .dwg, .dxf, .dgn, .emf, .wmf, or image files, such as .bmp, .gif, .jpg, .tif, .ico.png and .pdf. Select the desired drawing by double-clicking it or by clicking OK. The drawing is added in the 'Project Drawings' list. If you want to add more than one drawing in the project select them while pressing CTRL or SHIFT and press OK.
The name of the file you selected is the default value for the name of the drawing in the tree view of the ‘Drawings’ tab, but you can change it, if you wish.
 That is not possible in case of importing more than
one drawing simultaneously However you can edit the drawings’ names later on.
(See Drawing properties
That is not possible in case of importing more than
one drawing simultaneously However you can edit the drawings’ names later on.
(See Drawing properties  )
)
Let the ‘Save vector drawing(s) in project database’ field checked, unless you want to use the original drawings as the background using an XREF like method.
In case there are image files among the
drawings you have selected to import, they are always stored into the project
database even if you have not checked the ‘Save vector drawing(s) in project
database’ checkbox.
If one of the selected files is a pdf one
and has more than one pages, then each page is inserted as a separate drawing
with the same name followed by an underscore and the page number, for example
_1, _2 etc.
If you
select to import only one pdf file that has more than one pages then the
following window appears:
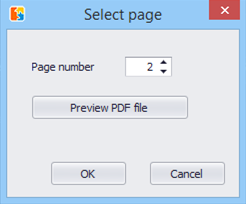
Select the page of the pdf file you want to import. You have also the preview option in order to select the one you want.
 Changes in
external references are reflected on the corresponding project drawing, but they
have no effect on its measurement sheets. It is possible that corrections have
to be made on the measurement sheets to coincide with the new version of the
drawing.
Changes in
external references are reflected on the corresponding project drawing, but they
have no effect on its measurement sheets. It is possible that corrections have
to be made on the measurement sheets to coincide with the new version of the
drawing.
After importing new drawings to the project, they are added to the ‘Drawings’ tab tree view and, at the same time, a new measurement sheet is created automatically as the first node below each drawing. The corresponding drawing window opens and the drawing is displayed.
Finally a reminder of certain basic adjustments that may be necessary is displayed. For image files, you should rotate and level the drawing, if needed, and then set its scale and origin, for easy and correct copying of measurements from drawing to drawing.
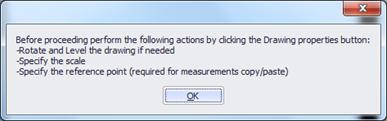
You should
follow these instructions in the order described above. Once you set the scale,
you can no longer rotate the drawing, for example.
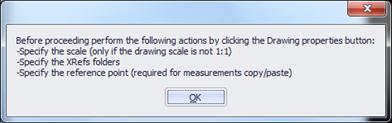
If you have added a vector file, you should set the scale (only if the drawing has not been created using the usual 1:1 scale), and also specify the location of the folders of the corresponding drawings (XREF), if there are any. You should also set the scale in case the drawing unit specified in ExtrAXION differs from the unit of the drawing. Additionally, you can define the origin for easy and correct copying of measurements from drawing to drawing and rotate the drawing, if needed.
You can adjust all of the above settings at the Properties
window (See Drawings/Drawing properties ) where you can, also, change the description and the
unit of measurement of the drawing, set digit number for the measurements
calculation precision, background color etc.
When adding more than one drawings simultaneously, they
do not open automatically. In this case the above windows appear when you open
the drawing for the first time.
Large drawings
(several MBs) may slow down the taking measurements process considerably.
Therefore, it is recommended that very large drawings be converted to smaller
ones, e.g. in case of .dwg drawings remove layers that are not necessary.