 Diagram Designer
 |
Using Layers |
|
 |
The concept of Layers
The use of layers is valuable to efficient use of Diagram Designer. There are 4 layers available in the program:
- Layer 1,
- Layer 2,
- Layer 3 and
- Global stencil
 The
easiest way to understand the use of layers is to
imagine 3 transparent sheets (layers 1, 2 and 3) laid over top of an opaque
sheet (Global stencil) in order, as shown in the picture to the right.
Looking at the sheets from above, the Global stencil is visible through Layer 1, for example. But since we are looking down, layers 2 and 3 are not visible; our point of view is from the level between layers 1 and 2. Note that the Global stencil layer is visible on all pages as well as on all layers..
When working on an individual layer (eg. layer 1), the other layers, while perhaps visible, are locked; objects on those layers cannot be moved or modified. This feature makes editing diagrams easier, providing layers are used effectively.
Objects may be moved from one layer to another by
- enable the proper layer (on which the objects currently reside) using the Diagram/Edit_layer menu,
- selecting the object(s),
- using cut to remove the objects, placing them on the clipboard,
- enable the target layer,
- paste the objects. The objects may have to be positioned, since they are pasted slightly offset.
The Diagram menu provides an option to select which layer is the current layer. Only the current layer can be edited.
Using the Diagram menu (Set layer color) changes all objects on the current layer (whether selected or not), setting their properties to the chosen color. The properties affected are
- Line color
- Fill color
- Text color
Setting a new layer color may obscure text, if the fill color and text color are the same.
Although no specific provision is made for setting a background color, the following procedure will accomplish this.
- select Global stencil as the current layer (Diagram/Edit_layer/Global_stencil).
- create a filled rectangle anywhere on the page, using the Draw rectangle tool.
- set the fill color of the rectangle to your choosing:
- select rectangle
- right_click/Properties
- Style tab/Fill color
- set the alignment to Fill by
- select rectangle
- right_click/Align/Fill
- return to the layer you wish to work on (eg. Diagram/Edit_layer/Layer_1)
The background color of the diagram is now set to a different color, other than white (default).
Insert inherited layer (Edit menu)
Inserting an inherited layer (into the current layer) provides a means of including data in the current view, other than the data on the current layer. By inserting an inherited layer, you are actually inserting a viewport to different layer, perhaps even on a different page. This is equivalent (see layering diagram) to bonding a different layer (from any page) to the current layer; the diagram shows:
- the current layer,
- all layers underneath the current layer, including Global stencil and
- the inherited layer inserted
As with normal layering, if you are editing a layer below the layer which contains the inherited layer, that inherited layer is not visible.
Note that any changes to the actual inherited layer are reflected in the inserted inherited layer; the inserted layer is not a copy, but a viewport to the actual layer.
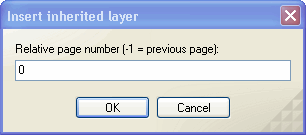
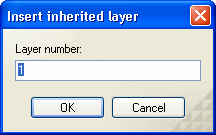
To insert an inherited layer, select the function from the Edit menu (Edit/Insert_inherited_layer):
|
 |
|
 |
 |
