SekChek for Windows: Scan Instructions
From SekChek
Scan Instructions
Prerequisites
You should already have created a copy of the Scan software (SEKWIEXT.EXE).
Outline of this Step

|
|

|
| Windows NT/200X Server | Scan |
SEKNTF.ZIP/ SEK2KF.ZIP |
**IMPORTANT**
- To ensure correct results use the Administrator account for the following operations.
- The Scan process must be run on the computer (DC or Server) you want to analyse. Logon to the Server locally.
See 'Planning your
Running the Scan Software
1. Decide whether you want to analyse any special registry keys or DACLs on directories.
If you want to scan special registry keys or DACLs / SACLs defined on directories, you must define your requirements in a file named sekchek.inp. For details of how to do this see: www.sekchek.com/sekchek-windows-sekchekinp-file.htm.
You can ignore this step if you do not want to scan registry keys and directory permissions.
2. Start the Scan software.
Run program SEKWIEXT.EXE on the NT or Windows 200X server from a directory on the network (preferred).
Windows 2008 systems: Right-click the Scan software (SEKWIEXT.EXE) and select 'Run as administrator'.
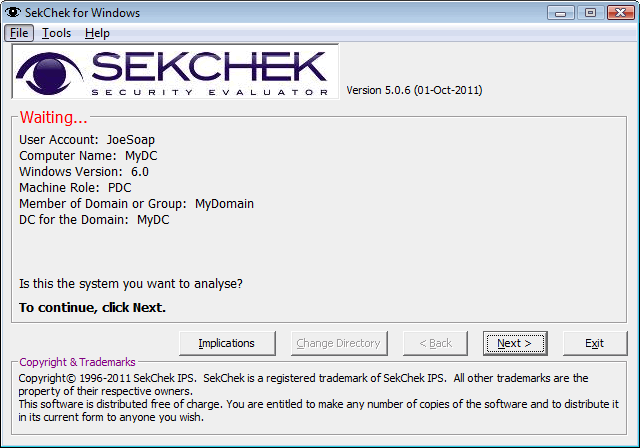
3. Select the path for SekChek output file.
Click ‘Next’... ‘Change Directory’...
4. Check / enter your processing options
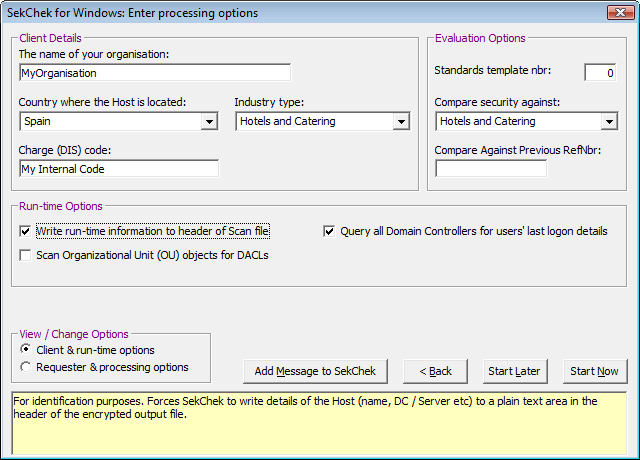
5. Click ‘Start Now’ or ‘Start Later’
‘Start Now’ will execute the Scan process immediately. SekChek will display the progress of the Scan.
‘Start Later’ will display a scheduler menu that allows you to select a more convenient time for SekChek to run. This is useful if you want to run SekChek outside prime business hours.
To Scan Last Logon Information from all Domain Controllers in a Windows Domain (Optional step)
Window's domains do not replicate account's last logon information across domain controllers. Each Domain Controller, within the domain, stores the details of the last logon information for accounts that the controller authenticated to the domain.
The SekChek for Windows Scan Software includes an optional check-box, 'Query all DCs for Last Logon details', that allows a user to retrieve all last logon information stored on Domain Controllers. When the 'Query all DCs for Last Logon details' check-box is enabled, the SekChek for Windows software will attempt to access all visible domain controllers on the network and retrieve last logon details from each domain controller.
![]() Notes:
Notes:
The'Query all DCs for Last Logon details' check-box is only available when the SekChek for Windows Scan Software is run on a Domain Controller. This option will not be available when the Scan process is run on stand-alone servers or workstations.
If domain controllers exist in a separate physical location from the domain controller where the Scan software is run, the time required for the Scan process to complete can increase significantly.
If the SekChek for Windows Scan software is initiated with the 'Query all DCs for Last Logon details' check-box unchecked, only the last logon information for the local domain controller will be retrieved.
What the Scan software will do…
The software will scan security-related data on the Windows system and write it to an encrypted file (SEKNTF.ZIP or SEK2KF.ZIP) in a directory of your choice.
We do not recommend that you write the file to a diskette as it could exceed the diskette's storage capacity.
Next Step…
Encrypt the Scan File on your PC