
Working with video transitions
A video transition controls how your movie plays from one video clip or picture to the next. You can add a transition between two pictures, video clips, or titles, in any combination, on the storyboard/timeline. The transition plays before the one clip ends and while the other clip starts to play. Windows Movie Maker contains various transitions you can add to your project. Transitions are stored in the Video Transitions folder in the collections pane.
You can change the playback duration of a video transition up to the duration of the shorter of the two adjacent clips. If you drag the video clip or picture on the timeline that you want to transition to over the clip or picture that you want to transition from, a cross-fade is added as the default transition between the two clips. There will be a straight cut (no fade) between two clips if you do not create a transition.
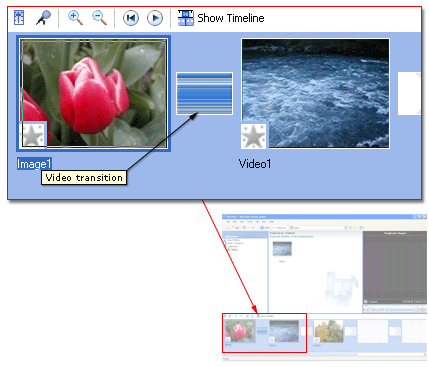
Any transitions you add appear on the Transition track of the timeline. To see this track, you must expand the Video track. The video transition length is determined by the amount of overlap between two clips. The following illustration displays a project on the timeline with an added video transition.
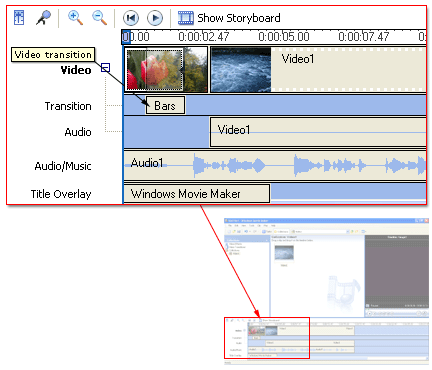
The following illustration displays a project on the storyboard with a video transition. Any transitions you add appear in a transition cell between two video clips or pictures.
Related topics
- To add a video transition
- To change the video transition duration
- To remove a video transition
- To specify default durations
- Using video transitions, video effects, and titles
© 2000-2002 Microsoft Corporation. All rights reserved.