
Adding titles and credits
Titles and credits let you enhance your movie by adding text-based information to your movie. You can add whatever text you want, but you may want to include information such as the title of your movie, your name, the date, and so forth.
You can add a title to various places in your movie: at the beginning or end of a movie, before or after a clip, or overlaying a clip. The title plays for the specified amount of time, and then the video clip or picture displays in your movie.
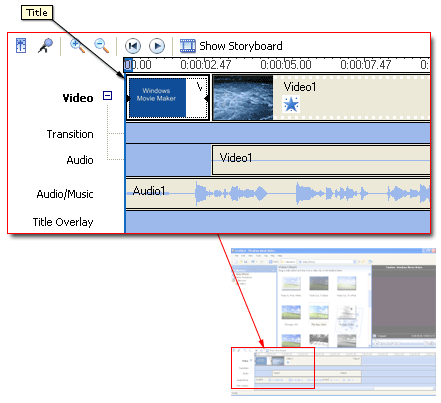
The following illustration shows a project that contains a title that displays before a video clip.
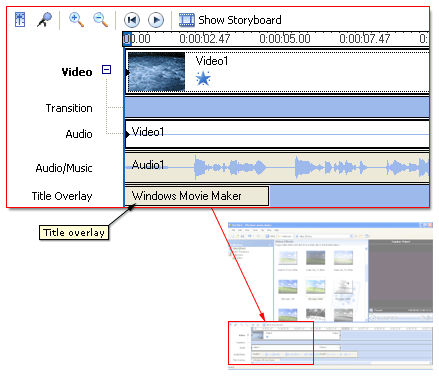
The following illustration shows a project that contains a title that displays as a title overlay over a video clip.
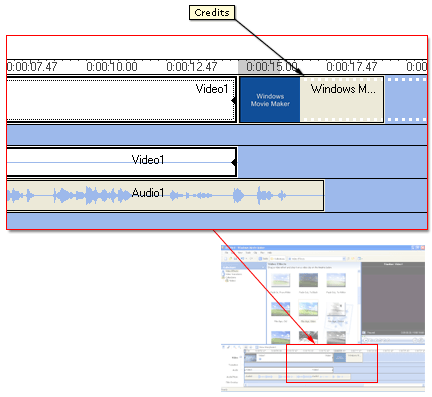
The following illustration shows a project that contains credits that display at the end of the project.
When adding titles or credits to a movie, do the following:
- Select where you want your title to appear in your movie. For more information about selecting a title location, see Choosing the title location.
- Enter text for the title. For more information about adding title text, see Entering title text.
- Select an animation style for the title. For more information about choosing a title animation, see Choosing the title animation.
- Select the font and colors for your title. For more information, see Selecting the title font and colors.
- Add the title to your movie.
Related topics
- To add a title or credit
- To edit an existing title
- To change the title duration
- To remove a title
- Using video transitions, video effects, and titles
© 2000-2002 Microsoft Corporation. All rights reserved.