Recording > Images + Signals > Image Capture
The Image Capture group of settings define the size and location of the image to be captured and the time interval between frames
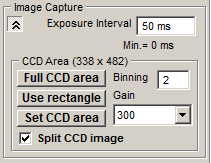
Exposure Interval: Sets the required time interval (in ms) between successive image frames. (The shortest valid inter-frame interval is indicated below the entry box. This will vary depending upon capture region size and CCD binning factor.)
CCD Area: If the camera supports CCD sub-region readout, the CCD area controls allow you to acquire the image from a defined sub-region within the CCD.
To use the full imaging area of the CCD, click the Full CCD Area button.
To acquire the image from a CCD sub-area defined on screen, use the mouse to drag in the edges of the capture rectangle superimposed on the live displayed image until it encompasses the region to be acquired, then click the Use rectangle button.
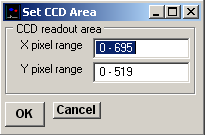
To define the CCD sub-area in terms of its X and Y pixel coordinates within the CCD, click the Set CCD Area button and enter the required X and Y pixel range into the Set CCD Area dialog box which pops up.
Binning: If the camera supports CCD pixel binning, to bin together blocks of pixels to increase image intensity and/or allow faster frame capture rates, enter a value greater than one into the Pixel Binning box, then press the <Enter> key. (A value of 2 bins together 2x2 blocks of pixels, increasing image intensity by 4).
Gain: Sets the camera CCD readout amplifier gain. (With EMCCD cameras the gain is expressed as a percentage of the maximum electron multiplying gain).
Split CCD Image: When selected, splits the the upper and lower halves of the CCD image into two separate panels. (This option can be used with optical image splitters such as Cairn Optosplit)