TODO: To change the footer's content go to Dr.Explain menu Options : Project Settings : HTML (CHM) Export : Setup HTML Template and Layout
Shadow Map
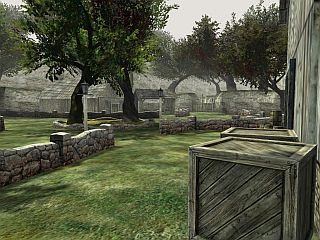
Shadow Map in Vanda Engine 1 is kind of Lightmap, which is a grayscale texture that contains the brightness of surfaces. Therefore, a Shadow Map in Vanda Engine 1 is pre-computed, and may be used for static instanced geometries only. Pixel values of 1 don't affect surfacebrightness, while pixel values of 0 completely darken the surface.Shadow Mapping in Vanda Engine 1 uses hardware multitexturing to combine a regular diffuse map and dirt map -If they exist- with a shadow map. Vanda Engine 1 maps the Shadow Map to the 3D object based on its 2nd UV set.
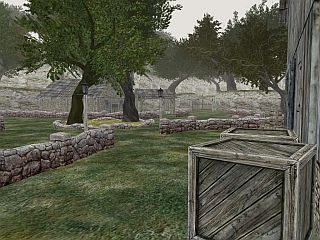
Shadow Map. (A) Left image shows the scene with Shadow Map. (B) Right image shows the same scene without Shadow Map.
To apply a Shadow Map to a skin or geometry, follow these steps:
·Select the geometry you want to apply Shadow Map to its geometry. Now if your object contains 2nd UV set, Shadow... button in Material Editor is activated.
·Click the button or go to Modify | Geometry | Material... menu.
·Click the Shadow... button. This opens a standard File dialog that lets you select a DDS file.
·Select your desired Shadow Map and Click Open.
To remove a Shadow Map from a skin or geometry, follow these steps:
·Select the instanced geometry or skin.
·Click the button or go to Modify | Geometry | Material... menu.
·Now select the - button next to the Shadow button.
·In a new dialog box that appears, click Yes button.