TODO: To change the footer's content go to Dr.Explain menu Options : Project Settings : HTML (CHM) Export : Setup HTML Template and Layout
Normal Map
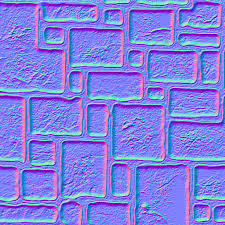
In Vanda Engine 1, a Normal Map is used to fake high-res geometry detail when it's mapped onto a low-res mesh. The pixels of the normal map each store a normal, a vector that describes the surface slope of the original high-res mesh at that point. The red, green, and blue channels of the normal map are used to control the direction of each pixel's normal.
A sample Normal Map
To apply a Normal Map to a skin or geometry, follow these steps:
·Select the instanced geometry or skin you want to apply Normal Map to its geometry.
·Click the button or go to Modify | Geometry | Material... menu.
·Click the Normal... button. This opens a standard File dialog that lets you select a DDS file.
·Select your desired Normal Map and Click Open.
To remove a Normal Map from a skin or geometry, follow these steps:
·Select the instanced geometry or skin.
·Click the button or go to Modify | Geometry | Material... menu.
·Now select the - button next to the Normal button.
·In a new dialog box that appears, click Yes button.