The Microchip Graphics Library installation follows the standard directory structure for all Microchip library solutions. Installing the library will give the following structure:
One of the demo subdirectories (example: Graphics or Combo) may become "Your Applications Directory" that will contain your application source code. You can add code and modules here that will use and interact with the library. The library specific folders are the following:
- The Microchip folder will contain the library components.
- The Help sub-folder under Microchip folder will contain this document (Graphics Library Help.chm file).
- The Graphics sub-folder under the Microchip folder is where the C files, documentation and utilities are located.
- Inside this Graphics sub-folder are the directories for the Drivers, Documents, GDD, Images and bin directories. It will also contain the directory for the Image Decoders source files.
- The GDD (Graphics Display Designer) directory contains the GDD project template. Use this to start projects using the Graphics Display Designer.
- The bin directory contains the Graphics Resource Converter utility and External Memory Programmer both implemented in java.
- The Include sub-folder under the Microchip folder will contain common header files to all Microchip library solutions.
- Another Graphics directory is included in the Include sub folder. This will hold the Graphics Library header files as well as the header files for the Image Decoders.
- The Board Support Package folder will contain hardware specific drivers that are common to the Microchip Demo Boards (such as Explorer 16, display panels or PICtail™ Plus Daughter Boards).
All subdirectories and files under the Microchip directory should not be modified. In case your project will use more than one Microchip library solution, this directory will contain all the library files you install. Thus, it is important to maintain the files in this directory. The Microchip Solutions directory may become your "MyProjects" directory that will contain all your projects using the different Microchip solutions.
There are various ways to get started with Microchip Graphics Library:
- Obtain Development Boards from the "Getting Started" section of the Microchip graphics website (
 www.microchip.com/graphics):
- Explorer 16 Starter Kit (DV164003) with any of the Graphics PICtail™ Plus Daughter Boards.
- PIC24FJ256DA210 Development Board (DV164039) with any of the individual Graphics Display Boards.
- A PIC32 Starter Kit and Graphics LCD Controller PICtail™ Plus SSD1926 Board (AC164127-5) with any of the individual Graphics Display Boards.
- A PIC32 Starter Kit and Graphics PICtail Plus Epson S1D13517 Board (AC164127-7) with any of the individual Graphics Display Boards.
- A PIC32 Starter Kit and Multi-Media Expansion Board (DM320005).
- Graphics PICtail™ Plus Daughter Board available:
- AC164127-3 - Graphics PICtail Plus Daughter Board with Truly 3.2" Display Kit
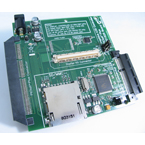
- AC164127-5 - Graphics LCD Controller PICtail Plus SSD1926 Board. This board is the same board used in AC164127-3 PIctail Plus and Display Panel combo shown above.
.
- AC164127-7 - Graphics PICtail Plus Epson S1D13517 Board.

- AC164144 - Low-Cost Controllerless (LCC) Graphics PICtail Plus Daughter Board.

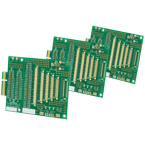
- Graphics Display Boards available:
- AC164127-4 - Graphics Display Truly 3.2" 240x320 Board

- AC164127-6 - Graphics Display Powertip 4.3" 480x272 Board

- AC164127-8 - Graphics Display Truly 5.7" 640x480 Board

- AC164127-9 - Graphics Display Truly 7" 800x480 Board

- AC164139 - Graphics Display Prototype Board
- Refer to Web Seminar 4 on “Microchip Graphics Library Architecture” from the "Training and Support" section for an overview of the structure and the different layers of the library. It also gives a brief information on how to use the library.
- Refer to Microchip's Regional Training Center class on Graphics Library:
- HIF 2131 – Designing with Microchip Graphics Library
- For a much detailed look on the usage, you can refer to the following application notes from the "Training and Support" section.
- AN1136 How to Use Widgets in Microchip Graphics Library. This application note introduces the basic functions needed to create and manage Widgets.
- AN1182 Fonts in the Microchip Graphics Library. This application note describes the format of the Microchip Graphics Library's font image. It also tells how to reduce the number of characters in a font and automate the creation of the character arrays referring to an application's strings.
- AN1227 Using a Keyboard with the Microchip Graphics Library. This application note describes how to implement a keyboard-based GUI.
- AN1246 How to Create Widgets in Microchip Graphics Library. This application note serves as a useful guide in creating customized Widgets. The essential components of a Widget are enumerated and described in this document. This application note also outlines the process of integrating the new Widget into the Graphics Library in order to utilize the already implemented routines for processing messages and rendering Widgets.
- AN1368 Developing Graphics Applications using PIC MCUs with Integrated Graphics Controller. This application note is intended for engineers who are designing their first graphic application. It describes the basic definitions and jargons of graphics applications and it helps the engineer to understand the theory, necessary decision factors, hardware considerations, available microcontrollers and development tools.
- Finally, you can obtain the free licensed Microchip Graphics library also from the "Getting Started" section.

How to Build Projects for the PIC24FJ256DA210 Development Board
- In the application specific HardwareProfile.h file of your project set the hardware platform to PIC24FJ256DA210 Development Board:
#define PIC24FJ256DA210_DEV_BOARD- In the the same application specific HardwareProfile.h file of your project, set the correct display controller and the display panel combination. Selecting the correct display panel will choose the correct parameter settings for the display. Examples of these parameters are horizontal and vertical resolution, display orientation, vertical and horizontal pulse width, and front and back porch settings.
- When using the Truly 3.2" display on AC164127-4 board
// set the display controller
#define GFX_USE_DISPLAY_CONTROLLER_MCHP_DA210
// set the display panel
#define GFX_USE_DISPLAY_PANEL_TFT_G240320LTSW_118W_E
- When using the Powertip 4.3" display on AC164127-6 board
// set the display controller
#define GFX_USE_DISPLAY_CONTROLLER_MCHP_DA210
// set the display panel
#define GFX_USE_DISPLAY_PANEL_PH480272T_005_I11Q
- In the the same application specific HardwareProfile.h file of your project, set following (Refer to each demo hardware profiles for examples):
// set the PMP interface
#define USE_16BIT_PMP
// set the Graphics Clock Divider that generates the Pixel clock.
// Refer to display data sheet for pixel clock frequency requirement
// and Family Reference Manual - Oscillator for details on GCLK divider (GCLKDIV).
#define GFX_GCLK_DIVIDER 38
// set the display buffer start address.
#define GFX_DISPLAY_BUFFER_START_ADDRESS 0x00020000ul
// set the EPMP CS1 base address if using external memory on EPMP CS 1 space and its size
#define GFX_EPMP_CS1_BASE_ADDRESS 0x00020000ul
#define GFX_EPMP_CS1_MEMORY_SIZE  0x40000ul
// set the EPMP CS2 base address if using external memory on EPMP CS 1 space and its size
#define GFX_EPMP_CS2_BASE_ADDRESS 0x00080000ul
#define GFX_EPMP_CS2_MEMORY_SIZE  0x80000ul
- In the the project's GraphicsConfig.h set the color depth to the desired bpp value (Refer to each demo hardware profiles for examples):
// set the color depth used
#define COLOR_DEPTH 16
How to Build Projects for Graphics PICtail™ Plus Board Version 3:
- In the application specific HardwareProfile.h file of your project set the hardware platform to Graphics PICtail™ Plus Board Version 3:
#define GFX_PICTAIL_V3- In the the same application specific HardwareProfile.h file of your project, set the correct display controller and the display panel combination. Selecting the correct display panel will choose the correct parameter settings for the display. Examples of these parameters are horizontal and vertical resolution, display orientation, vertical and horizontal pulse width, and front and back porch settings.
- When using the Truly 3.2" display on AC164127-4 board
// set the display controller
#define GFX_USE_DISPLAY_CONTROLLER_SSD1926
// set the display panel
#define GFX_USE_DISPLAY_PANEL_TFT_G240320LTSW_118W_E
- When using the Powertip 4.3" display on AC164127-6 board
// set the display controller
#define GFX_USE_DISPLAY_CONTROLLER_SSD1926
// set the display panel
#define GFX_USE_DISPLAY_PANEL_PH480272T_005_I11Q
- In the the same application specific HardwareProfile.h file of your project, set following (Refer to each demo hardware profiles for examples):
// set the hardware platform
#define EXPLORER_16
// set the PMP interface
#define USE_8BIT_PMP
- In the the project's GraphicsConfig.h set the color depth to the desired bpp value (Refer to each demo hardware profiles for examples):
// set the color depth used
#define COLOR_DEPTH 16
How to Build Projects for Graphics PICtail™ Plus Epson S1D13517 Board
- In the application specific HardwareProfile.h file of your project set the hardware platform to Graphics PICtail™ Plus Epson S1D13517 Board:
#define GFX_PICTAIL_V3E- In the the same application specific HardwareProfile.h file of your project, set the correct display controller and the display panel combination. Selecting the correct display panel will choose the correct parameter settings for the display. Examples of these parameters are horizontal and vertical resolution, display orientation, vertical and horizontal pulse width, and front and back porch settings.
- When using the Truly 3.2" display on AC164127-4 board
// set the display controller
#define GFX_USE_DISPLAY_CONTROLLER_S1D13517
// set the display panel
#define GFX_USE_DISPLAY_PANEL_TFT_G240320LTSW_118W_E
- When using the Powertip 4.3" display on AC164127-6 board
// set the display controller
#define GFX_USE_DISPLAY_CONTROLLER_S1D13517
// set the display panel
#define GFX_USE_DISPLAY_PANEL_PH480272T_005_I11Q
- In the the same application specific HardwareProfile.h file of your project, set following (Refer to each demo hardware profiles for examples):
// set the hardware platform
#define EXPLORER_16
// set the PMP interface
#define USE_8BIT_PMP
// set the display panel
#define GFX_USE_DISPLAY_PANEL_TFT_G240320LTSW_118W_E
- In the the project's GraphicsConfig.h set the color depth to the desired bpp value (Refer to each demo hardware profiles for examples):
// set the color depth used
#define COLOR_DEPTH 16
Low-Cost Controllerless (LCC) Graphics PICtail Plus Daughter Board:
- In the application specific HardwareProfile.h file of your project set the hardware platform to Low-Cost Controllerless (LCC) Graphics PICtail Plus Daughter Board:
#define GFX_PICTAIL_LCC- In the the same application specific HardwareProfile.h file of your project, set the correct display controller and the display panel combination. Selecting the correct display panel will choose the correct parameter settings for the display. Examples of these parameters are horizontal and vertical resolution, display orientation, vertical and horizontal pulse width, and front and back porch settings.
- When using the Truly 3.2" display on AC164127-4 board
// set the display controller
#define GFX_USE_DISPLAY_CONTROLLER_DMA
// set the display panel
#define GFX_USE_DISPLAY_PANEL_TFT_G240320LTSW_118W_E
- When using the Powertip 4.3" display on AC164127-6 board
// set the display controller
#define GFX_USE_DISPLAY_CONTROLLER_DMA
// set the display panel
#define GFX_USE_DISPLAY_PANEL_PH480272T_005_I11Q
- In the the same application specific HardwareProfile.h file of your project, set following (Refer to each demo hardware profiles for examples):
// set the hardware platform
#define EXPLORER_16  // or you can use PIC_SK if using Starter Kits
// set the PMP interface
#define USE_8BIT_PMP
- In the the project's GraphicsConfig.h set the color depth to the desired bpp value (Refer to each demo hardware profiles for examples):
// set the color depth used
#define COLOR_DEPTH 16
How to Build Projects for the Multimedia Expansion Board
- In the application specific HardwareProfile.h file of your project set the hardware platform to Graphics PICtail™ Plus Epson S1D13517 Board:
#define MEB_BOARD- In the application specific HardwareProfile.h file of your project, set the correct display controller.
#define GFX_USE_DISPLAY_CONTROLLER_SSD1926- In the the same application specific HardwareProfile.h file of your project, set following (Refer to each demo hardware profiles for examples):
// set the PMP interface
#define USE_8BIT_PMP
// set the Starter Kit used
#define PIC32_GP_SK // use generic PIC32 Starter Kit
 or
#define PIC32_USB_SK // use PIC32 USB Starter Kit
or
#define PIC32_ETH_SK // use PIC32 Ethernet Starter Kit
- In the the project's GraphicsConfig.h set the color depth to the desired bpp value (Refer to each demo hardware profiles for examples):
// set the color depth used
#define COLOR_DEPTH 16
The Microchip Graphics Library documentation has several components that covers installation, customization and usage of the library. Several demo projects are included in the installation to help you get started. Detailed information on each demo project is available from the "Getting Started" help file located in each of the demo folders.
The library installation also includes schematics of currently supported controllers and glass. These can be found in the ../<install directory>/Microchip/Graphics/Documents/Schematics directory.
- Schematic for Graphics Display Ampire 5.7in 320x240 Board Rev A.pdf
- Schematic for Graphics Display Powertip 3.5in 320x240 Board Rev B.pdf
- Schematic for Graphics Display Powertip 4.3in 480x272 Board Rev B.pdf
- Schematic for Graphics Display Truly 3.2in 240x320 Board Rev 4.pdf
- Schematic for Graphics Display Truly 3.5in 320x240 Board Rev A.pdf
- Schematic for Graphics LCD Controller PICtail SSD1926 Board Rev 2.pdf
- Schematic for Solomon Systech SSD1906.pdf
- Schematic for Truly GG1N1291UTSW-W-TP-E.pdf
- Schematic for Truly TFT-G240320UTSW-92W-TP.pdf
- Schematic for Truly TOD9M0043.pdf
- Schematic for Microtips MTF-T022BHNLP.pdf
- Schematic for Densitron TSR67802.pdf
- Schematic for Graphics Display DisplayTech 3.2in 240x320 Board.pdf
- Schematic for Graphics Display Newhaven 2.2in 240x320 with HX8347.pdf
- Schematic for Graphics Display Seiko 3.5in 320x240 Board.pdf
- Schematic for Graphics Displays DisplayTech and Truly 3.2in 240x320 with SSD1289.pdf
- Schematic for ILI9320.pdf
- Schematic for Graphics Display Prototype Board Rev 1.pdf
- Schematic for Graphics Display Truly 5.7in 640x480 Board Rev 2.pdf
- Schematic for Graphics Display Truly 7in 800x480 Board Rev 2.pdf
- Schematic for Graphics LCD Controller PICTail Plus S1D13517 Rev 1.1.pdf
- Schematic for Low-Cost Controllerless (LCC) Graphics Board Rev 1.pdf
- Schematic for PIC24FJ256DA210 Development Board Rev 1.1.pdf
The library allows displaying 1bpp, 4bpp, 8bpp, 16bpp and 24bpp images. They can be located in program flash space or external memory. To convert the bitmap format file (BMP extension) or JPEG format file into source C file containing data array for internal memory or Intel hex file for external memory the “Graphics Resource Converter” included in the library installation can be used. Refer to the utility help file for details on usage.
The library operates with 8-bit character encoded strings. It covers languages defined in IS0 8859 standards. East Asian and any other languages support is available for UNICODE encoded fonts. Font can be stored in internal flash as an array in const section (this limits font image size by 32Kbytes) or can be located in external memory. To convert the font file into source C file containing data array for internal memory or Intel hex file for external memory the “Graphics Resource Converter” utility can be used. The utility allows importing raster font files (FNT extension) or true font files (TTF extension). Refer to the help built in the utility for details. Raster font files can be extracted from MS Windows bitmap font package file (FNT extension) or converted from true type font file (TTF extension) with a third party font editor. One such freeware editor Fony is available at http://hukka.furtopia.org/. Another example is http://fontforge.sourceforge.net.
The utility also allows reducing the generated fonts to include only the characters that the application will use. This can be done by using font filtering. Please refer to application note "AN1182: Fonts in the Microchip Graphics Library" from the "Training and Support" section of the Microchip graphics website for details of implementing reduced fonts.
This help file includes the API description of the library. The way the API is structured is similar to the library layers.
- The Device Driver Layer presents all the API included to initialize and use the display controller and the glass. This section also contains information on how to add new Device Driver.
- The Graphics Primitive Layer is a hardware independent layer that contains the API for basic rendering functions. Use this section to render basic shapes like lines, rectangles, filled circle etc.
- The Graphics Object Layer contains the API specific to each Widget type. Use this section to create and manage Widgets as well as pages or screens of different Widgets. Messaging and rendering of Widgets are also included in this section.
Refer to the Microchip graphics website www.microchip.com/graphics for the latest version of the Microchip Graphics Library, webinars, application notes, FAQs and latest news and updates.