It is sometimes important to capture all incoming data
to a log file. Indigo
provides a way to capture this text in two way. First, there is session
data logging. This method is the best option for constant logging of
crucial data The incoming data is logged to a file as it is received,
so event in the event of a computer crash or power outage, the log file
will have captured the data to the file.
Data Logging
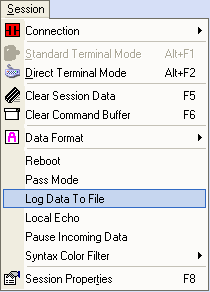
To enable logging, select the "Log Data To File"
option from the "Session" menu.

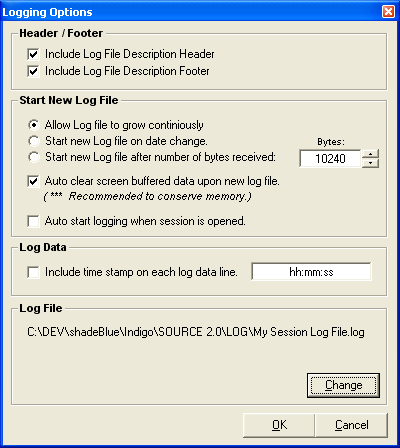
Afer selecting the Log Data To File option, you
will be prompted with the dialog below:

Header / Footer
- Include Log File Description Header
If this option is enabled, a log header including a date/time stamp
is included at the beginning of each log file.
- Include Log File Description Footer
If this option is enabled, a log footer including a date/time stamp
is included at the end of each log file.
Start New Log File
- Allow Log File to Grom Continiously
If this option is selected, all sessing logged data will be included
in a single log file. This is the recommended option if you are logging
data on a temporary basis.
- Start New Log File On Date Change
If this option is selected, a new log file will be created for each
new date that session data is received. This option is recommended
for long term or continious logging operations.
- Start New Log File After Number of Bytes Received
If this option is selected, a new log file will be created after the
user defined number of bytes have been reached. This option should
only be used for long term or continious logging operations, or situation
where excessive amounts of data is being logged.
- Auto Clear Screen Buffered Data Upon A New Log
File
If this option is enabled, the session data on screen will be cleared
when a new log file is generated. This option is used in conjunction
with the Start New Log File On Date Change or Start New
Log File After Number of Bytes Received options. This option
is recommended to conserve the computers memory.
- Auto Start Logging When Session is Opened
If this option is enabled, logging will automatically start each
time this session file is opened.
Log Data
- Include Time Stamp on each Log Data Line
If this option is enabled, each data line that gets logged will be
pre-pended with a time stamp. The time stamp format can be configured
using "hh" for hours, "mm" for seconds, and "ss"
for seconds.
Log File
- Here you can specify the log file name you wich the
session to log data to.

If eaither the Start New Log File On Date Change
or Start New Log File After Number of Bytes Received option
is enabled, you will be given additional options in the log file configuration
section. The additional options will allow you to specify how the
incremental new log files will be named. You can choose from the options
to simply place a date stamp in the filename or to include an auto
incremening number placed at then end of the log file name.
Save / Export Session Data
The alternate method to data logging is to simply export the session
window data. This will create a snapshot text file of the existing data
on screen. This method will not however, continuously log incoming data.
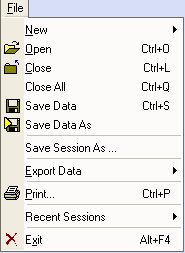
You can export the session data by selecting the Save Data,
Save Data As, or Export Data menu option in the File
menu.

See the help topic "Export
Session Data" for more information.