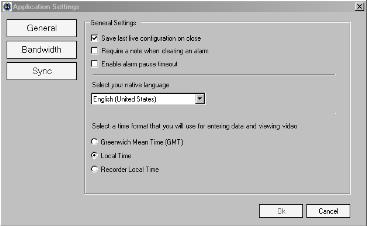
When you click Application Settings in the Setup page, the Application Settings dialog box appears (refer to Figure 3). This dialog box allows you to control your general, bandwidth, and synchronization settings for the application.General: Allows you to save the last live configuration when the application is closed. You can also require a note when clearing an alarm, enable an alarm pause timeout, select your native language, and select the time format to enter data and to view video.Figure 3. General Settings Dialog BoxBandwidth: Allows you to control the amount of information (data) requested from the DVR. When a server reaches the allowed bandwidth set by the administrator, it blocks additional read attempts and moves them into a queue to be processed once bandwidth use reaches an acceptable level.If an administrator sets a bandwidth limit, a throttle override with dwell information can be set up. This will allow users to override the current bandwidth restriction, if necessary, for a designated period of time. The following settings must be configured for the override:
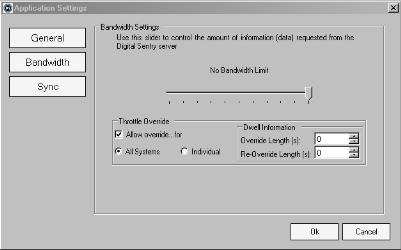
• Bandwidth Limit: Using the slider, set the amount of information requested from the Digital Sentry server.
• Throttle Override: Select “Allow override...for” all systems or an individual system.
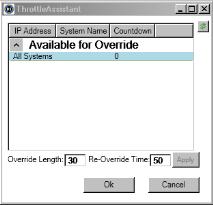
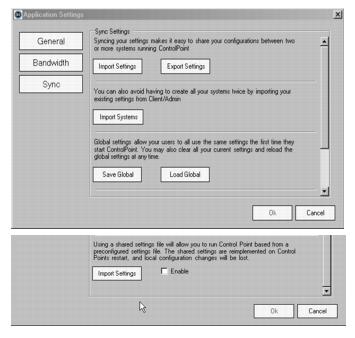
• Dwell Information: Set the override length of time (in seconds) for the bandwidth throttle override. Set the re-override length of time (in seconds) a user must wait before attempting another override.Figure 4. Bandwidth Settings Dialog BoxOnce these options have been configured, you can open the ThrottleAssistant by typing “B” on the keyboard (refer to Figure 5). The settings configured in the Bandwidth Settings dialog box appear in the ThrottleAssistant dialog box.Figure 5. Throttle AssistantNOTE: You can only set a bandwidth throttle on connected systems. If you select All Systems and one or more of those systems are not connected, you will receive a warning that the bandwidth throttle could not be overridden on the unconnected systems.Sync: Allows you to synchronize your import and export settings, which makes it easy to share your configurations between two or more systems running DS ControlPoint. You can import existing settings from DS Admin to avoid recreating your system settings. You can also use global settings when DS ControlPoint is first started, or you can clear your current settings and reload the global settings.Figure 6. Sync Settings Dialog Box1. Click the Application Settings tab in the Setup page. The Application Settings dialog box appears (refer to Figure 6).3. Click the Import Systems button. An Import Complete dialog box appears showing the number of systems that are imported and the number of existing systems that are ignored (refer to Figure 7).Figure 7. Import Complete Dialog Box1. Click Application Settings in the Setup page. The Application Settings dialog box appears (refer to Figure 6).