Creating a Label with Nero Express
From Nero LightScribe
Creating a Label with Nero Express
Insert a LightScribe capable disc into your LightScribe drive with the label side (the dull side of the disc) facing down.
FYI!The LightScribe system requires the use of LightScribe-enabled discs. LightScribe uses control features in the center/hub of the disc to identify media as LightScribe media. If your system does not seem to recognize the media as LightScribe media, take the following steps:
1. Make sure the disc is a LightScribe-enabled disc. LightScribe media will have the LightScribe logo in the inner hub area. There will also be visible control features inside, and adjacent to, the coated label area.
2. Make sure the disc is properly oriented in the drive. The label side, which contains a special coating, should be face down in the drive.
3. Clean the center area (hub) of the disc. Use a lint-free cloth to wipe the hub area and remove any dirt or smudges that may be covering the control features.
4. If these steps do not fix the problem, try another LightScribe disc
Follow the instructions on Section 'Starting with Nero StartSmart' of this guide to open the "Create disc label" window.
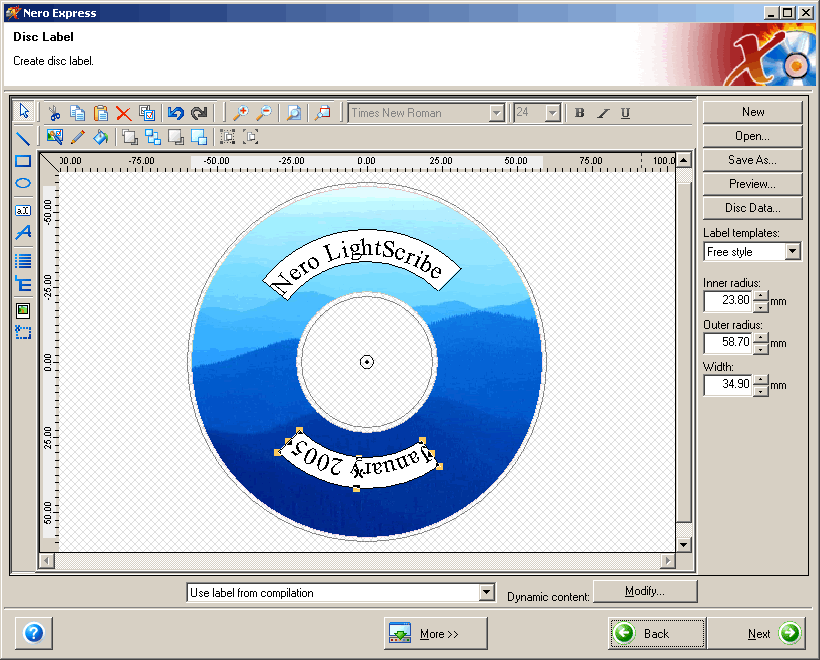
Using the tools on this window you can design your own label using different types of template. You can also insert your own background image and compose your own titles for the disc.