
About optical character recognition (OCR)
Optical character recognition (OCR) translates images of text, such as scanned documents, into actual text characters. Also known as text recognition, OCR makes it possible to edit and reuse the text that is normally locked inside scanned images. OCR works using a form of artificial intelligence known as pattern recognition to identify individual text characters on a page, including punctuation marks, spaces, and ends of lines.
OCR can be performed in three scenarios:
- Automatic OCR runs automatically each time you perform a new scan, unless you change the scanning presets.
- Manual Run OCR manually for documents that were scanned using another program.
- Indexing Indexing is a system service that helps you to quickly find files on your computer using text searches. When you perform OCR on Tagged Image File Format (TIFF) files, recognized text is available to the index, making it possible to find relevant TIFF files when you search. You can index any and all TIFF files on your computer.
In each of the three OCR scenarios, you can control the following settings. You must select these options in the Preset Options dialog box before you scan or perform a manual OCR operation.
- Auto rotate If the paper was scanned sideways or upside down, selecting Auto rotate correctly repositions the page. Keeping this option turned on helps to maximize OCR accuracy. When indexing text, Auto rotate allows text to be read in all orientations, but no changes are made to the file.
- Auto straighten If the paper was scanned slightly out of alignment, selecting Auto straighten correctly repositions the page. Keeping this option turned on helps to maximize OCR accuracy. This option is not applicable to indexing.
- OCR language By selecting a different language from this list, you can scan a document in a language other than your computer's default language.
 Adjust settings for automatic OCR
-
On the File menu, click Scan New Document, and then click Preset options. Select either Create new preset or Edit selected preset. Change OCR options on the Processing tab of the Preset Options dialog box.
Adjust settings for manual OCR
-
On the View menu, click Options. Change OCR options under Manual OCR Settings.
-
On the View menu, click Options, and then click Indexing Service. Change OCR options in the Indexing Service dialog box.
The accuracy of text recognition depends on several factors, including the type of document scanned and the scanner settings used. You can choose scanning presets to help improve OCR accuracy.
Note Documents scanned at resolutions greater than 900 dots per inch (dpi) will be converted to 900 dpi if Auto rotate or Auto straighten is selected.
To select a preset, click Scan New Document on the File menu and then select a preset from the list. The following table lists suggestions for optimizing OCR when scanning different document types.
| Original document | Scanner preset |
|---|---|
| Black or colored text on colored paper, or documents with busy backgrounds Photographs or artwork Colored text on white paper, or continuous-tone black and white images (such as photographs) |
Black and white from color page |
| Black text on white paper, or line art | Black and white |
You can also create or edit presets. In the Microsoft Office Document Scanning dialog box, click Preset options, and then click either Create new preset or Edit selected preset.
For maximum OCR accuracy, make sure that the Auto rotate and Auto straighten check boxes are selected on the Processing tab of the Preset Options dialog box. This is the default setting.
If you are using manual OCR, select the Auto rotate and Auto straighten check boxes in the Options dialog box.
For maximum OCR accuracy when indexing, click Options on the View menu, and then click Indexing Service to adjust these settings.
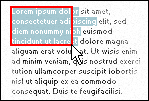
After OCR has been performed on a document, you can select text in the page pane or in Reading view by dragging, just as you can in other Microsoft Office programs. When you drag the mouse to select text, only whole words are selected. If you drag across the middle of a word, the entire word is selected, even if it falls partially outside the selection rectangle.
The selected text is actually contained in a hidden layer, separate from the document image. You can select and copy text in this layer just as you can in a text document.