BuildMap

BuildMap

Code Walkthrough

Running the Sample
After loading the BuildMap.dll into Map 3D, scroll through the command-line output to see five lines of response text:
- BuildMap sample application initialized.
- PROMPT: BuildMap sample commands:
- - BuildMap <Case 1>
- - GisOperation <Case 2>
- - ChangeStyle <Last step of Case 2, repeatable>
Command:
prompt enter the command BuildMap.NoteBefore running this command,
edit BuildMap\Data\Raster\bayarea.xml and
replace the value of the Location element’s name attribute with
the local absolute path to the Redding.JPG file, for example, <ObjectARX rood folder>\Map Samples\Platform\BuildMap\Data\Raster.
As a result, you see a map appear in the drawing pane as shown in the screen shot. This map is derived in part from the contents of the bayarea.jpg file that is located in the BuildMap\Data\Raster\ folder. If you scroll through the command-line output, you see following response text
Command:
_zoom,Specify corner of window, enter a scale factor (nX or nXP), or [All/Center/Dynamic/Extents/Previous/Scale/Window/Object] <real time>:
_extents, and Regenerating model..
Command:
prompt enter the command GisOperation. The layer containing the point features is made invisible, and the replacement of some of the polygon features with buffered polygon features, which have a different color.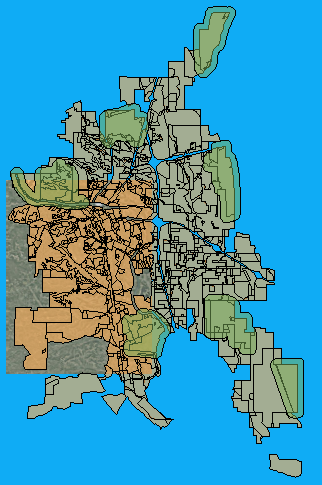
Command:
prompt enter the command ChangeStyle. The result is a change in the color of the buffered polygon features created by the GisOperation command.