Setup SQL Server for TFS
From Visual Studio Team Foundation Server 2012 v4
 How to set up SQL Server
First you install and configure SQL Server 2008 R2 for Team Foundation Server with reporting. Then you apply service pack 1 for SQL Server 2008 R2 and configure Windows Server to recover analysis services on failure.
Make sure the default collation settings in SQL Server match the existing settings from the SQL Server instance that you're migrating from. For more information, see: SQL Server Collation Requirements for Team Foundation Server |
Required Permissions
To perform these procedures, you must be a member of the Administrators security group on Windows Server.
Install SQL Server
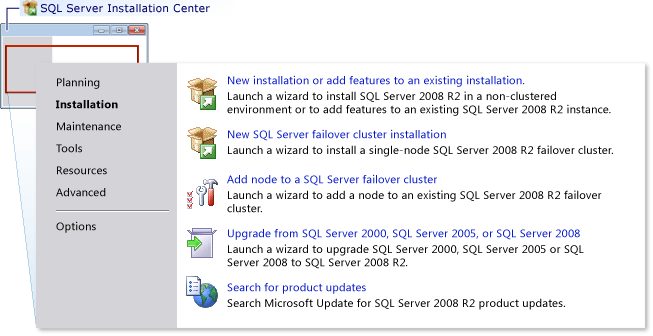
Launch setup.exe on the SQL Server DVD.
On the SQL Server Installation Center page, choose Installation, and then choose New installation or add features to an existing installation.
On the Setup Support Rules page, choose OK.
On the Product Key page, type your product key or specify a free edition and then choose Next.
On the License Terms page, accept the license agreement and choose Next.
On the Setup Support Files page, choose Install.
On the Setup Support Rules page, choose Next.
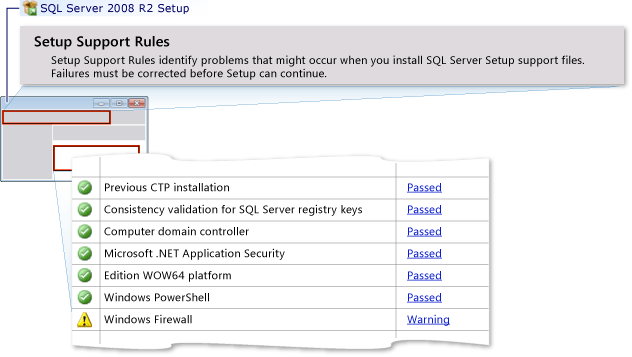
 Tip
TipA Windows Firewall warning might appear here, but you can safely ignore this warning. TFS automatically adds an exception for Windows Firewall during upgrade.
On the Setup Role page, choose SQL Server Feature Installation and then choose Next.
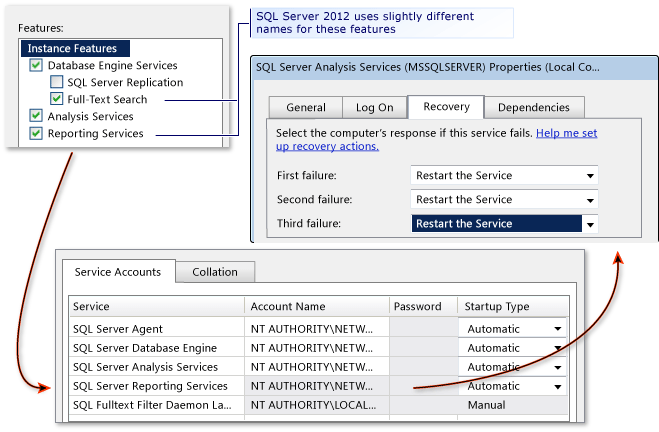
On the Feature Selection page, select the check boxes for the following components and then choose Next:
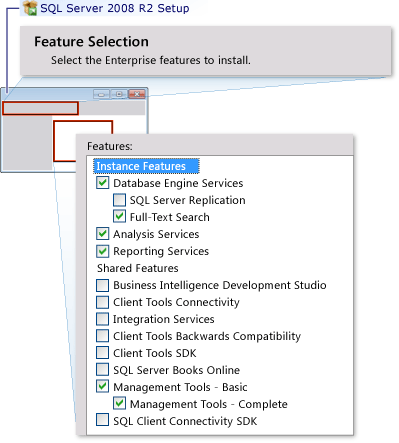
Database Engine Services (required for Team Foundation Server)
Full-Text Search (required for Team Foundation Server)
Analysis Services (required for reporting)
Reporting Services (required for reporting)
Management Tools - Basic (Management Tools -Complete automatically selects itself when you click Basic and this is fine)
On the Installation Rules page, choose Next.
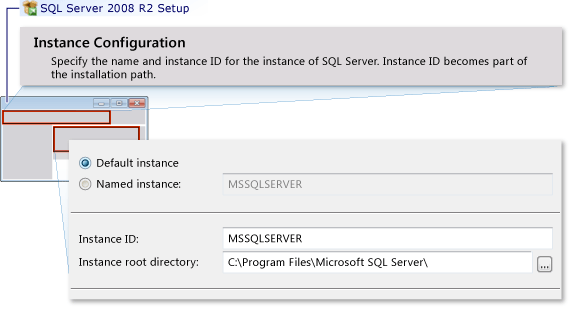
On the Instance Configuration page, choose Default instance. If you choose Named instance, type the name of the instance. Choose Next.
On the Disk Space Requirements page, choose Next.
On the Server Configuration page, choose Use the same account for all SQL Server services, and enter NT AUTHORITY\NETWORK SERVICE in Account Name for every service.
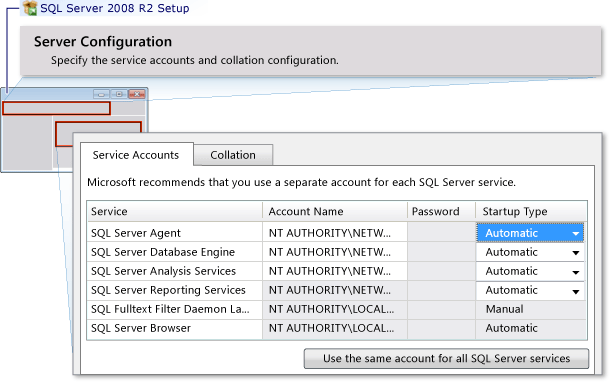
In the Startup Type column, verify that Automatic appears for all services that you can edit, and then choose Next.
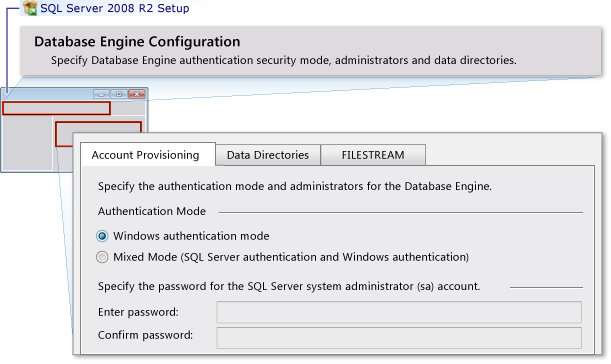
On the Database Engine Configuration page, choose Windows authentication mode, choose Add Current User, and then choose Next.
On the Analysis Services Configuration page, choose Add Current User, and then choose Next.
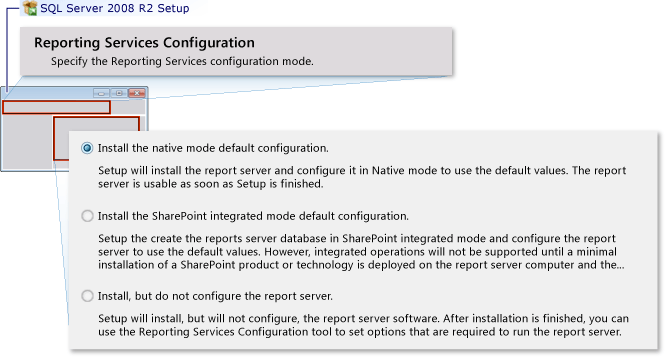
On the Reporting Services Configuration page, choose Install the native mode default configuration, and then choose Next.
Optional) On the Error and Usage Reporting page, specify whether to send information about errors and then choose Next.
On the Installation Rules page, choose Next.
On the Ready to Install page, review the list of components to be installed, and then choose Install.
The Installation Progress page shows the status of each component.
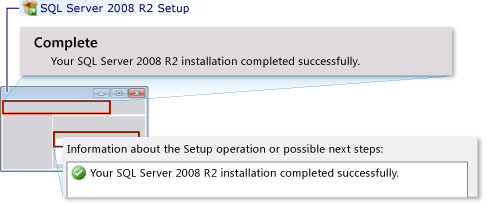
On the Complete page, choose Close.
Update SQL Server 2008 R2
TFS 2012.4 introduces a new SQL Server requirement for TFS 2012: SQL Server 2008 R2 now requires service pack 1 (SP1). Previously, SP1 was only strongly recommended for some SQL Server editions, but now all SQL Server 2008 R2 editions require SP 1.
Configure Analysis Services to recover on failure
You should configure the Windows service for Analysis Services to restart itself if it fails.
To configure Analysis Services to recover
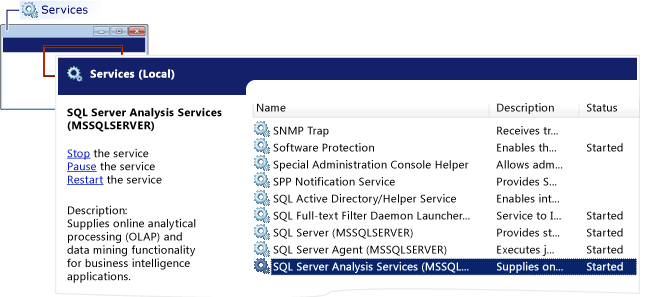
Open the Services control panel (Start >Administrative tools >Services).
Right-click the Windows service for SQL Server Analysis Services (MSSQLSERVER), and then choose Properties. If you are using a named instance of Analysis Services, the instance name appears in parenthesis
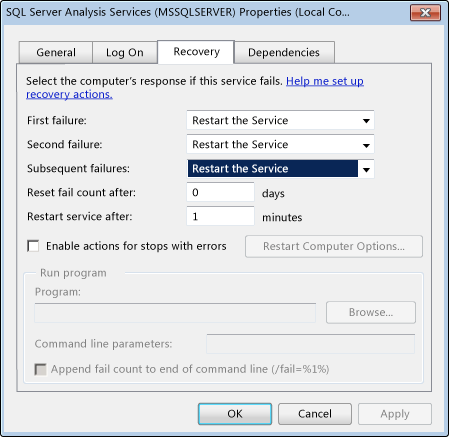
Choose Recovery.
In the First failure list, choose Restart the Service.
In the Second failure list, choose Restart the Service.
In the Subsequent failures list, choose Restart the Service, and then choose OK.
Next Step: Set up SharePoint
If you don't skip the portal setup, you have two options for how to deal with SharePoint (if you don't want to deal with SharePoint, you can move on to step 4, Back up and Restore Data for TFS):
Use the same SharePoint site for TFS that you have right now
If your old SharePoint server is still up and running, you can continue to use it. Go to the SharePoint server and uninstall old extensions, and then install the new extensions before you upgrade TFS. If SharePoint and the previous version of TFS were on the same computer, you have to uninstall the entire TFS 2010 application tier. In the new upgraded configuration, the only TFS component on the SharePoint server will be the TFS extensions for SharePoint.
For more information, see: Use the same SharePoint site for TFS that you have right now
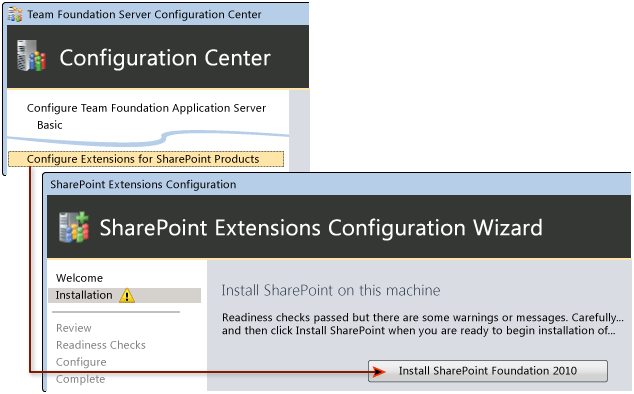
Move SharePoint to New Hardware for TFS
New for this version of TFS, you can install SharePoint Foundation using the TFS extensions for SharePoint wizard. The TFS wizard will install a fresh copy of SharePoint using the installation of SQL Server you just set up, and then configure the TFS extensions for the new installtion of TFS. After you install SharePoint, you'll detach its content database to prepare for the migration of the data from your previous SharePoint installation in step 4, Back up and Restore Data.
For more information: Move SharePoint to New Hardware for TFS