|
Working with Remote Files
|
Previous Top Next |
Pyscripter supports
working with remote files i.e. files that may reside in different computers
(servers) including Windows and Linux machines. You can open, edit run debug
and save back these files. They work seamlessly with other PyScripter
features such as the Recent File list,
project files, and Run Configurations.
Alternatively on the client side you can use the popular SSH client PuTTY.
Requirements
To use PyScripter with remote files your computer need to have SSH client capabilities at the computer running PyScripter and an SSH server running on the remote computer. SSH is a widely used network protocol for securely connecting to remote machines. Windows 10 since the April 2018 update includes SSH. With earlier versions of Windows 10 you need to manually enable SSH through "Enable Optional Features". For other versions of Windows you can install the latest version of OpenSSH for Windows using the provided installation instructions.Alternatively on the client side you can use the popular SSH client PuTTY.
Configuring the SSH client side
Pyscripter requires password-less authentication using rsa keys. You need to create the rsa keys and add them to the ssh-agent service which needs to be running. Your public key needs to be added to the ~/.ssh/authorised_keys file on the server side. Instructions are provided here.Configuring the SSH server side
The SSH server service (sshd) and SSH agent service (ssh-agent) need to be running on the server side. This is most likely true for Linux machines. In Windows machines you need to start the server using the
net start sshd
net start ssh-agent
commands. You can also configure these services to run automatically at login time.
Testing the SSH connection
From a command prompt issue the following command:ssh username@hostname
where username is the user name on the server side and host name is the IP address of the SSH server. If this works and you see the server shell, then PyScripter is ready to use the Server.
Opening remote files
You can open remote files using the File Menu. You are then shown the Open Remote File dialog shown below: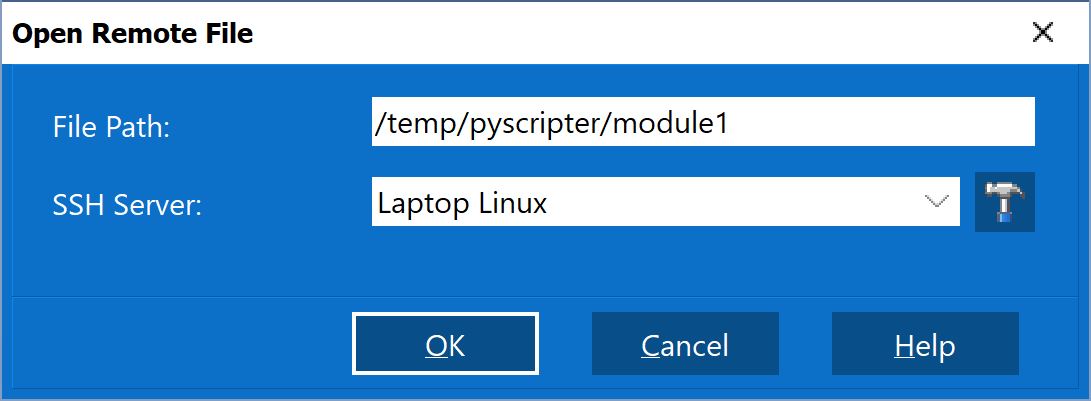
In this dialog box you provide the path to the remote file and select an SSH server from a drop-down list. You can also setup your SSH servers by pressing the button next to the SSH server field. In PyScripter remote file names are shown in the UNC format \\server name\filepath.
Setting up SSH servers
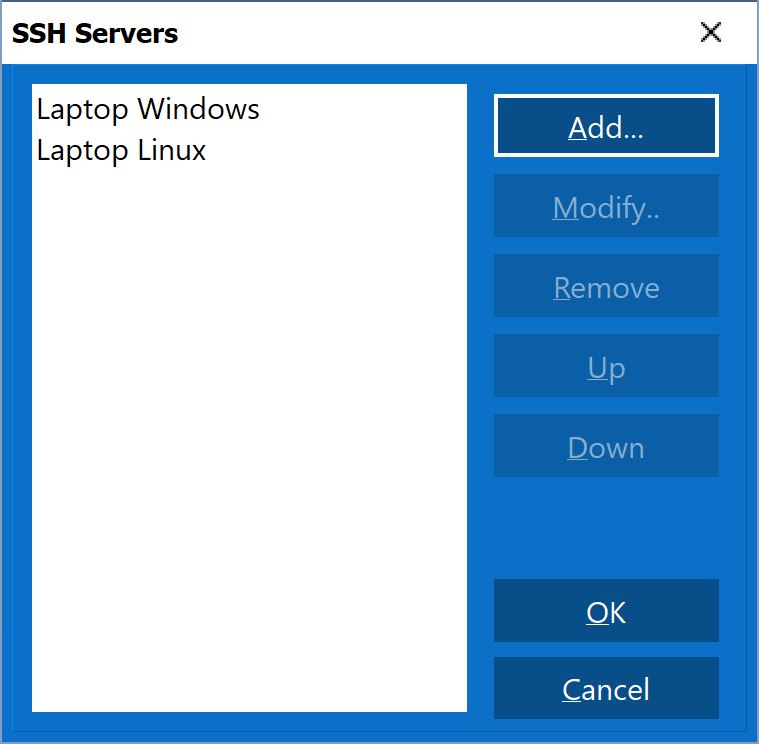
In this dialog box you add remove or modify SSH servers.
Editing SSH server information
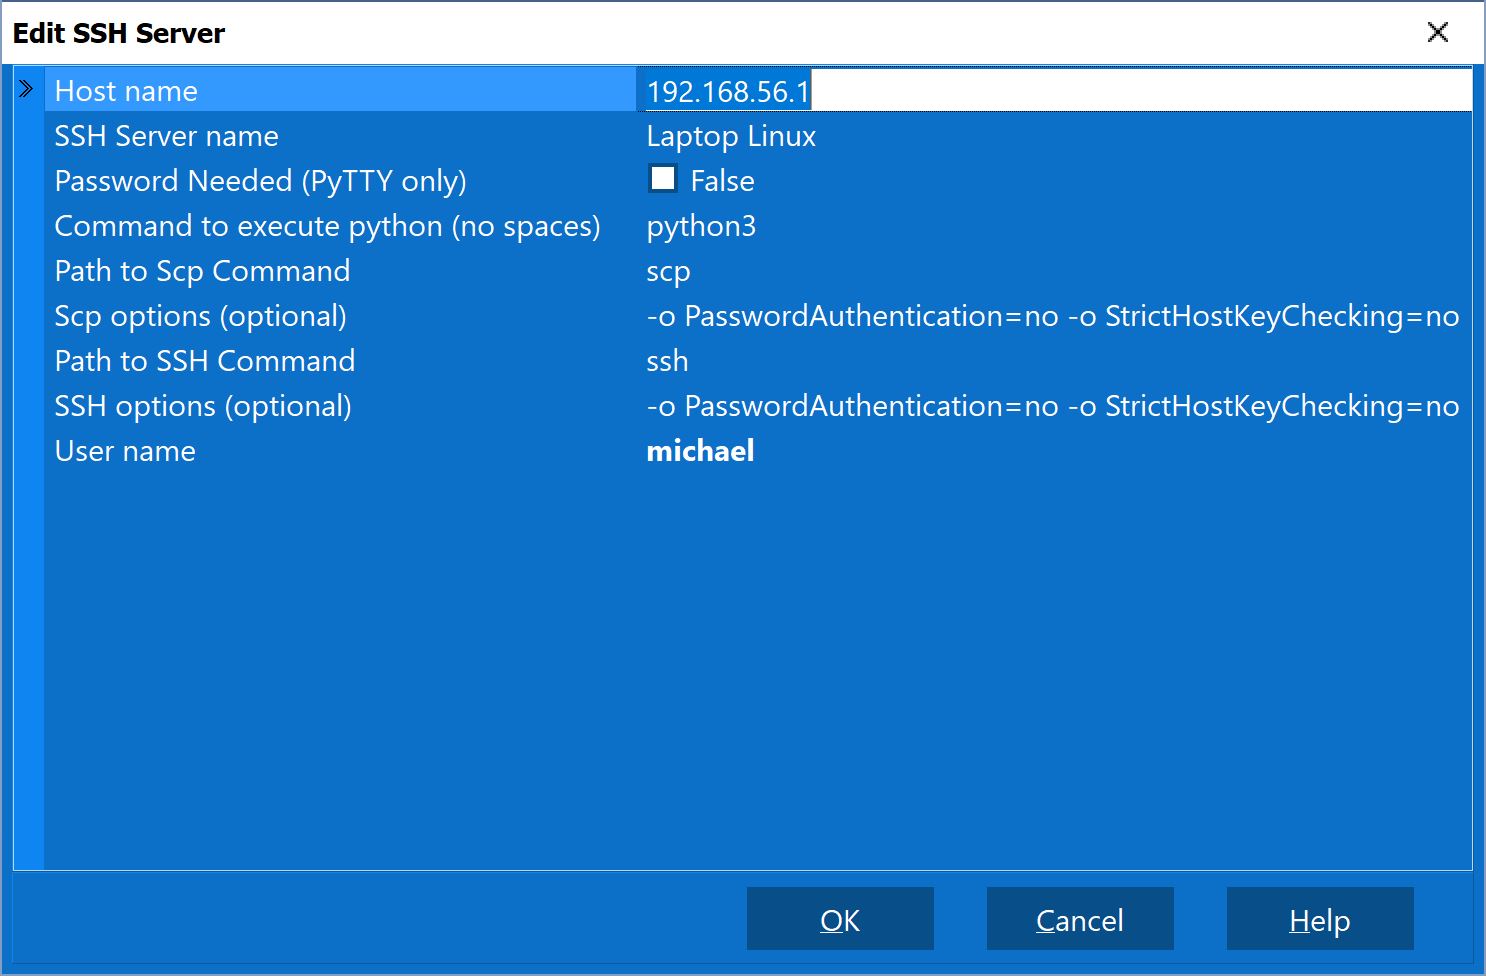
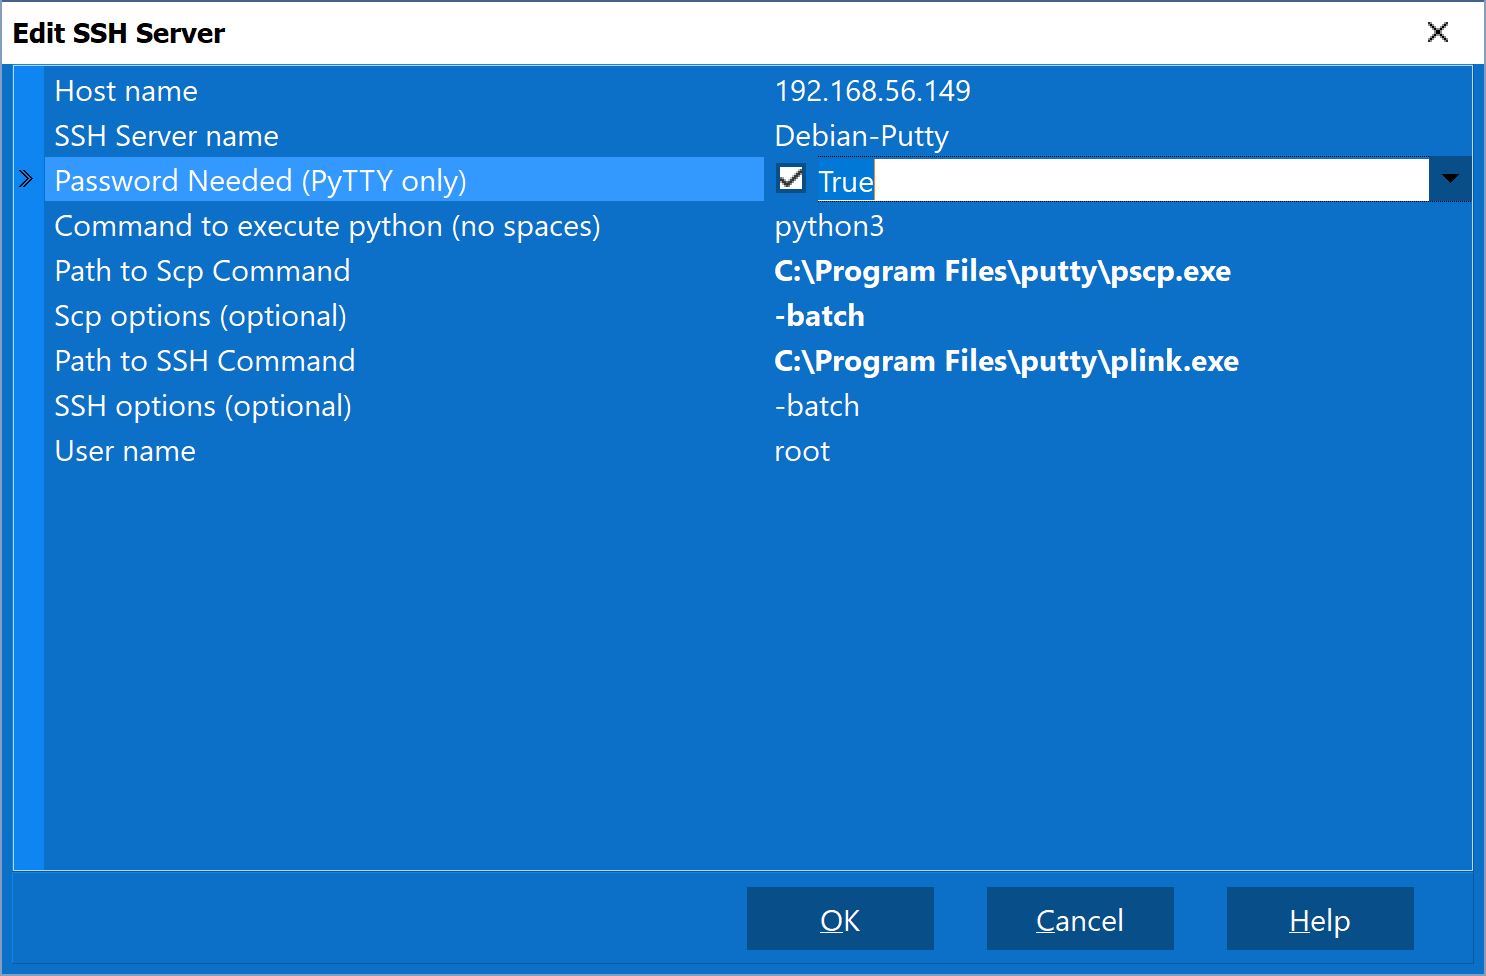
For each SSH server you need to provide a Name that will be used to identify the SSH server, as well as the user name and host name (or IP address) that will be used to connect to the server. You also need to provide the path to the scp and ssh commads and the command that will be used to execute Python on the server . Optionally you can provide additional SSH -o options that will be passed to the ssh and scp commands. For standard use leave this field empty. If you want to use password authentication (only with Putty - see below) you also need to check the Password Needed option.
Instead of OpenSSH for Windows you can use PuTTYas the SSH client. See below a typical PuTTY configuration of an SSH server. The example uses password authentication, but you can use a private/public key combination instead for password-free authentication. In that case you need to use puttygen to create the private/public key and add -i path_to_your_private_key to the scp and ssh options or instead run pagent and add to it the private key. You also need to setup your server to accept the public key by appending it to the ~/.ssh/authorized_keys file. See here for details.