Create Stripe Array
From VIA RAID
Create Stripe Array (RAID 0)
Stripe Array is also called RAID 0, it implements a striped disk array and the data is broken down into blocks in which each block is written to a separate disk drive. I/O performance is greatly improved by spreading the I/O load across many channels and drives. Best performance is achieved when data is striped across multiple channels with only one drive per channel.
RAID 0 is not a "True" RAID because it is NOT fault-tolerant. The failure of just one drive will result in all data in an array being lost. It should never be used in mission critical environments.
To create a Stripe disk array, click
toolbar button  or menu item Operation =>
Create Stripe ,then the following dialog will appear:
or menu item Operation =>
Create Stripe ,then the following dialog will appear:
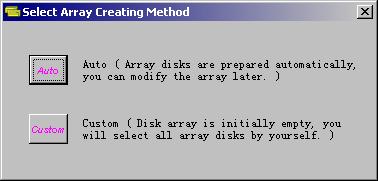
Click 'Auto' or 'Custom' button to select an Array Creating Method. Then the Create Stripe Array dialog will appear:

If you select Auto creation method, all available free disks attached on the RAID controller will be initially added into the Stripe disk array. You can deselect some disks from the Array Disks list if you don't want to use all Available Disks to create the Stripe array.
To add a disk into array,
please select an available disk from the left side list, then click  button (or press Right-Arrow key). The array disk's order in the Stripe disk array is the same order as it
was added into the array.
button (or press Right-Arrow key). The array disk's order in the Stripe disk array is the same order as it
was added into the array.
To remove a disk from array, please select the array disk, then click  button (or press Left-Arrow key).
Whenever a disk (array disk or available disk) is selected, its capacity and physical location will be shown in the bottom-left corner.
Principles to select Stripe Array disk:
-
Try to select disks in different channels. Certainly you can adjust disks' physical position manually after shutting down the system.
- It should be taken into account not to select a disk whose capacity is too much different with other array disks, or else the extra space on larger array disks will be wasted. The reason is that for each Stripe Array disk, its effective capacity (real capacity) will always be the smallest data capacity among all array disks.
Select Stripe Size for the Stripe Array
Refer to above dialog box, there is a drop-down list with the title 'Stripe Size' in the bottom-right corner. Stripe Size is the basic data block size used when writing data onto each stripe array disk. The principle of selecting Stripe Size is trying to balance most data Read/Write work onto all stripe disks, so that all stripe disks can work in parallel when Read/Write a data record is requested by the system. Therefore, the smaller the average system data record is, the smaller Stripe Size should be selected when create a Stripe Array. The default Stripe Size is 4k bytes.
Final Step
Click Create button to create the Stripe array. Message boxes will then pop up to ask for confirmation and prompt system reboot. System must be rebooted to enable the newly created Stripe array.