Get Started
1. Introduction
The working environment contains several connected components: Text Editor, Assembler and Simulator. Using those components we are able to write VAX11 code, compile it and run it. The environment also gives us the ability to run the program step by step and debug it.
The interface is simulator to Visual Studio .Net and to make it easy for new users to work with the simulator.
2. Main Features
Text Editor:
- Contains Syntax Highlight option for writing VAX11 code.
- Allows working on several files simultaneously
Assembler:
- Detailed Error Messages
- Code optimization option - resulting in shorter code than the old simulator.
- Can generate output file containing the user code and the machine code.
Simulator:
- Supports many of the VAX11 opcodes.
- Supports many VAX system-calls.
- Supports Interrupts and Exceptions
- Virtual memory support, giving 4GB addresses space.
- Contains simulation for physical memory and page faults.
- Option to analyze the program running time.
Debugger:
- Running the program in Step-By-Step Mode
- Supports Break-Points
- Displays registers status, memory and stack.
3. Start Working
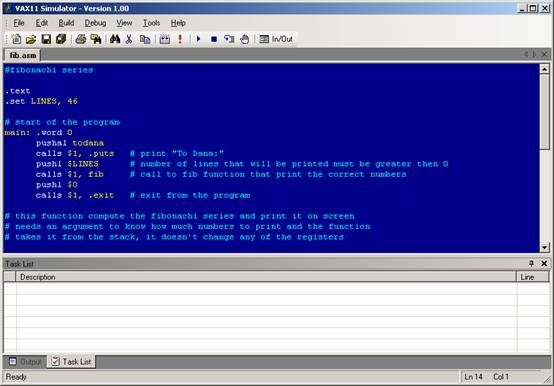
When opening the working environment, the main application window will appear.
|
VAX11 Simulator Opening Screen |
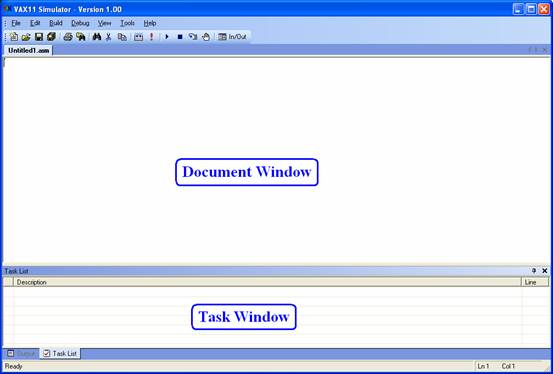
Document Window is the place where the user writes the program's code. This window is operating as simple text editor.
The Task Window is used by the assembler. If it finds errors in the user's code, the task window will contain it, and will give the user to jump directly to that line.
Near the task list we can find the Output Window, where the assembler and the simulator sends information about the compilation status or the running status.
4. Text Editor
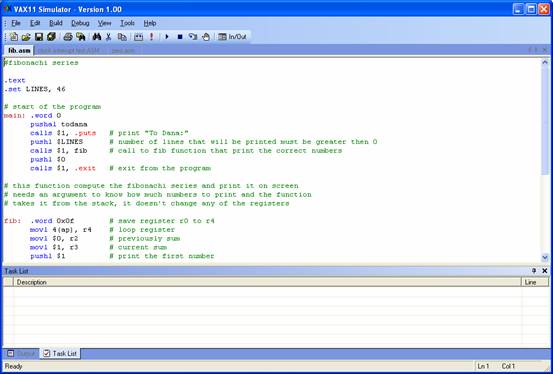
The working environment allows the user to write text files which contains VAX code. Every document (program) appears on its own window, and the user is able to switch between the open documents.
The editor colors the code as we type it, to make it easier to read the source.
We are able to customize the colors via the environment menus.
|
Three open documents |
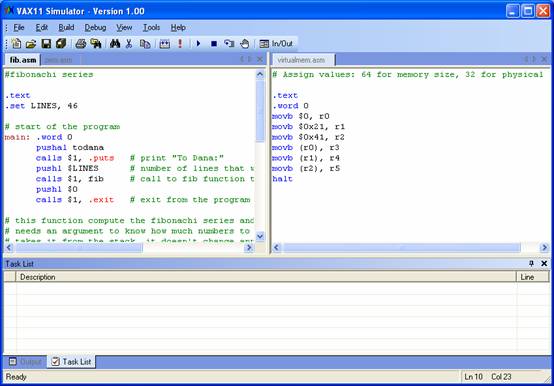
The working environment also let us to split the open documents and view each one of it on part of the screen. Splitting the view is done by dragging the document name from the documents tab to the desire place.
|
Splitting the windows |
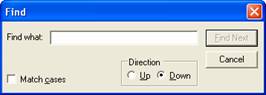
The editor contains finding tool in the text. To use it, select "Find" under the "Edit" menu, or press Ctrl+F. Then enter the text to be searched.
|
Find Window
|
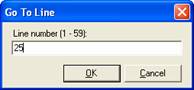
Jumping to specific line in the text can be done using "Go To" option in the "Edit" window, or using the Ctrl+G keys.
|
Go To Line Window |
5. Options Window
|
Options Window – Environment Settings |
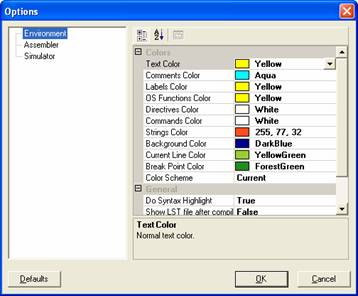
Many aspects of the environment, assembler and simulator can be personalize.
The options window let the user change the different settings of the system.
5.1. Working Environment
|
Colors |
|
|
Parameter |
Meaning |
|
Text Color |
Normal text color |
|
Comments Color |
Comments start after # sign. |
|
Labels Color |
Labels are identifiers following by : that appears on start of lines. |
|
OS Functions Color |
The simulator supports some high-level functions, as printf, getchar, etc. These functions are known as operation system functions. |
|
Directives Color |
Directives are commands meant for the assembler, that doesn't appear on the final machine code. Examples: .word, .space |
|
Commands Color |
VAX11 commands (opcodes) color |
|
Strings Color |
Strings are text appear betweens "". |
|
Background Color |
Documents Background Color |
|
Current Line Color |
Color of the next line that will be executed (debug mode) |
|
BreakPoint Color |
BreakPoint Color |
|
Color Scheme |
Select one of pre-defined colors sets |
|
General |
|
|
Parameter |
Meaning |
|
Do Syntax Hightlight |
Select if the environment should highlight special VAX11 words. |
|
Show LST file after compile |
If set, the LST file created during the compilation will be displayed after compile ends successfully. |
|
Show agent on startup |
The agent, Merlin, is welcome the users of VAX11 Simulator every time the program runs. |
|
The working environment with custom colors settings |
5.2. Assembler
|
General |
|
|
Parameter |
Meaning |
|
Optimize Code |
VAX11 Simulator generates smaller code than the old SIM simulator used by the Technion. Set this option to false if you wish the assembler to generate code as SIM does, without its enhancements. |
|
Save LST file after compile |
Select if the assembler should save LST file after successful compilation. LST file is text file containing the machine code and the source code of the compiled program. |
5.3. Simulator
The simulator simulate a physical memory that divided to pages and supports virtual memory. The settings that related to memory effects the simulation of that memory.
The console is the input/output window of each running program.
|
Console |
|
|
Parameter |
Meaning |
|
Text Color |
The color of the console's output. |
|
Background Color |
Background color for the console. |
|
Always on top on debug mode |
If selected, the console window of debugged application will be above all other windows, even when deactivate. |
|
General |
|
|
Parameter |
Meaning |
|
Show Registers in Hex |
If true, while debugging, the registers values will be displayed in Hex basis. Else it will be displayed as decimal numbers. |
|
Show Special Registers |
If true, while debugging, the special VAX11 registers will be displayed among the general registers. |
|
Show Debug Information |
If selected, the simulator will generate detailed
information about the simulator state in case of errors in the user's
program. |
|
Memory |
|
|
Parameter |
Meaning |
|
Page Size |
Memory Page Size |
|
Physical Memory Size |
Physical Memory Size. The memory size should be multiple of the page size. |
|
Show Memory Accesses |
If selected, the simulator will display information about accesses to memory after each command. |
|
Show Physical Addresses |
If selected, the simulator will show "physical" addressing for every virtual address. |
|
Show Page Faults |
If selected, the simulator will display message when page-fault occurs. |
|
Fill Memory With Garbage |
If true, uninitalize memory cells will contain garbage. If false, it will contain zeros |
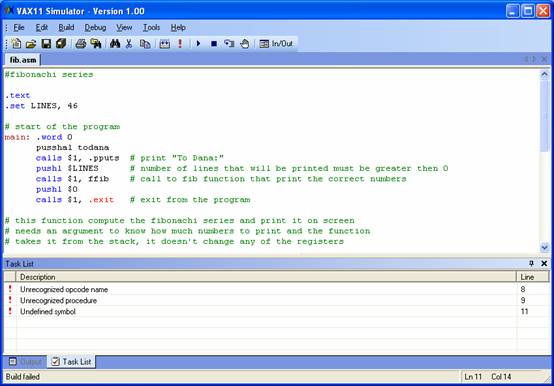
6. The Assembler
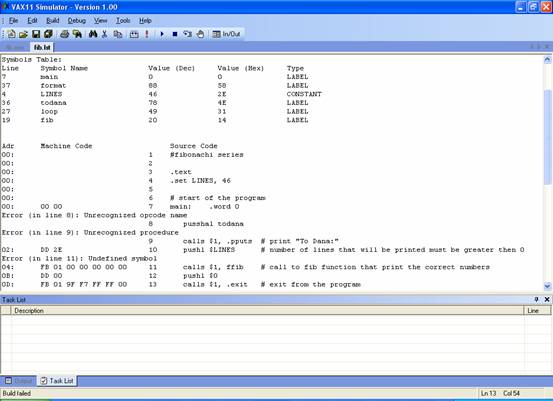
After we wrote an assembler code, we can compile it using the "Compile" option under "Build" menu. In case we have errors in our code, list of the errors will appear on the task window, and we will be able to fix it.
|
Code With Errors – The Errors appears on the Task Window |
LST files are files contain the user code and the machine code of the program.
The working environment lets the user watch and save the LST files.
To do so, we need to press on "View LST File" option under the "Build" menu.
Note that we can view that file even if we have errors on our code.
|
LST File |
7. The Simulator
The simulator is able to execute VAX11 programs. It simulate many hardware aspects, including memory, registers, interrupts, exceptions and more.
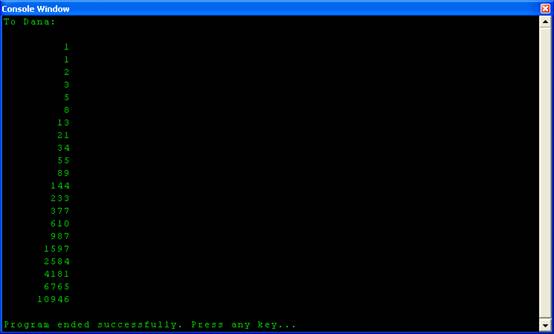
In order to execute our program, we need to select "Execute" option from the "Build" menu. After we will press that option, a console window will appear and our program will start.
|
Console window containing program that displays Fibonacci numbers |
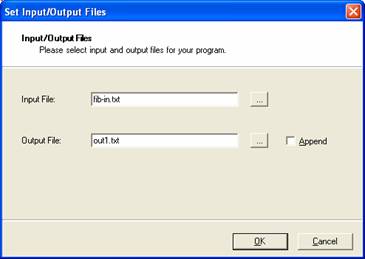
The simulator let us selecting input and output files for out program, using " Set Input/Output Files" in the "Build" menu.
Pay attention that the input and output files can be set for each open document separately.
Append option let us adding output to existing file.
|
Set Input/Output Files Window |
The debug menu allows us running the program in Step-By-Step mode, in order to fix problems in our program. Starting the program in Step-By-Step mode is done by pressing on "Step" option under the "Debug" menu.
When the debug starts several windows will appears to displays the system status: registers windows, memory and stack windows. Also the next line to be performed will be marked using a color.
|
|
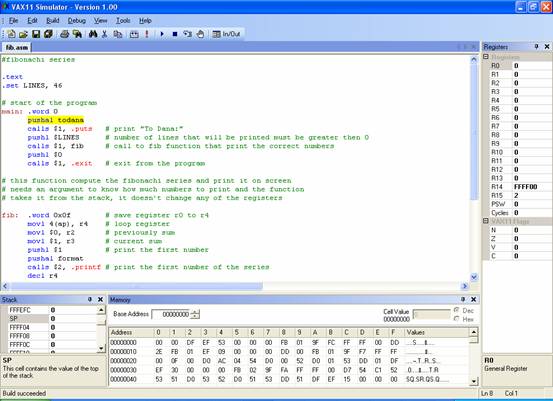
A console window will be opened too to display the program's output.
|
|
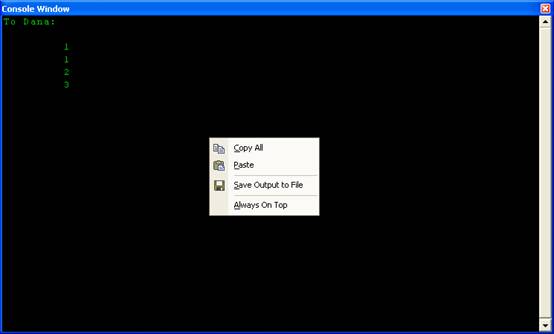
Another useful option is right-clicking on the console. A popup menu will appear with several options: Setting the window as "Always in Top", saving the program's output, and pasting data to the running program.