Click on the "New" button at the top of the VirtualBox Manager window. A wizard will pop up to guide you through setting up a new virtual machine (VM):
|
On the following pages, the wizard will ask you for the bare minimum of information that is needed to create a VM, in particular:
-
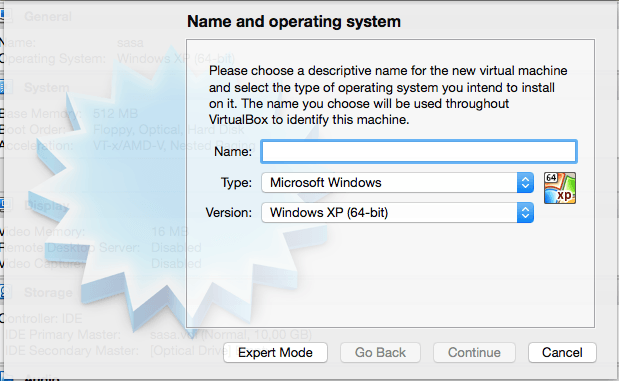
The VM name will later be shown in the VM list of the VirtualBox Manager window, and it will be used for the VM's files on disk. Even though any name could be used, keep in mind that once you have created a few VMs, you will appreciate if you have given your VMs rather informative names; "My VM" would thus be less useful than "Windows XP SP2 with OpenOffice".
-
For "Operating System Type", select the operating system that you want to install later. The supported operating systems are grouped; if you want to install something very unusual that is not listed, select "Other". Depending on your selection, VirtualBox will enable or disable certain VM settings that your guest operating system may require. This is particularly important for 64-bit guests (see Section 3.1.2, “64-bit guests”). It is therefore recommended to always set it to the correct value.
-
On the next page, select the memory (RAM) that VirtualBox should allocate every time the virtual machine is started. The amount of memory given here will be taken away from your host machine and presented to the guest operating system, which will report this size as the (virtual) computer's installed RAM.
Note
Choose this setting carefully! The memory you give to the VM will not be available to your host OS while the VM is running, so do not specify more than you can spare. For example, if your host machine has 1 GB of RAM and you enter 512 MB as the amount of RAM for a particular virtual machine, while that VM is running, you will only have 512 MB left for all the other software on your host. If you run two VMs at the same time, even more memory will be allocated for the second VM (which may not even be able to start if that memory is not available). On the other hand, you should specify as much as your guest OS (and your applications) will require to run properly.
A Windows XP guest will require at least a few hundred MB RAM to run properly, and Windows Vista will even refuse to install with less than 512 MB. Of course, if you want to run graphics-intensive applications in your VM, you may require even more RAM.
So, as a rule of thumb, if you have 1 GB of RAM or more in your host computer, it is usually safe to allocate 512 MB to each VM. But, in any case, make sure you always have at least 256 to 512 MB of RAM left on your host operating system. Otherwise you may cause your host OS to excessively swap out memory to your hard disk, effectively bringing your host system to a standstill.
As with the other settings, you can change this setting later, after you have created the VM.
-
Next, you must specify a virtual hard disk for your VM.
There are many and potentially complicated ways in which VirtualBox can provide hard disk space to a VM (see Chapter 5, Virtual storage for details), but the most common way is to use a large image file on your "real" hard disk, whose contents VirtualBox presents to your VM as if it were a complete hard disk. This file represents an entire hard disk then, so you can even copy it to another host and use it with another VirtualBox installation.
The wizard shows you the following window:
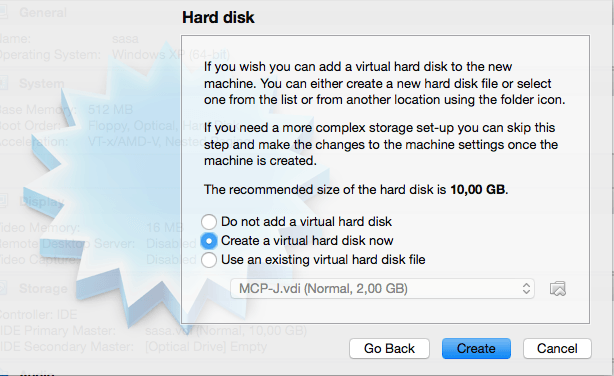
Here you have the following options:
-
To create a new, empty virtual hard disk, press the "New" button.
-
You can pick an existing disk image file.
The drop-down list presented in the window contains all disk images which are currently remembered by VirtualBox, probably because they are currently attached to a virtual machine (or have been in the past).
Alternatively, you can click on the small folder button next to the drop-down list to bring up a standard file dialog, which allows you to pick any disk image file on your host disk.
Most probably, if you are using VirtualBox for the first time, you will want to create a new disk image. Hence, press the "New" button.
This brings up another window, the "Create New Virtual Disk Wizard", which helps you create a new disk image file in the new virtual machine's folder.
VirtualBox supports two types of image files:
-
A dynamically allocated file will only grow in size when the guest actually stores data on its virtual hard disk. It will therefore initially be small on the host hard drive and only later grow to the size specified as it is filled with data.
-
A fixed-size file will immediately occupy the file specified, even if only a fraction of the virtual hard disk space is actually in use. While occupying much more space, a fixed-size file incurs less overhead and is therefore slightly faster than a dynamically allocated file.
For details about the differences, please refer to Section 5.2, “Disk image files (VDI, VMDK, VHD, HDD)”.
To prevent your physical hard disk from running full, VirtualBox limits the size of the image file. Still, it needs to be large enough to hold the contents of your operating system and the applications you want to install -- for a modern Windows or Linux guest, you will probably need several gigabytes for any serious use. The limit of the image file size can be changed later (see Section 8.23, “VBoxManage modifymedium” for details).
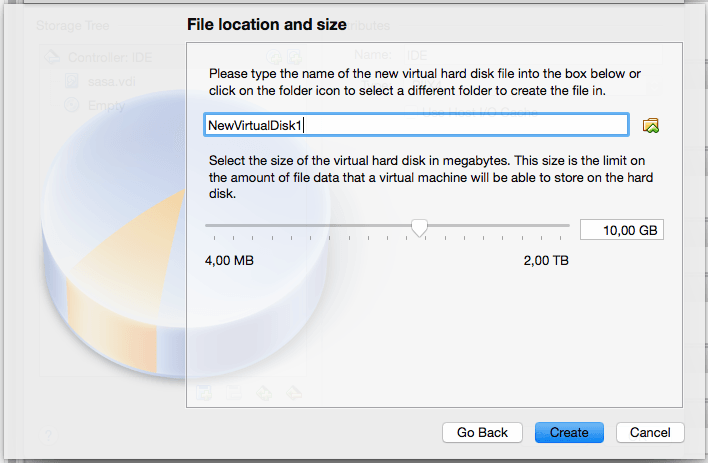
After having selected or created your image file, again press "Next" to go to the next page.
-
-
After clicking on "Finish", your new virtual machine will be created. You will then see it in the list on the left side of the Manager window, with the name you entered initially.
Note
After becoming familiar with the use of wizards, consider using the Expert Mode available in some wizards. Where available, this is selectable using a button, and speeds up user processes using wizards.