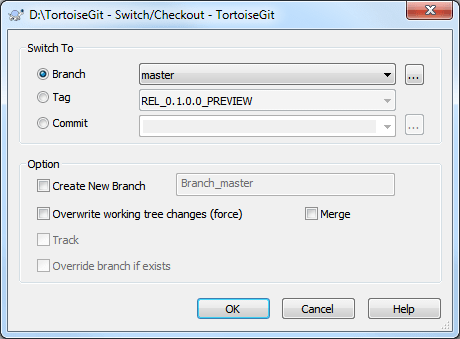
The Switch/Checkout dialog can be used to checkout a specific version to the working tree (i.e., all files are updated to match their state of the selected version). Normally, a specific version will be represented by a (local) branch which is set as the current branch (cf. Section 2.27, “Branching/Tagging” and Section 1, “Repositories and Branches”).
Select a git repository directory in windows explorer Right click to pop up the context menu and select the command → , which brings up the following dialog box:
If you enter a branch name at Create New Branch, a new branch will be created. Also, the new branch will be set as the current branch (HEAD).
You can click on the to browse the references/branches/log to choose a branch to checkout.
Check Overwrite working tree changes (force) will overwrite uncommitted changes in the working tree with the selected version.
When you selected a remote branch, you can check Track in order to track the remote branch. When you open the push, pull or sync dialog, the remote branch will be pre-selected automatically.
You can find more information at Section G.3.18, “git-checkout(1)”
![[Important]](important.png)
|
Important |
|---|---|
|
If you checkout/switch to a Tag or Commit, you should create a new branch. Otherwise you will work at "no branch" (detached HEAD state; i.e., there is no current branch, cf. the section called “DETACHED HEAD”). This can be easily fixed by creating a branch at this version and switching to it. |
![[Tip]](tip.png)
|
Exporting |
|---|---|
|
Sometimes you may want to create a local copy without any of those
|
