Selecting Queues
From IPFX Integrator for Excel
Selecting Queues
To select queues for a workbook:
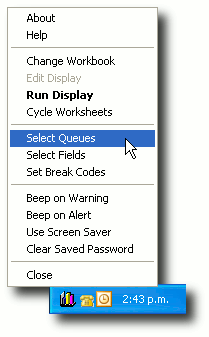
- Right-click on the IPFX Integrator for Excel system tray icon, and choose the menu option Select Queues:
- A list of the currently-selected queues (if any) is displayed:
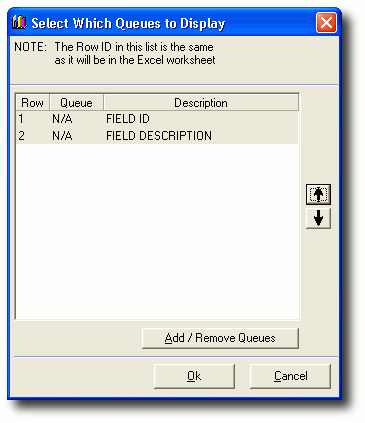
Note: The first two rows of the DATA worksheet are reserved for IPFX-specific field information.
- Click the Add / Remove Queues button to select the queues that you wish to include in your display:
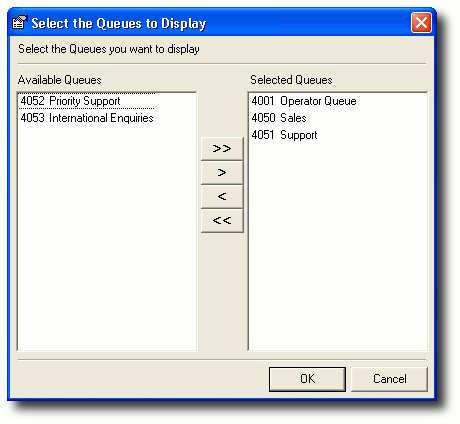
Select a queue from the Available Queues panel by clicking on it, then click the > button to move the queue into the Selected Queues panel. Repeat until all the queues you wish to use are shown in the Selected Queues panel.
To remove a queue from the Selected Queues panel, click on the name of the queue and click the < button.
When you are satisfied with your selection, click OK.
- A summary of your selected queues is displayed.
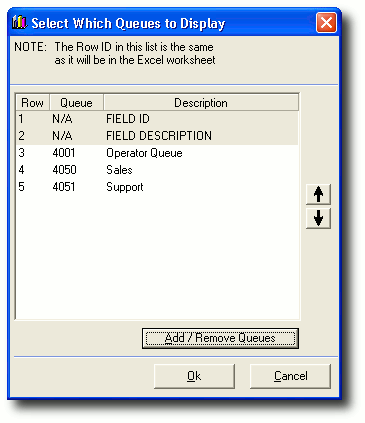
Use the up and down arrows to change the order in which your queues will appear in the spreadsheet.
- Click Ok.
The selected queues are now linked to the DATA worksheet of your selected workbook.