Prepare a Windows Server as the Host for LANSA Client
From LANSA Client Administrator
Prepare a Windows Server as the Host for LANSA Client
The following steps need to be performed when using a Windows server as a host to LANSA Client. If you wish to use an IBM i as a host to LANSA Client, refer to Prepare an IBM i as the Host for LANSA Client.
These steps are based on the demonstration material provided by the process. Using the demonstration partition will allow you to quickly test LANSA Client. To execute LANSA Client against your own data, you will need to load your application files into Visual LANSA.
Before you Start
You will need the LANSA Windows CD-ROM to perform these steps.
LANSA Client Server Setup
When using LANSA Client with a Windows Server, you must complete the following tasks on the server:
1. Install Visual LANSA on the Windows Server.
2. Set up communications using the LANSA Communications Administrator.
Select from the LANSA system's menu and select from the sub menu.
3. In the dialog:
Select the option on the Menu bar and choose .
Change the Number of Threads to 2.
Press the button.
4. Install the LANSA Client definitions. This is an automatic process carried out as part of the process when you log on to Visual LANSA. To do this:
a. Logon on to Visual LANSA.
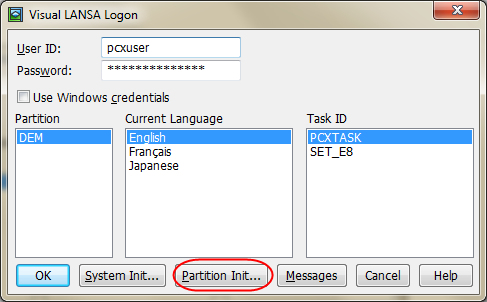
b. Enter your Password and, before you press OK, select the button.
c. Press and the dialog box will open.
In the Partition Initialization dialog box, select the software that you wish to install.
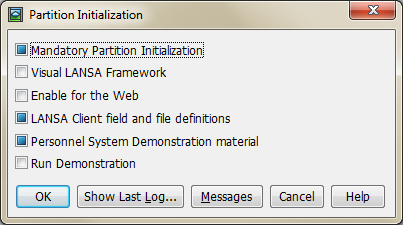
d. For LANSA Client, select (i.e. tick) the . Press . There will be a short delay while the fields and files are installed.
5. Perform SYSEXPORT: From your LANSA System's menu, select and then SYSEXPORT from the sub menu.
6. Run the *CLTEXPORT process by selecting the from the LANSA menu.
7. Add the LANSA Client Licenses by selecting the Server Licenses in the Settings and Administration folder. You should have been provided with an xml file. From the "New" tab sheet, select the xml file then apply the license. If successful, license details should appear in the "Applied" tab sheet.
8. Confirm that the x_lansa.pro file exists in the directory which corresponds to the LANSA Client partition. For example the DEM partition has a directory named <drive>:\Program Files\lansa\x_win95\x_lansa\x_dem.
If x_lansa.pro does not exist, create a text file named x_lansa.pro. For example:
DBUT=MSSQLS
DBII=LX_LANSA
GUSR=QOTHPRDOWN
9. Save the new x_lansa.pro file in <drive>:\Program Files\lansa\x_win95\x_lansa\x_dem directory (Assuming "x_dem" is the directory that you are using).