Vertical galleries and image arrays

Offline MediaWiki Code Editor

Vertical Galleries and Image Arrays
Previous Top Next

For other solutions to display galleries see: Galleries
graphic
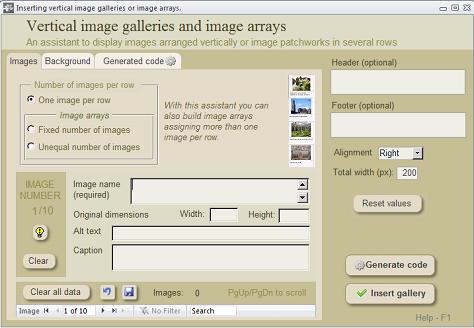
Assistant for vertical image galleries and image arrays

This assistant helps you to display a series of 2-10 images arranged vertically, likewise series of images arranged in a patchwork of several rows.


Vertical gallery


Galleries of this type are aligned to the right by default (recommended) but you can change alignment according to your needs.  The total-width of the gallery is 200 px by default, but you can change the figure. This galleries can optionally show a header and/or a footer.

The assistant is based on the template {{Multiple image}} which allows to display up to ten images per gallery. Selecting more than one image per row with this assistant you can also display image arrays where images appear in a patchwork of up to four rows. The data you must enter for every image are the following:

·    Image file name (Required)
·    Dimensions of the original image (width and height)
·    Alt text (optional)
·    Caption (optional)

The dimensions of the original images are required for the template to calculate image heights while adjusting the images to the same total-width. The default total- width is 200 px, but you can modify the figure.

The galleries aligned to the right (default) or to the left allow the subsequent text to float on the other side, but the centered galleries (not recommended) do not.
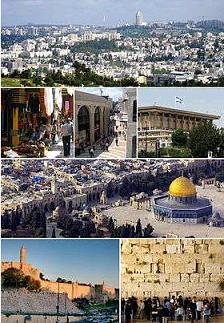
One image per row
 
This is the most common option. The images are displayed in one column and the width of all images is automatically adjusted to the same size .
graphic Typical aspect
More than one image per row (patchwork)

With this assistant you can also build image arrays assigning two or more images to every row. An equal number of images per row is the simplest option, but you can also assign an unequal number of images per row. If you choose an unequal number or images, the assistant allows to build arrays of up to four rows.

The article Jerusalem shows a good example of the type of patchwork you might built with the help of this assistant. In the example there are four rows and the number of images per row are: 1-3- 1-2.  Images are assigned to the rows according to their relation of aspect. The widest images are left alone in a row, while the narrowest images are two or three per row. Pay attention to this at the time to declare image data, to do it in the right order. Otherwise you will not achieve the desired results.

graphic
Background color

The default background color is white, but if you want to consider using a background color for the containing frame you can easily select a shade of white from a panel of 15 colors. If you prefer some other color aside from this panel you will have to type it manually in the generated code. Be aware that darker background colors might affect legibility.


Removing the border around the images

The border around the images can be removed using |image_style=border:none.  Add this code after total-width and before the first image.

Increasing the gap between images

The gap between the images can be increased using |image_gap=N where N is the number of pixels. Ex. |image_gap=20 . This is a resource to increase the distance between images for the sake of clarity. Add this code after the total-width and before the first image.