Galleries based on wikitables
From Offline MediaWiki Code Editor
|
Galleries based on Wikitables
|
Previous Top Next |
For other solutions to display galleries see: Galleries
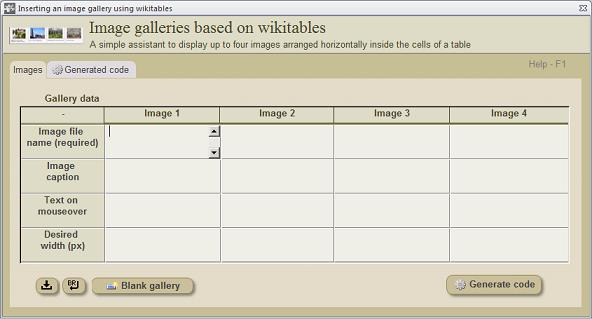 An assistant to build and insert wikicode for image galleries based on wikitables.
|
|
Galleries based on Wikitables are series of images using table cells as image
containers. This is one of the simplest techniques to display image galleries in Wikipedia
articles.
· Withstand up to four images arranged horizontally in cells of fixed width
· Image width: 100 - 200 px.
· Cell background shade and thin borders.
· Captions with a smaller font size (87%).
· An alternative text may be displayed on mouseover
Note that the galleries build with this technique have a fixed width, so you should not
make too much wide galleries which exceed the usual page width. Also note that if the
gallery consists of one or two images, it will be aligned to the right (by default) making
able that the following text can float on the left side. If you want to display the gallery of 1-
2 images aligned to the left you have to modify the code manually. But if the gallery
consists of three of four images it will be centered in the page.
only the names (not the entire address).
2. In the second row, enter the caption of each image.
3. In the third row, enter the text to be displayed on mouseover.
5. Generate the wikicode of the gallery, clicking on the command
button <Generate code>.
6. If you know the sintax, make all links and format changes
to the the captions in the wikicode window. Or, if you prefer
make the changes after inserting the gallery in the article.
7. Insert the gallery clicking on the command button <Insert
gallery>
8. To build a new gallery click on the command button <Blank
gallery>.
|style="width: XX%;"
Create and insert as many galleries as you need, one after the other until completing the
desired number of images.
Relative units instead of pixels
It has been recommended to use relative "em" units instead of fixed-pixel sizes for
images. “em” units are measures relative to the actual font size. For example, if the font
size of the document is 12pt, then 1em=12pt. So if you use "em" units do not forget to
include the units. For example an image of 299x125px might also be also expressed as
25x10em.
|