Recover My Files Data Recovery Software | English
V4
___________________________________________________
iPod Recovery
Loss of music files from an iPod is a common occurrence. In most situations, the music files can be recovered from the iPod and saved back to a PC. Select your situation below:
+ I Pressed the iTunes Restore Button / My iPod was Restored to Factory Settings
The Restore button appears in iTunes when the iPod is connected to your PC. It restores the iPod to its original factory condition. All existing song on the iPod are lost, but can be recovered.
If you still have your iTunes library, your songs, videos, pod casts, audio books, and games can be synced back to your iPod. If not, you need Recover My Files to recover the files from the iPod disk.
Before you Begin
|
Do Not Connect your iPod to iTunes. If iTunes starts running, immediately shut it down. Why? The default setting in iTunes when an iPod is connected is to "auto-sync". This means that iTunes will try and write it's list of songs to your iPod. It is important when performing iPod data recovery not to write new data to iPod drive unless it is necessary to do so. Do not connect to iTunes unless we specifically give instructions to do so. |
Steps to iPod Recovery
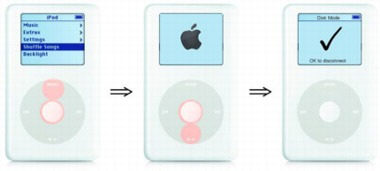
1. Place your iPod in Disk Mode
Place your iPod in Disk Mode
Disconnect your iPod from your PC and place it into "Disk Mode". This enables your computer to see the iPod as a standard hard drive:
Note: The iPod Touch or iPhone do not have a disk mode. If you cannot force your iPod into
disk mode, your iPod may have a hardware issue. You may need to
see a local Apple hardware service center. |
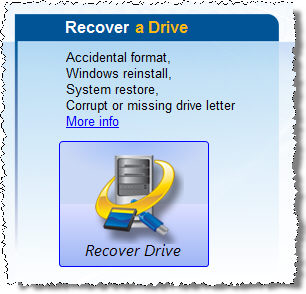
2. Run a "Recover Drive" search
Start Recover My Files and select "Recover Drive". Click Next.
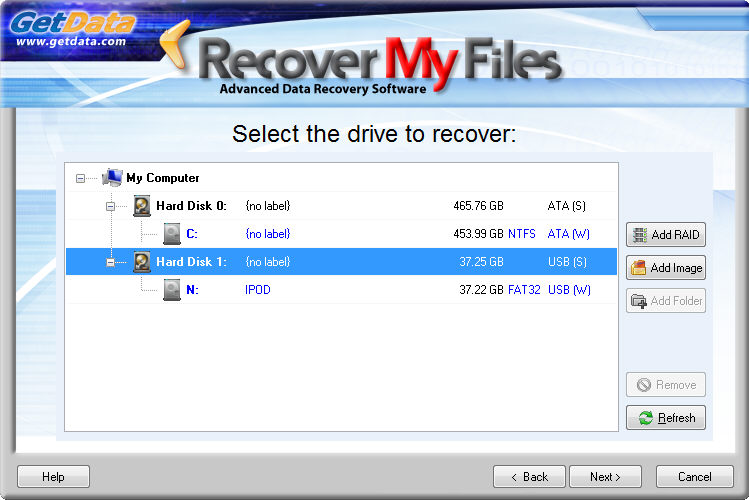
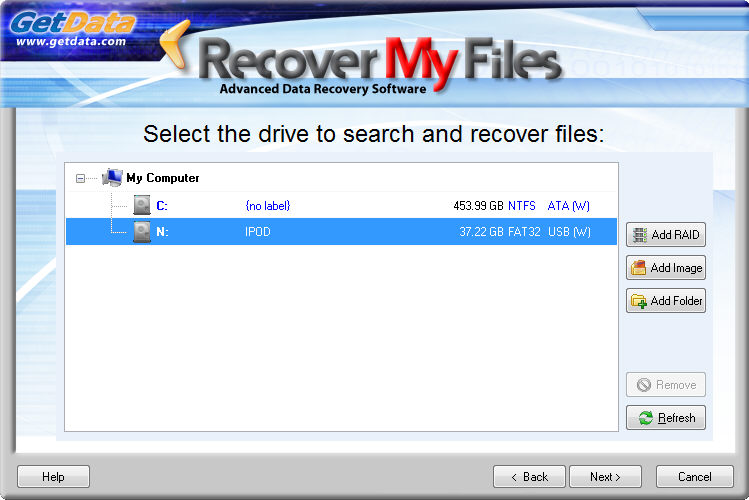
In the drive selection window, highlight the iPod hard disk with your mouse (as shown below). Click Next.
In the search selection window, select "Automatic drive recovery. (Recommended)". Click Start.
Search Phase 1 - Partition Recovery
Phase 1 of the search attempts to locate and rebuild then entire lost partition. If the partition can be recovered, all of the missing folders and files structure will be displayed.

Part 1 of the search should take between 1 - 30 minutes to complete (depending on the size of the drive and the number of files that it contains).
It is possible to stop the search during phase 1 (by pressing the "Stop" button, however it is necessary to complete this phase for the file and folder structure to build and display .
Search Phase 2 - Recovering Lost Files
Phase 2 of the search has two functions;
-
it searches for fragments of file system records (MFT and FAT) that can be used to rebuild full file and folder structure;
-
sequentially scan the remaining blocks of the hard disk to locate " Lost Files".
What is a Lost File?
A Lost File is one that has been deleted, but which no longer has a Windows Operating System record in the FAT or MFT. Windows no longer knows about this file, but content of the file remains on the disk and can be recovered.
Lost files are located using a technique referred to as "data carving".
Data carving is the technique of recovering files based on content. Recover My Files examines the header, content and footer of a file to determine if it matches a known structure, e.g. JPEG, TIF, XLS, DOC etc.
The limitation of data carving is that;
the original file name is not recovered as this information is stored only in the FAT or MFT and is not stored with the file data;
to identify a Lost File, the file format must be understood and included in the list of Recover My Files available file types.

It is possible to stop the search for lost files and recommence it at a later time from the same position. Learn more here.
Before you stop the search, write down the block number that the search is up to, e.g. "3,867,514 of 78,126,048";
Press the stop button;
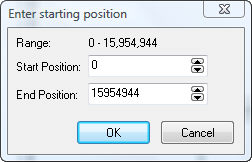
Click the OPTIONS button in the main program screen, go to the ADVANCED tab and place a tick in the box for "prompt for start sector" and "Start with Lost File Scan".
Click OK to save these options, then press "Start Recovery" > "Drive Recovery" and enter the starting location
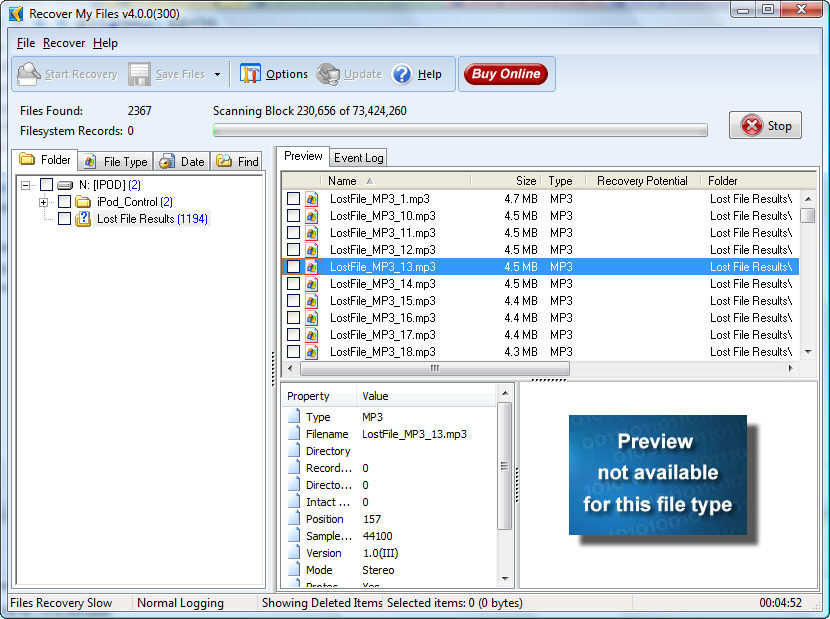
3. Examine iPod search results
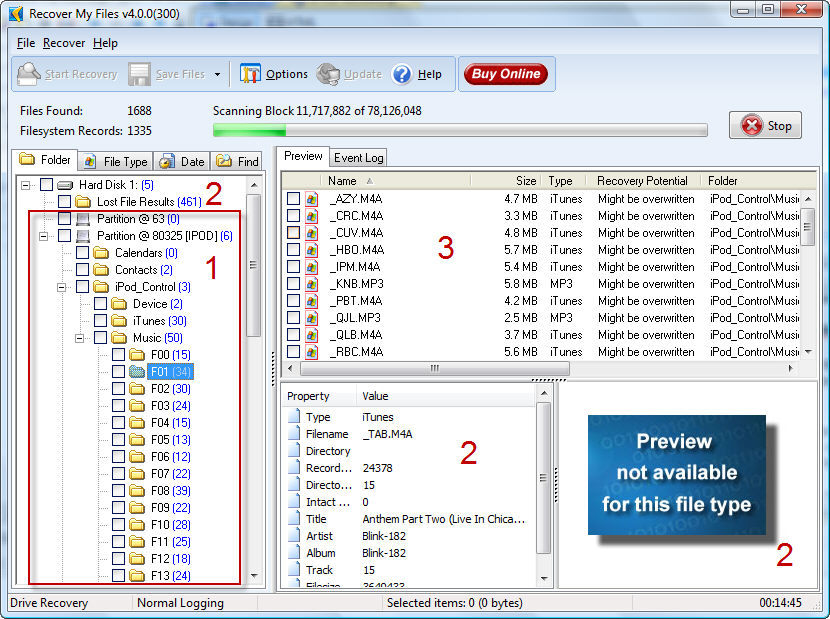
A iPod recovery results screen is shown below:
 In
In
"Folder" Results
At the end of the search, select the "Folder" tab to view the recovered file and folder structure ("1" in the screen shot above). You music files can be located in folders called "iPod Controls > Music > F00, F01, F02 and so forth. Inside these folders are your music files. They are not organized in a any particular fashion within these folders, you can organize them later.
"Lost File" Results
If the file and folder structure was NOT recovered, then look in "Lost File Results" ("2" in the screen shot above).
Saving Your Files
From the Folder tab of the Recover My Files results screen, save the contents of the "Music" folder or the "Lost Files" folder to your hard drive or whatever other device you choose. Learn more about saving files here.
Do not worry that you cannot understand the file name, because the song information (artist, title, album etc.) is hidden into the file. When you play them in Itunes, Winamp, Windows Media Player or QuickTime and then you can see all information such as Album Name and Singer.
Once you have the files saved on your computer, you can re-import them into iTunes using the "File" or "Folder" > Import function in iTunes. You should then see full artist, title, album etc. in your iTunes library.
+ I Synced my iPod with an Empty iTunes Library
Syncing with an empty iTunes library can easily happen if you plug your iPod into a new computer.
With the iPod, the sync process only ever happens one way, PC / iTunes > iPod, so a new blank library is written to you iPod full of songs.
Syncing with a blank iTunes library does not permanently erase the songs on your iPod and they can be recovered.
Before you Begin
Do Not Connect your iPod to iTunes. If iTunes starts running, immediately shut it down. Why? The default setting in iTunes when an iPod is connected is to "auto-sync". This means that iTunes will try and write it's list of songs to your iPod. It is important when performing iPod
data recovery not to write new data to iPod drive unless it is
necessary to do so. Do not connect to iTunes
unless we specifically give instructions to do so. |
Place your iPod in Disk Mode
Disconnect your iPod from your PC and place it into "Disk Mode". This enables your computer to see the iPod as a standard hard drive:
Note: The iPod Touch or iPhone do not have a disk mode. If you cannot force your iPod into
disk mode, your iPod may have a hardware issue. You may need to
see a local Apple hardware service center. |
1. iPod "Recover Drive" search
Start Recover My Files and select "Recover Drive". Click Next.
In the drive selection window, highlight the iPod hard disk with your mouse (as shown below). Click Next.
In the search selection window, select "Automatic drive recovery. (Recommended)". Click Start.
Search Phase 1 - Partition Recovery
Phase 1 of the search attempts to locate and rebuild then entire lost partition. If the partition can be recovered, all of the missing folders and files structure will be displayed.
Part 1 of the search should take between 1 - 30 minutes to complete (depending on the size of the drive and the number of files that it contains).
It is possible to stop the search during phase 1 (by pressing the "Stop" button, however it is necessary to complete this phase for the file and folder structure to build and display.
Search Phase 2 - Recovering Lost Files
Phase 2 of the search has two functions;
it searches for fragments of file system records (MFT and FAT) that can be used to rebuild full file and folder structure;
sequentially scan the remaining blocks of the hard disk to locate Lost Files.
It is possible to stop the search for lost files and recommence it at a later time from the same position. Learn more here.
You can stop the Phase 2, Lost File search, this search and restart it at the same location by doing the following:
Write down the block number that the search is up to, e.g. 3,867,514 of 78,126,048;
Press the stop button;
Click the OPTIONS button in the main program screen, go to the ADVANCED tab and place a tick in the box for "prompt for start sector" and "Start with Lost File Scan". Click OK to save these options, then press "Start Recovery" > "Drive Recovery" and enter the starting location
2. Examine iPod search results
A iPod recovery results screen is shown below:
In
"Folder" Results
At the end of the search, select the "Folder" tab to view the recovered file and folder structure ("1" in the screen shot above). You music files can be located in folders called "iPod Controls > Music > F00, F01, F02 and so forth. Inside these folders are your music files. They are not organized in a any particular fashion within these folders, you can organize them later.
"Lost File" Results
If the file and folder structure was NOT recovered, then look in "Lost File Results" ("2" in the screen shot above).
Saving Your Files
From the Folder tab of the Recover My Files results screen, save the contents of the "Music" folder or the "Lost Files" folder to your hard drive or whatever other device you choose. Learn more about saving files here.
Do not worry that you cannot understand the file name, because the song information (artist, title, album etc.) is hidden into the file. When you play them in Itunes, Winamp, Windows Media Player or QuickTime and then you can see all information such as Album Name and Singer.
Once you have the files saved on your computer, you can re-import them into iTunes using the "File" or "Folder" > Import function in iTunes. You should then see full artist, title, album etc. in your iTunes library.
+ I Synced another iTunes Library to My iPod
If you plug your iPod into a PC other than your own, it is possible that iTunes on that computer could sync and another persons songs get written to your iPod.
The process of writing new songs to an iPod will overwrite and permanently erase existing files. However, if the volume of new songs is less than the volume of songs that were on your iPod, then there is still the possibility to recover the remainder of your songs.
Before you Begin
Do Not Connect your iPod to iTunes. If iTunes starts running, immediately shut it down. Why? The default setting in iTunes when an iPod is connected is to "auto-sync". This means that iTunes will try and write it's list of songs to your iPod. It is important when performing iPod
data recovery not to write new data to iPod drive unless it is
necessary to do so. Do not connect to iTunes
unless we specifically give instructions to do so. |
Place your iPod in Disk Mode
Disconnect your iPod from your PC and place it into "Disk Mode". This enables your computer to see the iPod as a standard hard drive:
Note: The iPod Touch or iPhone do not have a disk mode. If you cannot force your iPod into
disk mode, your iPod may have a hardware issue. You may need to
see a local Apple hardware service center. |
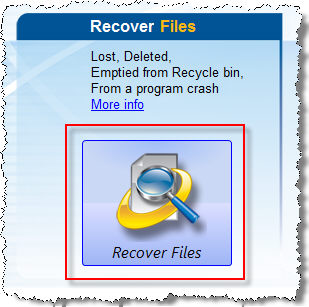
Run Recover My Files and select the "Recover Files" option:
Select the drive letter of your iPod:
In the search selection window, select Search for deleted files, then search for selected "Lost File" types. In the file type selection screen, ensure that you have the following file types selected:
-
iTunes audio file (.m4a, .m4b, .m4p)
-
MP3 Music file (.mp3, .mp, .mp1, .mp2)
-
and any other file types which were stored on your iPod that you wish to recover.
Click "Start" to commence the search. Recover My Files will scan your iPod and look for "Lost Files". These files will be displayed under the "Folder" tab in the "Lost File Results" folder:
It is possible to stop the search for lost files and recommence it at a later time from the same position. Learn more here.
Before you stop the search, write down the block number that the search is up to, e.g. "3,867,514 of 78,126,048";
Press the stop button;
Click the OPTIONS button in the main program screen, go to the ADVANCED tab and place a tick in the box for "prompt for start sector" and "Start with Lost File Scan".
Click OK to save these options, then press "Start Recovery" > "Drive Recovery" and enter the starting location
Saving Your Files
From the Folder tab of the Recover My Files results screen, save the contents of the "Lost File Results" folder. Do not worry that the file name is not correct, because the song information (artist, title, album etc.) is hidden into the file. When you play them in Itunes, Winamp, Windows Media Player or QuickTime and then you can see all information such as Album Name and Singer.
Once you have the files saved on your computer, you can re-import them into iTunes using the "File" or "Folder" > Import function in iTunes. You should then see full artist, title, album etc. in your iTunes library.
+ My iPod has a Sad Face icon
If your iPod displays a sad iPod icon it is usually NOT a good sign. In most cases, the sad iPod icon indicates a hardware issue.
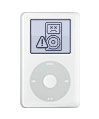
Test your iPod by manually placing the iPod in "Disk Mode". If you are able to force iPod into Disk Mode then it may not be a hardware issue.
Place your iPod in Disk Mode
Disconnect your iPod from your PC and place it into "Disk Mode". This enables your computer to see the iPod as a standard hard drive:
Note: The iPod Touch or iPhone do not have a disk mode. If you cannot force your iPod into
disk mode, your iPod may have a hardware issue. You may need to
see a local Apple hardware service center. |
If you successfully get your iPod into disk mode, follow the instructions in this help file titled: "I Pressed the iTunes Restore Button / My iPod was Restored to Factory Settings".
If you cannot force your iPod into disk mode and the sad face icon persists, then your iPod has a hardware issue. It may still be possible to recover your data, but you will need to send to your iPod to a hardware data recovery service.
+ I want to copy the music off my iPod and put it on my computer
Before you Begin
Do Not Connect your iPod to iTunes. If iTunes starts running, immediately shut it down. Why? The default setting in iTunes when an iPod is connected is to "auto-sync". This means that iTunes will try and write it's list of songs to your iPod. It is important when performing iPod
data recovery not to write new data to iPod drive unless it is
necessary to do so. Do not connect to iTunes
unless we specifically give instructions to do so. |
Place your iPod in Disk Mode
Disconnect your iPod from your PC and place it into "Disk Mode". This enables your computer to see the iPod as a standard hard drive:
Note: The iPod Touch or iPhone do not have a disk mode. If you cannot force your iPod into
disk mode, your iPod may have a hardware issue. You may need to
see a local Apple hardware service center. |
-
Once you iPod is in Disk Mode, connect it to your PC.
-
Click on the drive letter that represents your iPod (it will probably be E: or F:).
-
Folders on your iPod are usually "hidden". To display these folder, in the Windows Explorer navigation menu, click on "Tools-> Folder Options" and click on the "View" tab. Choose the "Show Hidden Files and Folders" option and click "OK."
-
Look for the "iPod Control" folder and open it. Click on "Music" in that folder. There should be a number of other folders here, named F00, F01, F02 and so forth. These are your music files. They are not organized in a any particular fashion within these folders, you'll have to organize them later.
-
Copy the "Music" folder to your hard drive or whatever other device you choose. Or, if you do not want to select all the files, pick and choose through the MP3s. You should be able to see the file names as you mouse over each individual file.
-
After you have copied all your files from iPod into your Computer you can see that all files are labeled with 4 letter file name. You cannot understand which file is for which Song because all information is hidden into the file. But do not worried about that because you can play them in Winamp, Windows Media Player or QuickTime and then you can see all information such as Album Name, Singer and all other information what you added before in your iTunes. You can then rename the files if you would like or you can keep them as they are.