Creating a Keyboard
From Oska
Creating an Oska Keyboard
In this tutorial you will learn:
- How to start a new project and set up the keyboard
- How to add images to keys
- How to assign actions to keys
Step 1: Starting a new project and setting up the keyboard
Note: It is worthwhile designing your idea and planning what you want on paper before you start a new project. This will mean you won't have to make as many adjustments later.
When you open Oska Editor it will automatically load the default keyboard.
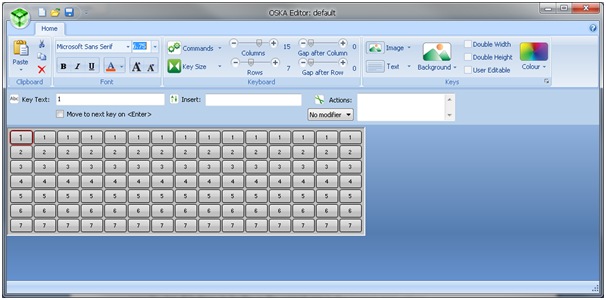
The first step in making a keyboard is deciding how many rows and columns you will need to fit in all of the required keys.
In this tutorial we are going o make a UK QWERTY keyboard; therefore 15 columns and 7 rows should be sufficient for all of the keys and also a row for some shortcut buttons. You should also decide on the size of your keys at this stage. Keys can be wide, tall, both or neither. For this tutorial we are just going to have normal sized keys.
Set the columns and rows sliders to the appropriate settings and you should get a keyboard like this:
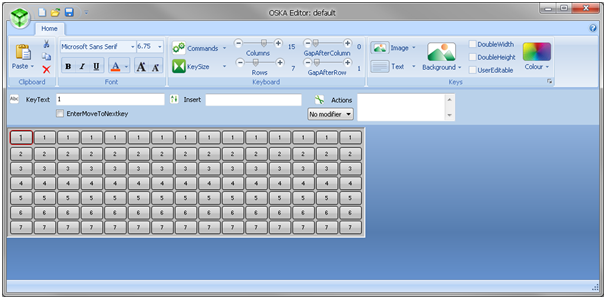
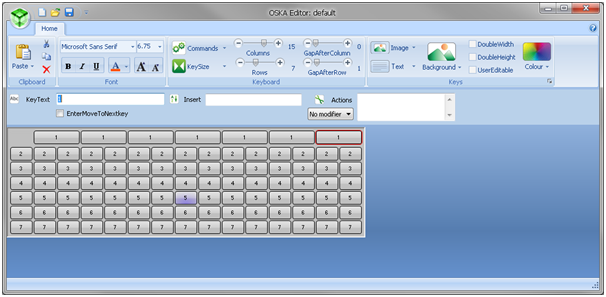
We are going to have a row of shortcut buttons at the top of the keyboard so we're going to create a gap between the first and second rows to make sure there's a clear distinction between typing keys and shortcut keys.
Increase the 'Gap after Row' to 1 and a gap should appear between the required rows.
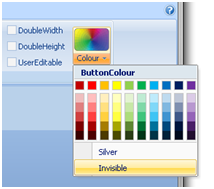
Along the shortcut key row we're going to set the keys to twice the width of a normal key. Because we have an odd number of rows we need to hide the top-left key. To do this click on the top-left key and then click on 'Invisible' in the 'Colour' drop-down menu.
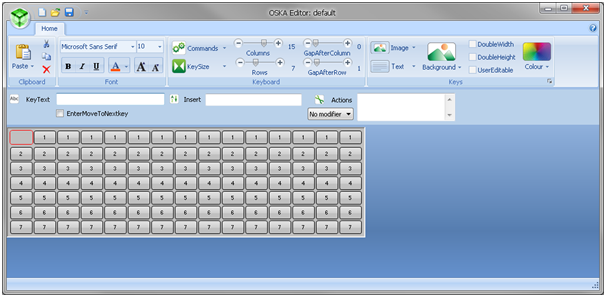
We also need to get rid of the text in the key. To do this, go to 'KeyText' and delete everything in the box. This should delete all text in the key and completely hide it.
Note: Hidden keys can still be selected. Do not be concerned if you can still see a red outline around a key; this will not be visible in the final keyboard.
The result should look like this:
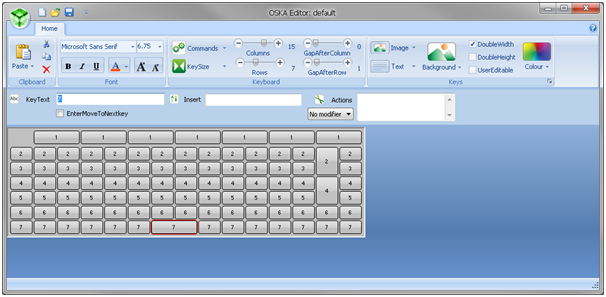
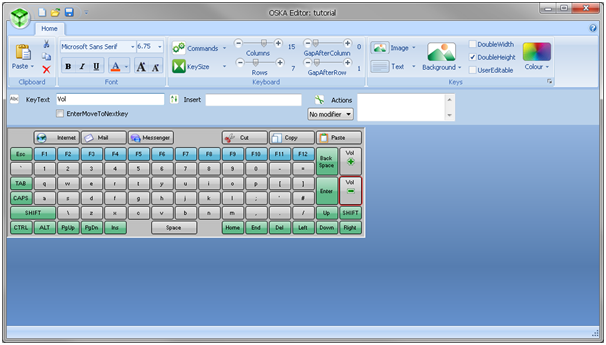
Now we need to widen the keys along the top row. Select the left-most (visible) key on the top row and tick the 'DoubleWidth' checkbox which is found to the left of the 'Colour' drop-down.
To assign this style to all of the keys along the top row you should first copy the key by either clicking on 'Copy' in the toolbar or by pressing the keyboard shortcut Ctrl + C. After this click on the next button along the top row and from the 'Paste' drop-down menu select 'ApplyStyleToKey'. Repeat this for each key in the top row and you should get this:
We're finished with the shortcut row for now so we're going to move onto creating some of the keyboards 'special' keys like Enter and Backspace.
Select the key second from the right on the second row and then tick the 'DoubleHeight' checkbox. Copy this key and paste the style to the key directly below.
To make the spacebar select the key that is seventh from the left on the bottom row and tick 'DoubleWidth'.
Now we will start adding text to some of the buttons. Select the spacebar and in the 'KeyText' box type 'Space'. This should change the text of the button.
Note: If the text won't fit or is too small you can change the font by using the controls in the 'Font' area of the toolbar.
Also do this for the Enter and Backspace keys we created earlier (Backspace should appear above Enter) and you should have this:
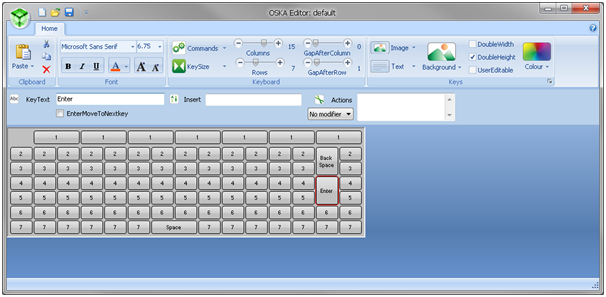
To make the Backspace and Enter keys really stand out we're going to add some colour to them. Select the 'Enter' key and then select a green colour from the 'Colour' drop-down menu. Repeat this for 'Backspace'.
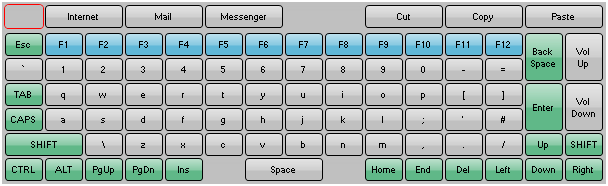
With this done you can now fill in the text for the remaining keys and set colours for important ones. The following is the design we created:
Note: If you have not recently saved your work, now would be a good time. Remember to use 'Save As' for your first save to avoid overwriting the default keyboard file.
Step 2: Adding images to keys
As well as making your keyboard look better, images can also improve the usability of your keyboard. In this section we will be adding icons to the keys in the shortcut row and the 'Vol Up' and 'Vol Down' keys.
Below are the icons used for this keyboard. A library of icons for you to user is provided with Oska. Free icons can also be found on the internet or you can make your own using image editing software.
First we will add an image for the 'Internet' key. To do this, click on the key and then select 'Browse' form the 'Image' drop-down menu. Find the image you wish to use and then click 'Open'. The image should appear on the key.
Note: Oska does not scale images. You may need to edit your images to fit them onto the keys.
To position the text and image so that they both fit use the 'Image' and 'Text' drop-downs. In the example the text is aligned to the right, the image is aligned to the left and both are centred vertically.
Continue to do this for each key the requires an image and you should get something similar to this:
Step 3: Adding actions to keys
The keyboard is looking good but so far it doesn't actually do anything; this is where actions come in.
We will start by adding actions to the alphanumeric keys on the keyboard so that they can be used to type things. The quickest way to do this is to click on 'CopyKeyText' in the 'Commands' drop-down menu. This copies all the text in the 'KeyText' into the 'Insert' text for each button. You could also go through each button individually and type the appropriate text to type in the 'Insert' box.
Next we will move onto adding actions to the shortcut keys. We want the first button to launch a web browser. Click on the 'Internet' button and delete the text in 'Insert' that was added when we used 'CopyKeyText'. Right-click on the textbox next to 'Actions' and select 'Control > Run Program'; this will insert the text '<Run:program name here>' into the 'Actions' box.
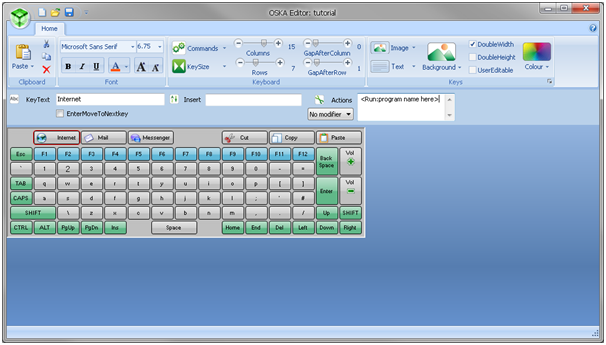
Replace 'program name here' with 'iexplore.exe'. When this key is pressed it will now run Internet Explorer.
Repeat this process for the 'Mail' and 'Messenger' keys, inserting the name of the process you wish to run when they are pressed.
The next buttons to add actions to are the 'Cur', 'Copy' and 'Paste' buttons. Select the 'Cur' button and delete all text from the 'Insert' box. Right-click on the 'Insert' box and a menu should appear showing all the options for keys to press.
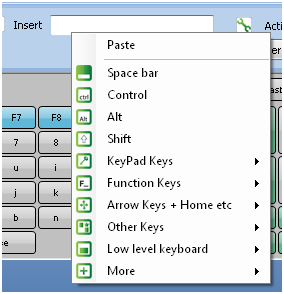
Click on 'Control' and then type 'x'. This will cause the key to type Ctrl + X when it is pressed which is the common shortcut for cut.
Repeat these steps to insert Ctrl + C for 'Copy' and Ctrl + V for 'Paste'.
You should now be able to assign actions for all the other keys on the keyboard. Hint: the volume up and down actions are in the 'Actions' box but everything else is in the 'Insert' box.
The final thing to do is assign modifiers to the appropriate keys (i.e., Ctrl, Alt, Shift & Caps). Select the 'CAPS' key and select 'CAPS' from the modifier drop-down list next to the 'Actions' box. Repeat this for the 'Ctrl', 'Alt', and both 'Shift' keys, selecting an appropriate modifier in each case.
The keyboard is now finished. Open it in Oska Player and try it out.