Replacing a Fuse
Refer to the following table for user-replaceable fuse ratings and manufacturer information for the NI PXI-4130.
| Input/Output | Fuse Rating | Description | Recommended Manufacturer Part Number |
|---|---|---|---|
| Channel 0 (F1) | F 1.5 A 125 V | User-replaceable chip fuse | Littelfuse 045301.5 |
| Auxiliary Power Input | T 6.3 A L 250 V | User-replaceable 5 x 20 mm glass fuse | Littelfuse 21806.3 |
To replace a fuse on the NI PXI-4130, complete the following steps:
- Shut down the chassis.
- Disconnect all output and auxiliary power connections.
- Remove the NI PXI-4130 from the chassis.
- Identify the fuse you want to replace using the following figure.
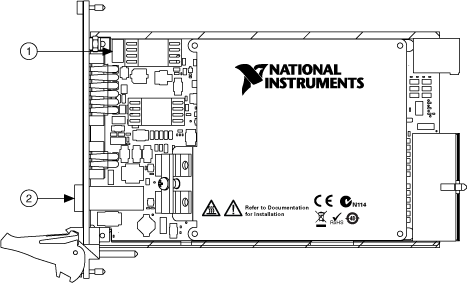
1 Output Channel Fuse (Channel 0) 2 Auxiliary Input Fuse - Remove the fuse.
- (Output channel fuse) Using small pliers, gently pull the fuse to release it from the fuse holder.
- (Auxiliary input fuse)
- Using a flathead screwdriver, turn the fuse holder cap counter-clockwise to release it from the NI PXI-4130 front panel.
- Gently pull the auxiliary power input fuse to release it from the fuse holder cap.
- Install the replacement fuse.
- (Output channel fuse) Using small pliers, gently place the replacement fuse into the fuse holder.
- (Auxiliary input fuse) Slide the replacement fuse into the fuse holder cap, and screw the cap clockwise to replace it on the NI PXI-4130 front panel.