|
Galleries based on the <gallery> Tag
|
Previous Top Next |
For other solutions to display galleries see: Galleries
 An assistant to build and insert wikicode for image galleries based on the HTML <gallery> tag.
|
|
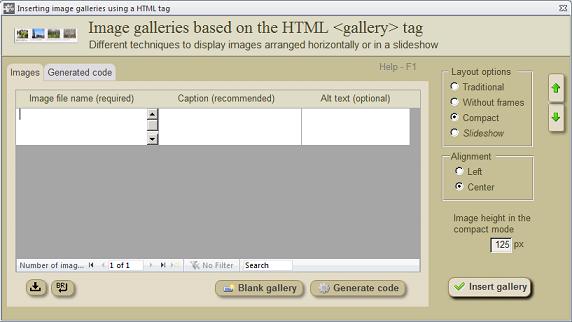
This assistant helps you to build and insert image galleries using the HTML gallery tag,
even if you ignore the sintax. With this technique the number of images in each row
adjusts automatically to the page width. Those images which have not enough space in
a row, flow automatically to the following row. Although some galleries may be aligned
to the left the subsequent text cannot float on the other side of the page as happen
with other techniques.
How to use this assistant
Select the method you want to use to build the gallery and make the changes you want
in the image dimensions:
· Enter gallery data:
· Name of the image file (required), not the entire URL
· Footnote (recommended); and
· Alternative text (optional).
· Include all the images you want. These data will be saved after closing the
assistant.
·
You can generate the gallery code clicking on the command button <Generate code>.
The generated code is NOT saved when you close the assistant. But, if an error occurs
during insertion, the generated code is saved until the next opening of the assistant,
unless you close the Edit window or leave the application.
· If you know the sintax, make links and format changes directly in the code window.
· Insert the gallery clicking on the command button <Insert gallery>.
· To erase data and build a new gallery, click first on the command button <Blank
gallery>.
This method renders rows of four images arranged horizontally in boxes of fixed size,
with a very light background color. The resulting galleries are quite similar to those
based on tables. The boxes are surrounded by a thin grey border. Default size of the
images is 120 x 120 px, but you can optionally increase this size to 180 x 160 px. If you
want even bigger dimensions you should then change manually the figures directly in
the code window. Galleries of this type, align to the left by default, but you can change
the alignment manually in the code window.
As the size of the images are limited by the size of the boxes, this method renders
images with different heights, what is more evident when the images have different
aspect ratios. You can solve this if you gather images with a relatively similar aspect
ratio. The footnotes appear aligned to the left by default.
2. No frames method
3. Compact method
This is the default method. It renders galleries centered in the page, without any space
wasted among images. All the images are displayed with the same height. The default
height is 125 px, but you can increase it up to 160 px to show bigger images in the
same space. If you want to increase this value, you can do it manually in the code
window.
4. Slideshow method
This method is convenient for big images, because makes the best use of the page
space. The assistant gives a default width of 350 px for the images. If you want to
modify this value you can do it directly in the code window. The "alt" text is not
considered by this method.
|