|
Name |
Description |
|
|
- Before inserting PIC18F87J50 PIM or PIC18F46J50 PIM in the PIC18 Explorer board, insure that the processor selector switch (S4) is in the “ICE” position as seen in the image below. Failure to so will result in difficulties in getting the PIC18F87J50/PIC18F46J50 PIM to sit properly on the PIC18 Explorer.

- Before inserting PIC18F87J50/PIC18F46J50 PIM into the PIC18 Explorer board, remove all the attached cables from both the boards. Be careful while inserting the PIM into PIC18 board. Insure that no pins are bent or damaged during the process. Also insure that the PIM is not shifted in any direction and that... more
|
|
|
- Before attaching the PIM to the Explorer 16 board, insure that the processor selector switch (S2) is in the “PIM” position as seen in the image below.

- Short the J7 jumper to the “PIC24” setting

- Be careful while inserting the PIC24FJ256GB110 PIM or any other appropriate PIM into Exp 16 board. Insure that no pins are bent or damaged during the process. Also insure that the PIM is not shifted in any direction and that all of the headers are properly aligned.
- Short JP1 to SRC1 (i.e. RD1) or SRC2 (i.e. RB15) based upon the smart card clock pin configured... more
|
|
|
Ensure that JP1 of SC PICTail card & J12 of LPC board are left open. One side of J4 port pins of the SC PICTail card matches with the J11 port of LPC board. Insert the matching side of J4 port of SC PICTail board into the J11 port of LPC board. Make sure that the Smart Card Connector is facing towards the LPC board. Insert the Smart Card in SC PICTail board. Apart from the above guidelines, couple of below steps has to be followed to make the demo work:-
- Short Tx & Rx line of the UART (i.e.... more
|
|
|
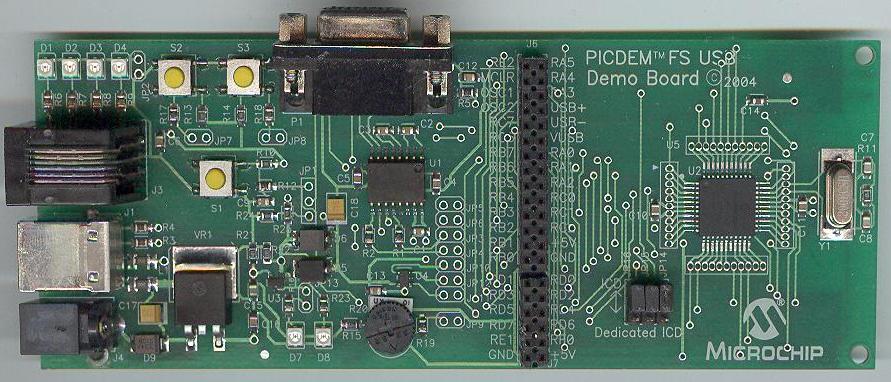
- If using the PICDEM FS USB Demo Board, no hardware related configuration or jumper setting changes should be necessary. The demo board need only be programmed with appropriate firmware.
- Don’t short the jumper at J11 port.
- Insert the J2 port of SC (Smart/Sim Card) PICTail card into J3 port of PICDEM FSUSB board as per the pin configuration. Insert the Smart Card in SC PICTail board.
|