


| Amicus | |
| Place an Order screen | |
| See Also Submit feedback on this topic | |
| Modules & Other Devices > Other Devices > PDA > Smart Docket > Order Creation in Smart Docket > Place an Order screen |
Glossary Item Box
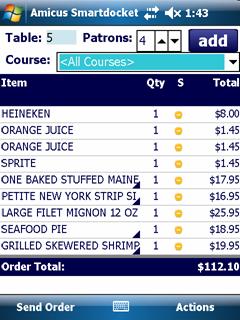
Figure : Place an Order screen with all added items
When a course is selected it will display only the items associated with that course.
To display only one course, select the course from the Course drop-down list. Figure shows Mains items added to the Place an Order screen.
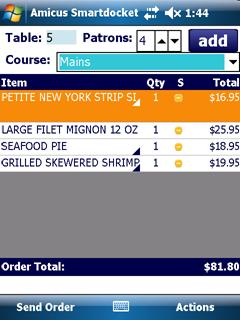
Figure : Place an Order screen with only Mains items
Place an Order Screen Elements
Table — The number of the current table. Use the up and down arrow buttons to increase or decrease the number of patrons at the current table.
Patrons — The number of diners at the current table. This number will adjust automatically to the maximum Patron number added on the Select Menu Item Options screen.
Add — Select to display the Choose Menu Item to Add screen.
Course — The drop-down list of courses will show the items associated with each course.
The list on this screen has the following columns:
-
Item Description — A description of the item being ordered and all the options that have been selected. Notes are also shown with the description, an example is shown in Figure 11.
-
Qty — The number of items being ordered
-
S — Shows the status of the added items:
 — Unsent items.
 — Sent items.
 — Cancelled items.
-
Price — The price of this item. The user will not be allowed to change the price.
-
Send Order — Sends the order to the configured printer. The order will be split into categories such as entrees, mains and drinks.
-
Actions — A menu containing the following options:
-
Add Item — Select to display the Choose Menu Item to Add screen.
-
Add to Queue — Sends the order to the configured printer.
-
Cancel Changes — Removes the changed items in the order, closes the Place an Order screen and returns to the Choose Table screen.