DEBUG DEMO
This
demo shows the complete range of debugging commands available for
viewing what is going on inside the AI system. These function by
creating new DarkBasic objects and manipulating them within the AI
system to display the desired information, therefore these commands
work best when you are using a 3D world to represent the world. The
information available for display includes waypoints, waypoint edges,
obstacle bounds, sounds, entity paths, entity view and hearing
ranges, entity-entity avoidance data, and detailed entity parameter
information.
It demonstrates each command in turn by showing a
simple example of the command's display then removing it for the
next. As such this demo does not follow the usual pattern of setup ->
main loop -> end, but instead has several mini setups with a pause
to let the user move to the next.
AI Start
AI Set Radius
2.5
As usual, we start by creating the AI system and
setting the radius we want to use. The Start command creates
container 0 where we will be adding our objects and displaying them.
We then move to the first debug command, showing waypoints.
AI
Add Static Obstacle 101
backdrop off
cls
AI Debug Show
Waypoints 0,2.5
print "Debug Commands Demo, Press Any Key To
Continue"
print
print "1 - Displaying Waypoint
Data"
wait key
This
adds a single obstacle in the centre of the screen, adds it to the AI
system which automatically creates four waypoints for it, then
displays the waypoints for container 0 at a height of 2.5. The height
is necessary because there is no Y data stored for waypoints or
obstacles so you can choose a Y position for them to appear.
Waypoints are shown as blue dots that represent the corners of
obstacles so entities have a point of reference about how to move
around an obstacle. The debug command chooses a DarkBasic object id
by starting at 65535 and decreasing until a free object is found or
it reaches 0, in which case the command fails and has no effect. The
Show Waypoint command only calculates its object once, and so does
not automatically update its display if you add/remove waypoints
whilst it is displaying. You would have to call Show Waypoints again
to re-calculate it. The program then waits for the user to press a
key before continuing.
AI Debug Hide Waypoints
0
cls
AI Debug Show Waypoint Edges 0,2.5
Next
we hide the waypoints and display the waypoint edges. These represent
the visibility of waypoints from each other, an edge between two
waypoints means an entity can use it as a valid section of path when
moving around obstacles. Edges are shown as blue lines and again you
choose the Y position you want the debug object to appear and the
object number is chosen by starting at 65535. Edges are not
re-calculated automatically so you need to call Show again to display
changes.
AI Debug Hide Waypoint Edges 0
cls
AI
Debug Show Obstacle Bounds 0,2.5
This
hides the edges and displays the obstacle bounds which define the
extent of all obstacles with the radius (set above) added. The
difference between waypoint edges and obstacle bounds is that
obstacle bounds are drawn surrounding each and every obstacle even
when they overlap, whereas waypoints take the obstacles as a whole
and draw around overlapping obstacles as if they were one. Waypoints
edges can also link obstacles together. The debug object is chosen by
starting at 65535 and is not re-calculated automatically. Call Show
again to update any changes to the debug display.
AI Debug
Hide Obstacle Bounds 0
cls
AI Debug Show Sounds 2.5
We
now move on to displaying sounds which can attract nearby entities,
they are shown as yellow dots and they are updated in real time. The
DarkBasic objects to display them are chosen by starting at object id
65535 and decreasing. This requires some sounds exist in order to
view the debug output.
repeat
if
scancode()<>0 then hold=1
set cursor 0,0
print "Debug
Commands Demo, Press Any Key To Continue"
print
print "4
- Displaying Random Sounds"
AI Update
if rnd(screen fps())
= 0 then AI Create Sound rnd(80)-40,rnd(80)-40,0,0
until
scancode()=0 and hold=1
This
loop creates random sounds around the level, which will be displayed
by debug objects, until the user presses a key. The yellow dot will
remain for as long as the sound can be heard, about 1 second, and
then be removed from system. The Update command is needed to remove
and display sounds as it is a real time debugging command. The next
debug command involves entity paths.
AI Add Enemy
1
AI Make Path 1
AI Path Add Point 1,20,0
AI Path Add Point
1,-20,0
AI Entity Assign Patrol Path 1,1
AI Debug Show
Paths 2.5
This creates an
entity and a patrol path to use in the next debug command. The patrol
path deliberately crosses the obstacle from the previous setup to
create a more interesting path, which is display in red. The final
point in the path represents the entity's final destination, which it
has generated the path to, and the intermediate points are shown as
red dots which represent the waypoints the entity is using to get to
its destination, if any. The points are connected by red lines which
represent the order the points will be visited in. Path displays are
updated in real time and you can specify a Y position for the debug
object. Paths will be displayed for all entities. Another loop
updates the AI system to move the entity and update the path.
AI
Debug Hide Paths
AI Set Entity View Arc 1,90,170
AI Debug Show
View Arcs 2.5
A view
angle is assigned to the entity from the previous setup for the next
debug command, which displays view angles, view range, and hearing
range. The view is shown as a transparent red circle that extends to
the distance of the view range and angle within which points can
potentially be seen. The
hearing range is shown as a yellow circle within which sounds can be
heard. The calculation for the display object is only done once since
view angles and ranges rarely change it is faster to keep the object
from frame to frame. Any changes to the view range, angle or hearing
range need a call to Show View Arcs to update. The position and
rotation of the display object will be updated in real time when
Update is called as this can be done quickly.
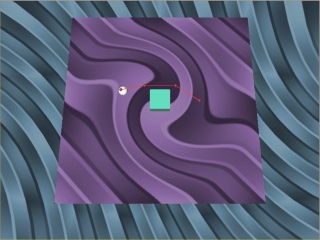
AI
Debug Hide View Arcs
make object sphere 2,5
position object
2,9.5,2.5,4
AI Add Enemy 2
AI Debug Show Avoidance Angles
2.5
The next command
requires another entity to display entity to entity avoidance data.
This is where an entity detects nearby entities and marks their area
as blocked, restricting movement in that direction. Blocked
directions are shown as a small green arc extending to the full width
of the marked area and update in real time. This is a slow command as
it must re-calculate the avoidance object every time it changes which
is every frame when it is close to one or more entities.
AI
Debug Hide Avoidance Angles
AI Kill Entity 2
delete object 2
AI
Set Console Output On 1
The
second entity is no longer needed so is removed from the AI system
and deleted, always remove an entity before deleting its object if
the object is linked to it. The
Set Console Output command is different in that it opens a new window
to display a detailed list of the main entity parameters that is
updated in real time. Closing this new window manually will result in
the program crashing, you should use Set Console Output Off to close
it.
AI Set Console Output Off
AI Hide
Errors
Hiding errors is
used to prevent the AI system exiting the program and displaying
error messages when an invalid action or command is performed, such
as setting a parameter for an entity that does not exist. It is
useful if you want to handle errors yourself, for example adding an
entity and then checking if the entity exists will let you know if
the addition succeeded or failed.
AI Set Entity
Speed 3,10
In this case
the loop contains an invalid command since entity 3 has not been
added, with errors off the command will have no effect.