Editing an Image
From Digital Photo Professional
Editing an Image
This section explains how to adjust an image using the tool palette in the edit window. You can easily restore an image to its original condition with the [ ![]() ] button even if you have made the wrong adjustment. Try out the various adjustments. How to make adjustments using the [RAW] tool palette functions, and how to adjust automatically with the [RGB] tool palette are explained in this section.
] button even if you have made the wrong adjustment. Try out the various adjustments. How to make adjustments using the [RAW] tool palette functions, and how to adjust automatically with the [RGB] tool palette are explained in this section.
-
Double-click a thumbnail image in the main window.
-
The edit window appears.
-
-
Select the [View] menu → [Tool palette].
-
The tool palette appears.
-
-
Select the [RAW] tab sheet on the tool palette, and edit the image.
Adjusting Brightness
Changing a Picture Style
Adjusting Color Tone by Changing White Balance
Adjusting Color Tone Using Click White Balance
Adjusting Contrast
Changing Color Tone and Color Saturation
Adjusting Monochrome
Adjusting Image Sharpness-
The image changes in real time according to adjustments performed with the tool palette.
-
To revert to the condition before the last operation performed on the tool palette, select [Undo] in the [Edit] menu or press <Ctrl> + <Z> keys.
You can rotate an image in the [Adjustment] menu.
You can adjust an image while comparing the image before and after adjustment. (Adjusting While Comparing with the Original Image)
You can synchronize multiple images and edit while comparing them. (Adjusting by Comparing Multiple Images)
About the RAW Tool Palette
You can adjust images with the tool palette by switching between the [RAW], [RGB], [NR/ALO] and [Lens] tab sheets according to your editing requirements. Adjustments similar to those that can be performed with the functions of your camera can be performed using the functions of the [RAW] tool palette. When the camera settings were incorrect during shooting, or when the shooting result is not what you visualized, you can get closer to what you envisaged with the [RAW] tool palette which is similar to the camera.
RAW Tool Palette
| [Brightness adjustment] | Brightness adjustment |
| [White balance adjustment] | White balance adjustment (Adjusting Color Tone by Changing White Balance, Adjusting Color Tone Using Click White Balance, Adjusting White Balance with Color Temperature, Tuning White Balance with Color Wheel) |
| [Picture Style] | Picture Style settings (Changing a Picture Style, Using a Picture Style File) |
 |
Dynamic range adjustment |
| [Contrast] | Contrast adjustment |
| [Highlight] | Shadows/highlights adjustment |
| [Shadow] | |
| [Linear] | Linear setting |
| [Color tone] | Color tone and color saturation adjustment |
| [Color saturation] | |
| [Sharpness]/[Unsharp mask] | Sharpness adjustment |
| Enlargement display position* |
*If an image is displayed enlarged, the enlargement display position can be moved by dragging. The enlargement display position appears when [Docking display] has been set and the edit image window has been enlarged. (Tool Palette)
Editing with the Tool Palette in the Main Window
By clicking the [Tool Palette] button in the toolbar on the main window, the same tool palette that appears in the edit window is displayed and you can edit images.
Adjusting Brightness
The brightness of an image can be adjusted. Move the slider to the right to make the image brighter and to the left to make the image darker.
Adjust an image while viewing it.
Drag the slider left or right, or enter a value to adjust the brightness in [Brightness adjustment].
Changing a Picture Style
If the image you shot is different to what you visualized, you can change the Picture Style to get closer to what you envisaged. Even if you have saved the image with [Monochrome] selected, you can still change to another Picture Style at any point by simply selecting a Picture Style other than [Monochrome].
-
Select a Picture Style from the list box.
| The Picture Style set on the camera when the image was shot. When the mode in the Creative Zone is selected on the camera, the Picture Style set in ( ) is displayed. When the mode in the Basic Zone is selected on the camera, [Shot settings] is displayed in ( ), and image characteristics that are according to the selected shooting mode are applied. |
|
| [Standard] | The image looks vivid. Ordinarily, this setting is suitable for most images. |
| [Auto] | The color tone will be adjusted to suit the scene. The colors will look vivid. Especially the colors of blue skies, greenery, and sunsets will be vivid in a shot of nature, outdoor, or sunset scenes. |
| [Portrait] | For nice skin tones. Effective for close-ups of women and children. By changing the [Color tone], you can adjust the skin tone. |
| [Landscape] | For vivid blues and greens. Effective for making images of landscapes impressive. |
| [Neutral] | For natural colors and subdued images. Effective for base images which are to undergo adjustment. |
| [Faithful] | When the subject is photographed under a color temperature of 5200K, the color is adjusted colorimetrically to match the subject's color. Effective for base images which are to undergo adjustment. |
| [Monochrome] | For black and white images. You can also adjust with [Filter effect] or [Toning effect]. |
| (Picture Style file registered in the camera) | Displayed when selecting an image shot with the Picture Style file registered in the camera. In the list, the name of the Picture Style file is displayed in ( ). |
| [Picture Style file applied in DPP] | The name of the Picture Style file applied in DPP is displayed in [ ]. |
-
Even if the RAW image is from a camera that does not have Picture Style settings, you can still set a Picture Style as long as the RAW image is compatible with DPP. (Supported Images)
You can retain the [Color tone], [Color saturation], [Contrast], [Unsharp mask] and [Sharpness] settings, even if you change the Picture Style. (Tool Palette)
[Auto] is only applied to images shot with the EOS-1D X, EOS-1D C, EOS 5D Mark III, EOS 6D, EOS 70D, EOS REBEL T5i/700D, EOS REBEL SL1/100D, EOS REBEL T4i/650D, EOS REBEL T3i/600D, EOS M2 or EOS M. When changing a Picture Style with several images selected, you can select [Auto] if images shot with the EOS-1D X, EOS-1D C, EOS 5D Mark III, EOS 6D, EOS 70D, EOS REBEL T5i/700D, EOS REBEL SL1/100D, EOS REBEL T4i/650D, EOS REBEL T3i/600D, EOS M2 or EOS M are included. However, [Auto] is actually applied only to images shot with the EOS-1D X, EOS-1D C, EOS 5D Mark III, EOS 6D, EOS 70D, EOS REBEL T5i/700D, EOS REBEL SL1/100D, EOS REBEL T4i/650D, EOS REBEL T3i/600D, EOS M2 or EOS M.
You cannot select [Auto] with multiple-exposure RAW images created on the camera.
Picture Style File
A Picture Style file is an extended function file of Picture Style. (Using a Picture Style File)
Adjusting Color Tone by Changing White Balance
If the color tone of the photographed image does not appear natural, change the white balance to make it appear natural. You can make the color tone natural by setting the light source at the time of shooting an image of, for example, pale-colored flowers.
Select a white balance from the list box.
-
 ( ) is the white balance set on the camera when the image was shot.
When the mode in the Creative Zone is selected on the camera, the white balance set in ( ) is displayed.
When the mode in the Basic Zone is selected on the camera, [Shot settings] is displayed in ( ), and image characteristics that are according to the selected shooting mode are applied.
If you have corrected white balance, the correction value is displayed in ( ).
-
| [Auto] | Automatically adjusts the white balance. |
| [Daylight] | For sunny daylight outdoors. |
| [Shade] | For shaded areas outdoors. |
| [Cloudy] | For cloudy or hazy days and during sunset. |
| [Tungsten] | For tungsten (light bulb) light. |
| [White fluorescent light] | For white fluorescent light. |
| [Flash] | When flash is used. |
| [Color temperature] | You can manually set color temperature for 2500 to 10000K (in 100K increments). |
| [Click white balance] | Displayed for images on which you performed the click white balance. |
If the color tone of the image does not appear natural after changing the white balance, adjust the white balance using click white balance.
To make further fine adjustments to color tone after adjusting the white balance, you can use [Color tone] to get closer to your requirements.
-
You cannot register the adjustment results as personal white balance when you have selected [
( )] from the list box. -
You cannot change or adjust white balance with multiple-exposure RAW images created on the camera.
Adjusting Color Tone Using Click White Balance
You can adjust white balance using a selected part of an image as the standard for white to make the image appear natural. Using click white balance is effective when using it in parts of an image where white color tone has changed under the influence of a light source.
-
Click the [
 ] button.
-
When you move the cursor over the image, the cursor [
 ] changes to [
  ].
].
-
Click on a point that is to be the standard for white.
-
The color of the image is adjusted with the point you selected as the standard for white.
-
If you click on another point in the image, the white balance is adjusted again.
-
To finish click white balance, right-click with the mouse or click the [
] button again.
-
When there are no white areas in your image, you can adjust the white balance by clicking on a grey point of the image in step 2. This has the same adjustment result as selecting a white point.
-
The image is adjusted based on the average value of 5 x 5 pixel range from the clicked point.
-
You cannot change or adjust white balance with multiple-exposure RAW images created on the camera.
Adjusting Contrast
Modulation and degree of contrast can be adjusted. Move the slider to the right to make contrast stronger and to the left to make contrast weaker.
Adjust an image while viewing it.
Drag the slider left or right to adjust the tone curve in 9 steps.
Use [Linear] when you will be adjusting separately using image editing software that has advanced editing functions. Note that when [Linear] is checkmarked, the image will become dim.
Changing Color Tone and Color Saturation
Skin tone and overall color saturation can be adjusted. If Picture Style is set to [Monochrome], [Color tone] and [Color saturation] switch to [Filter effect] and [Toning effect].
Adjust an image while viewing it.
Drag the slider left or right to adjust the color tone and color saturation.
-
[Color tone]
- Mainly used for adjusting skin tones. Move the slider to the right to make skin tones more yellow, and to the left to make skin tones redder.
-
[Color saturation]
- The overall color depth of the image is adjusted with color saturation. Move the slider to the right to make the color deeper, and to the left to make the color weaker.
Adjusting Monochrome
When the Picture Style is set to [Monochrome], you can create monochrome photographs with effects similar to filtering and with the look of a single-color photograph.
-
Select [Monochrome] in the [Picture Style] list box.
-
Drag the [Filter effect] slider left or right for adjustment.
-
[Filter effect]
- Creates an image where the white of clouds and the green of trees are emphasized in the same monochrome photograph.
| [None] | Ordinary monochrome image without filter effect. |
| [Yellow] | Blue sky is reproduced more naturally and white clouds emerge clearly. |
| [Orange] | Blue sky becomes somewhat darker. The brightness of the setting sun increases further. |
| [Red] | Blue sky becomes quite dark. Autumn leaves become clear and bright. |
| [Green] | Human skin tones and lips become softer. The green leaves of trees become clear and bright. |
-
[Toning effect]
- You can create a monochrome photograph to which a single color has been added. You can choose from [None], [Sepia], [Blue], [Purple] and [Green].
To emphasize the filter effect, set the [Contrast] slider closer to the right.
Adjusting Image Sharpness
You can make the overall atmosphere of an image harder or softer. Adjustment can be made by selecting from two modes, [Sharpness] and [Unsharp mask].
-
[Sharpness]
- Controls the sharpness of an image by adjusting the level of emphasis for the outline of the image. The further to the right the [Sharpness] slider is moved (the larger the setting), the more the edges are emphasized for a sharper image.
-
[Unsharp mask]
- Adjusts the image's sharpness more finely.
[Strength]
Shows the level of emphasis for the outline of the image. The further to the right the slider is moved (the larger the setting), the more the image's edges are emphasized for a sharper image.
[Fineness]
Shows the fineness of the emphasized outline. The further to the left the slider is moved (the smaller the setting), the more fine detail can be emphasized.
[Threshold]
Sets "how much contrast difference there should be compared to surroundings before emphasizing edges".
- Adjusts the image's sharpness more finely.
-
Select [Sharpness] from the list box and make the setting.
Adjust an image while viewing it.
Drag the slider left or right to adjust the sharpness.
Detailed Setting of Image Sharpness
-
Select [Unsharp mask] from the list box and make the setting.
Adjust an image while viewing it.
Drag the slider left or right to adjust the sharpness.
Adjust image sharpness with the window view set to [200% view], [100% view] or [50% view]. If the view is set to [Fit to window] (full view), the effects of adjustment may seem unnatural.
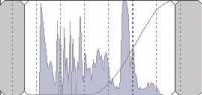
Automatically Adjusting Brightness and Color (Tone Curve Assist)
In order to make the image a desirable standard image, automatically adjust the image tone curve. You can select the degree of automatic adjustment from "Standard" and "High".
Click on the [RGB] tab sheet and click the desired automatic adjustment button.
-
The tone curve changes as adjusted.
-
-
[
 ] (Standard)
- Standard automatic adjustment. Suitable for most images.
-
[
 ] (High)
- Use when the effect achieved in standard automatic adjustment is not strong enough.
-
[
 ]
]- Reverts the tone curve to the original settings.
The result of automatic adjustment (tone curve assist) may not be as expected with the following images:
- Images which have been shot with the proper exposure
- Images where the brightness is unbalanced
- Images which are too dark
- Images which have extreme backlighting