|
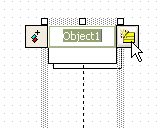
Procedure for creating object
In order to create object,
| 1. | Click [Toolbox] -> [Sequence] -> [Object] button. |
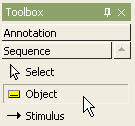
| 2. | And click at the position where object will be placed in the [main window]. |
| 3. | Object quick dialog is shown. At the quick dialog, enter the object name. |
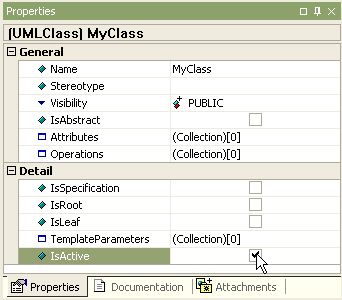
Procedure for setting active object
In order to set class to active object,
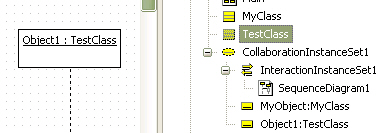
| 1. | Set assigned class's [IsActive] property to true. |
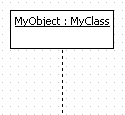
| 2. | For MyObject, change MyClass's IsActive property. |
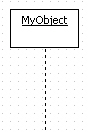
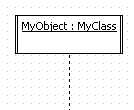
| 3. | If class property is not assigned, you can't change object to active object. The result is as follows. |
Procedure for setting to multi object
In order to set object to multi object,
| 1. | Set object's [IsMultiInstance] property to true. |
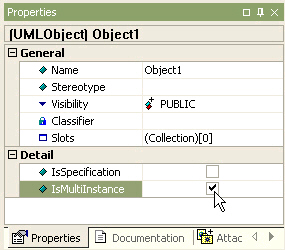
| 2. | Then the object is changed to multi object. |
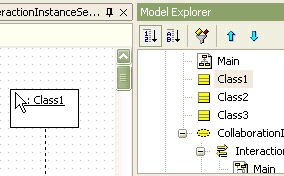
Procedure for creating object from class
In order to create object from class,
| 1. | Select class in the [model explorer]. |
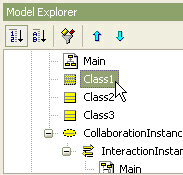
| 2. | Drag and drop it into [main window]. |
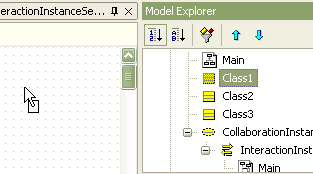
| 3. | Finally, a object is created on the diagram. |
Procedure for creating class from object
If class is not assigned to object,
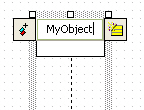
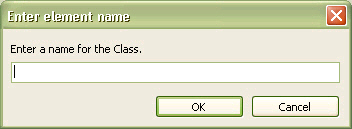
| 1. | Double-click object to pop up quick dialog, click add class button |
| 2. | At the [Enter element name] dialog, enter the new class name. |
| 3. | And new class is created and assigned to object. |
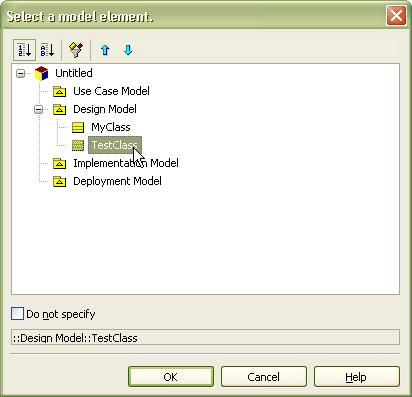
| 4. | If you want existing class to be assigned to object, click  button in object's classifier property, and select class to be assigned to object at the [Select a model element] dialog. button in object's classifier property, and select class to be assigned to object at the [Select a model element] dialog. |
Procedure for creating outgoing from object stimulus by using shortcut creation syntax
In order to create outgoing stimulus from selected object to another object,
| 1. | Double-click from-object, or select from-object and press [Enter] key to pop up quick dialog. |
| 2. | At the quick dialog, enter stimulus name after "->" string ("<-" string for incoming and "<->" for outgoing with return). |
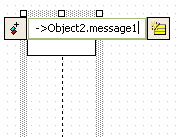
| 3. | Press [Enter] key and outgoing stimulus from selected object to target object is created and placed at the last order. |
|