|
Semantics
A component represents a modular, deployable, and replaceable part of a system that encapsulates implementation and exposes a set of interfaces.
Procedure for creating component
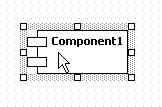
In order to create Component,
| 1. | Click [Toolbox] -> [Component] -> [Component] button. |
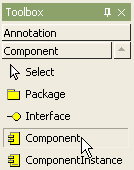
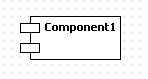
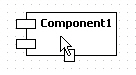
| 2. | Click at the position where Component will be placed in the [main window]. And at the quick dialog, enter component name and press [Enter] key. The result is as follows. |
Procedure for adding resident element
In order to add resident element to component,
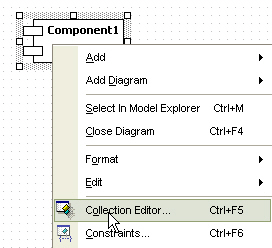
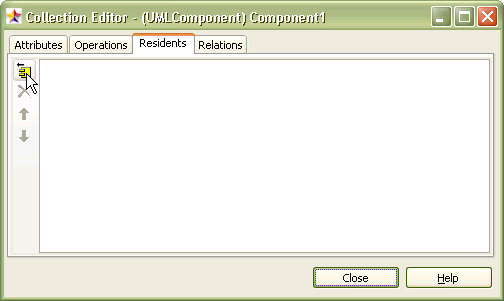
| 1. | Select [Collection Editor...] popup menu of component. |
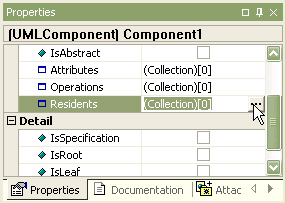
| 2. | Or click  button in [Residents] property on properties window. button in [Residents] property on properties window. |
| 3. | At the [Residents] tab of the [collection editor], you can add resident element by using  button. button. |
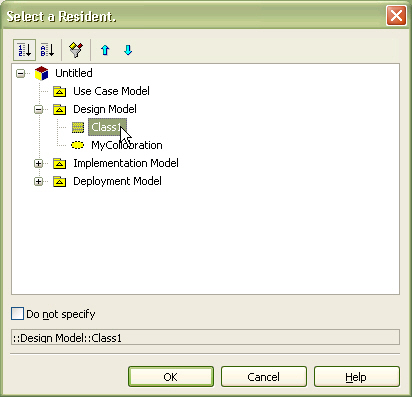
| 4. | At the [Select a Resident] dialog, select resident component. |
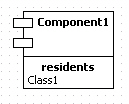
| 5. | The component is assigned to component as resident component and is shown as follows. |
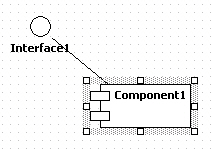
Procedure for creating providing relationship
In order to create providing relationship,
| 1. | Click [Toolbox] -> [Component] -> [Realization] button |

| 2. | Drag from component and drop to interface in the [main window]. |
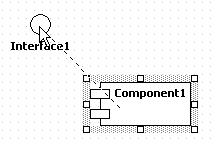
| 3. | The result is as follows. |
Procedure for creating requiring relationship
In order to create requiring relationship,
| 1. | Click [Toolbox] -> [Component] -> [Dependency] button. |
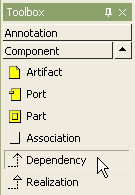
| 2. | Drag from component and drop to interface in the [main window]. |
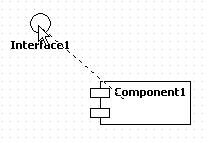
| 3. | Finally, the interface requiring relationship is created. |
Procedure for creating providing interface of class.
In order to create providing inteface of class, use shortcut creation syntax.
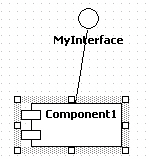
| 1. | Double-click class. At the quick dialog, enter "-@" staring and interface name, separate interface names by "," character. |
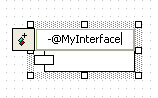
| 2. | And press [Enter] key. Several interfaces provided by selected class is created and arranged automatically. |
Procedure for creating requiring interface of class.
In order to create requiring inteface of class, use shortcut creation syntax.
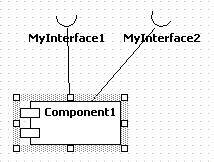
| 1. | Double-click class. At the quick dialog, enter "-(" or "-->", and enter interface names, separate interface names by "," character. |
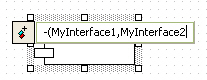
| 2. | And press [Enter] key. Several interfaces required by selected class is created and arranged automatically. |
Procedure for creating port
In order to create port on a component,
| 1. | Click [Toolbox] -> [Component] -> [Port] button. |
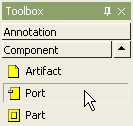
| 2. | And click the component where the port will be contained in the [main window]. |
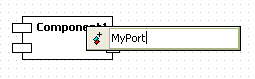
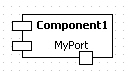
| 3. | A port is created on the component. At the quick dialog, enter the port name and press [Enter] ken to be complete. |
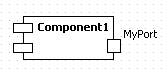
| 4. | The result is as follows. |
Procedure for creating view by dragging port
You can create port by dragging port from [model explorer] to main diagram.
| 1. | Drag port in the [model explorer] and drop on the component in the main diagram. |
| 2. | A port appears on the component. If it is not dropped on the component but on the other area of the diagram, component with port will be created |
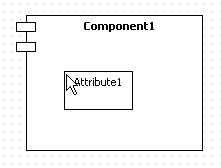
Procedure for creating part
In order to create part,
| 1. | Click [Toolbox] -> [Component] -> [Part] button. |
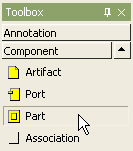
| 2. | And click the component where the part will be contained in the [main window]. |
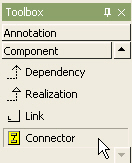
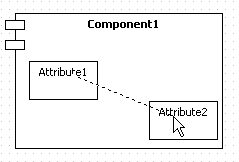
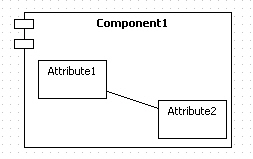
Procedure for creating connector
In order to create connector,
| 1. | Click [Toolbox] -> [Component] -> [Connector] button. |
| 2. | Drag from one part and drop to the other part in the [main window]. |
| 3. | The connector between two parts is created finally as follows. |
|