Install and Configure Team Foundation Server
From Visual Studio Team Foundation Server 2012
This topic, the third part of the Restore a Single-Server tutorial, teaches you how to install Team Foundation Server (TFS) using the Application-Tier Only wizard. You will also learn how to install the Extensions for SharePoint Products on the new server. Additionally, you will learn how to configure SharePoint Foundation 2010, reporting, and analysis services to work with the new server.
The examples in this tutorial topic follow Jill, an IT Administrator at the fictitious company, Fabrikam, Inc., as she recovers from a hardware failure of the original deployment described in Get Up and Running With a Single-Server Installation [Tutorial]. The examples here will be easier to follow if you're familiar with that tutorial.
In this topic
Required permissions
To perform this procedure, you must be a member of the following groups or have the following permissions:
A member of the Administrators security group on the server.
A member of the Team Foundation Administrators group.
Either a member of the SQL Server System Administrator security group, or your SQL Server Perform Back Up and Create Maintenance Plan permission must be set to Allow.
A member of the sysadmin security group for the databases for Team Foundation.
A member of the Farm Administrators group.
 Install Team Foundation Server and the Extensions for SharePoint Products
By restoring the databases that TFS uses, you have already restored the data tier of the original deployment. Now you must complete the restoration process by installing the application tier-the application and services that compose Team Foundation Server-by using the Application-Tier Only wizard. You must also install the extensions used by TFS and SharePoint Foundation 2010 by running the Extensions for SharePoint Products wizard.
To install the application tier and the extensions
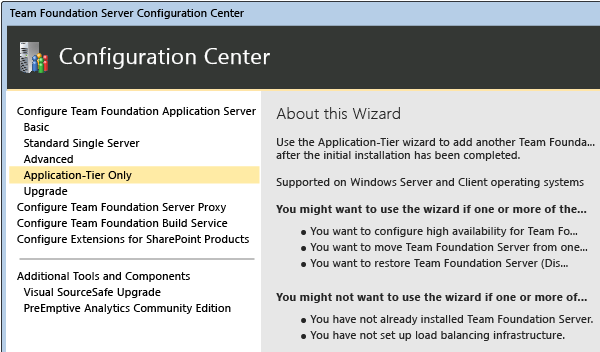
Open the administration console and start the configuration process.

If you don't see the administration console for TFS, you haven't installed the TFS software on the server. To learn how, go to Install Team Foundation Server.
Launch the application-tier only wizard.
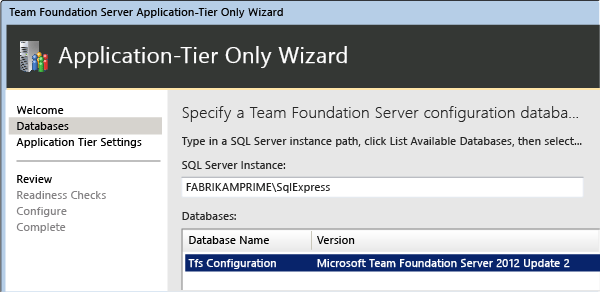
Specify the name of the SQL Server where you just restored the databases and choose List Available Databases to populate the list. Choose the configuration database.
In this particular example, Jill specifies FKPMALTERNATE\SQLExpress in SQL Server Instance because she is using a named instance (SQLExpress) on the new server, and highlights TFS_Configuration. In the ideal case, the new SQL Server instance would have the same name as the prior server (FABRIKAMPRIME).
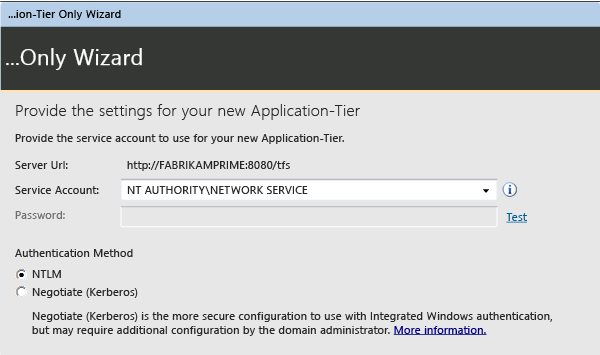
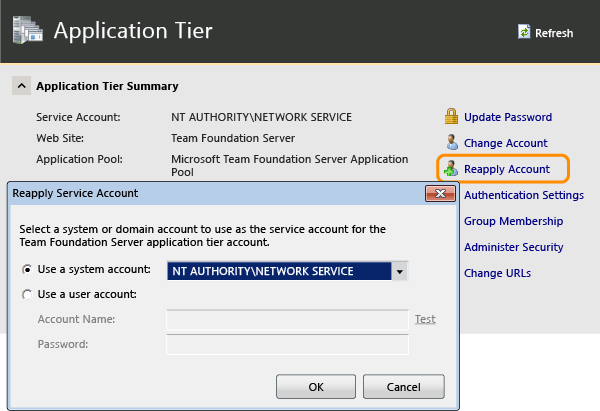
Provide the same service account information as used in the prior deployment, if possible.
In the example deployment, Jill makes sure that NT AUTHORITY\NETWORK SERVICE appears in Service Account, and that the authentication method is set to the default, NTLM.
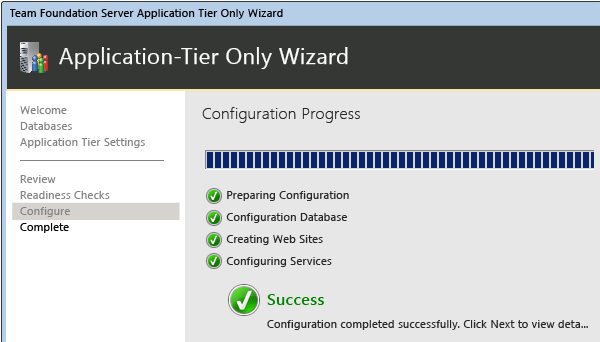
Complete the wizard.
In the Configuration Center, choose Configure Extensions for SharePoint Products and complete that wizard to install the extensions.
Open the administration console, and in the Application Tier pane, update or refresh the URLs to reflect the new URLs for the restored server. Even if you have not changed the name or ports used for the restored server, you should reapply this information.
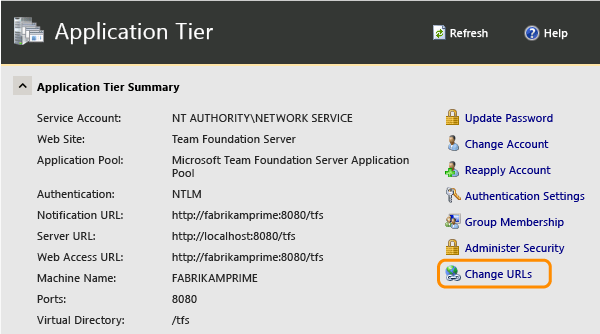

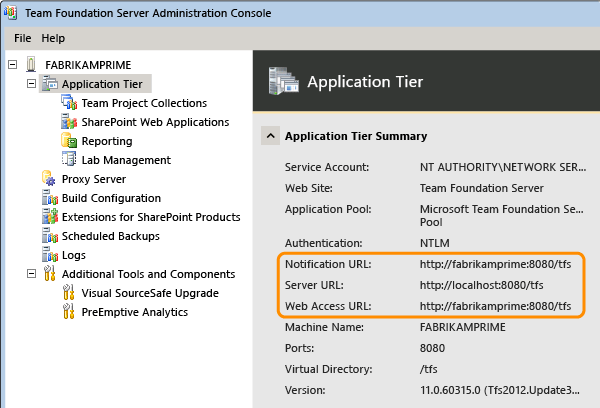
After finishing the update, verify that the URLS appear correctly.
Reapply the service account for TFS.
Configure SharePoint Products
After you install the application tier and the extensions, you must reconfigure the settings for the SharePoint web applications that your deployment uses.
To configure the settings for SharePoint web applications
Open the administration console for Team Foundation.
In the navigation bar, choose SharePoint Web Applications.
In the SharePoint Web Applications list, highlight the web application used by the original deployment, and then choose Change.
 Tip
TipBy default, the web application should appear automatically in the list of web applications. If it does not, choose Add, and then add it manually.
The SharePoint Web Application Settings window opens. In Web Application URL and Central Administration URL, review the settings, and if necessary, specify or change the values to reflect the URLs on the new server.
When you are satisfied with the settings, choose OK.
For more information about how to configure SharePoint web applications as part of your deployment, see
Configure reporting and Analysis Services
After you have configured SharePoint Foundation 2010, you must redirect Team Foundation Server to the location of the report server, restart the warehouse, and manually rebuild the database for Analysis Services.
You must complete this procedure even if you restored the TFS_Warehouse and TFS_Analysis databases, as the previous section describes. |
To reconfigure reporting and Analysis Services
In the navigation bar for the administration console, choose Reporting.
On the Reporting page, choose Edit.
In the Take Offline dialog box, choose OK.
The Reporting dialog box opens.
Select the Use Reporting check box.
On the Warehouse tab, in Server, specify the name of the report server, and in Database, type the name of the warehouse database. Optionally choose Test Connection to verify that the database is valid.
On the Analysis Services tab, in the Server list, specify the name of the server that is running SQL Server Analysis Services. In Database, specify the name of the analysis services database, and in Account for accessing data sources, specify the username and password of the data sources account.
On the Reports tab, in the Server list, specify the name of the report server, and then choose Populate URLs. In Username and Password, specify the account name and password (if any) for the data sources account. In Default Path, specify the relative path for the location where reports are stored, and then choose OK.
In the administration console, choose Start Jobs to restart reporting.
Open a Command Prompt window, and then change directories to %ProgramFiles%\Microsoft Team Foundation Server 11.0\Tools.
Enter the following command to rebuild the database for Analysis Services:
TFSConfig RebuildWarehouse /AnalysisServices /ReportingDataSourcePassword:Password
Password is the password for the data sources account for Reporting Services.
In the example deployment, Jill types the following at the command line: TFSConfig RebuildWarehouse /AnalysisServices /ReportingDataSourcePassword:password.
Wait until the command is successfully completed.
Home |