MapCruncher for Microsoft Virtual Earth Help
From MapCruncher
Using MapCruncher
This topics demonstrates how to use MapCruncher by showing you how to create a simple mashup of the Microsoft Redmond campus map.
-
Find a map you want to crunch in a
supported file type.
Be aware that maps may be under copyright, which restricts your ability to republish them.
For this help file we are going to use the
Microsoft Redmond Campus Map found at
http://members.microsoft.com/careers/mslife/locations/images/campus_map.jpg,
as shown in Figure 1.

Figure 1. The Microsoft Redmond campus map
- Right-click campus_map.jpg and save it to your local disk.
- Launch MapCruncher. It begins by creating a New Mashup document.
-
Select File, Add Source Map, and select campus_map.jpg,
as shown in Figure 2.
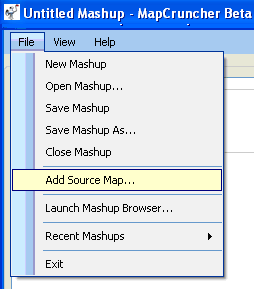
Figure 2. Selecting a source map
-
Create the first of three correspondences as follows:
-
Navigate around the source map to find an identifiable feature.
Drag the mouse to pan.
Double-click to center and zoom, or use the mouse wheel to zoom in and out.
Place the feature under the crosshairs,
as shown in Figure 3 (shown at zoom level 5).
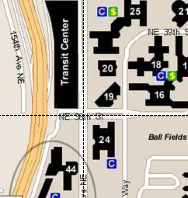
Figure 3. Placing an identifiable feature (156th Ave NE and NE 36th St)
-
Navigate around the Virtual Earth map to find the corresponding feature,
as shown in Figure 4 (shown at zoom level 15).
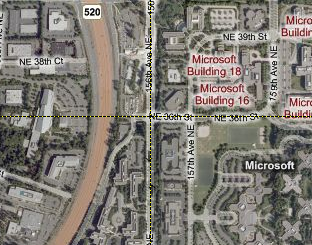
Figure 4. Placing the corresponding Virtual Earth feature
-
Label the point (this step is optional),
as shown in Figure 5.
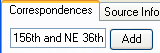
Figure 5. Labeling a point
-
Click Add,
as shown in Figure 6.
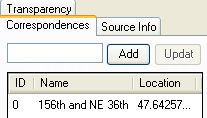
Figure 6. Adding a correspondence
Repeat this process for the other two correspondences. Now you have a rough registration between the maps. The procedure for adding more correspondences is easier, and each correspondence you add reduces error.
-
Navigate around the source map to find an identifiable feature.
Drag the mouse to pan.
Double-click to center and zoom, or use the mouse wheel to zoom in and out.
Place the feature under the crosshairs,
as shown in Figure 3 (shown at zoom level 5).
-
Click Lock,
as shown in Figure 7.
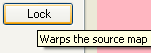
Figure 7. Locking the map
Note that as you manipulate the source map, the Virtual Earth map moves along with you. -
Find a new point on the source map,
as shown in Figure 8.
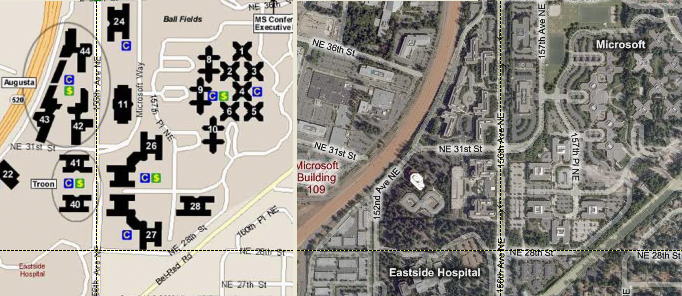
Figure 8. Finding a new point
-
Click Unlock,
as shown in Figure 9.
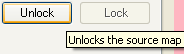
Figure 9. Unlocking the map
-
Fine-tune the position on the Virtual Earth map,
as shown in Figure 10. Notice how we changed the campus map zoom level to
6 and the Virtual Earth zoom level to 16.
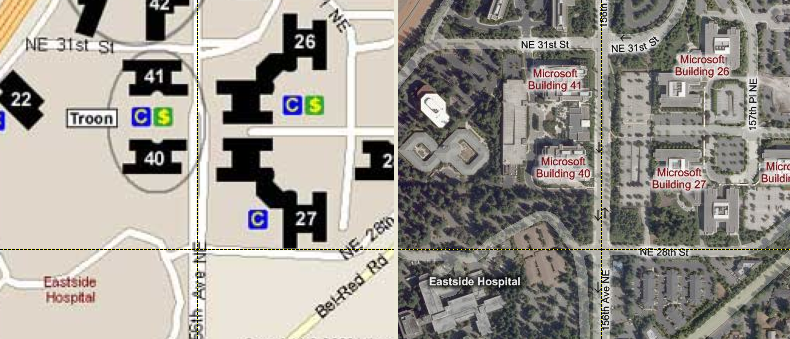
Figure 10. Fine tuning the map
-
Label and add the new point.
Repeat this process until you find that new points do not seem to require very much tuning.
Tip: Error distances and the error wand
Troubleshoot: How many points do I need?
Troubleshoot: Why does my map look skewed? -
Tell the visitors where to find the original maps (this step is optional),
as shown in Figure 11.
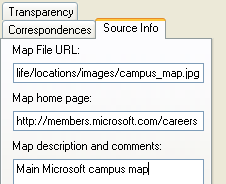
Figure 11. Adding source information
-
Select the Maximum (Closest) Zoom value and click the
Render button,
as shown in Figure 12.

Figure 12. Select zoom level and start rendering process
MapCruncher calculates a default zoom level based on the size of the source map. MapCruncher renders in order from far-away tiles to zoomed-in tiles, so you can request a higher zoom level than you require, and cancel rendering at any time.
NOTE: Each additional zoom level quadruples the number of tiles generated, and also the time taken to render and the space required to store the tiles. At level 1, four tiles cover the surface of the Earth; street level is around level 19. Before you set the zoom level greater than 19, be aware that at high zoom levels estimation can take minutes and rendering can take hours. -
Select an output folder where the rendered results are stored,
as shown in Figure 13.
You can select a folder served by your Web server, if you want to publish the results.
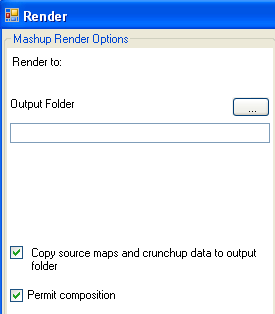
Figure 13. Set rendering options
-
Click the Start button.
As MapCruncher begins rendering,
it estimates the rendered output size,
as shown in Figure 14.
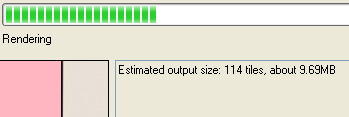
Figure 14. MapCruncher estimate
It should take about a minute to render the campus map. -
Use the links to view the rendered tiles inside MapCruncher, or with your Web browser
(this step is optional),
as shown in Figure 15.

Figure 15. Viewing the rendered tiles
-
If you are publishing your results on your Web site,
copy the rendered folder to your Web server,
and open the
SamplePage.html
file in a browser.
It should look something like Figure 16.
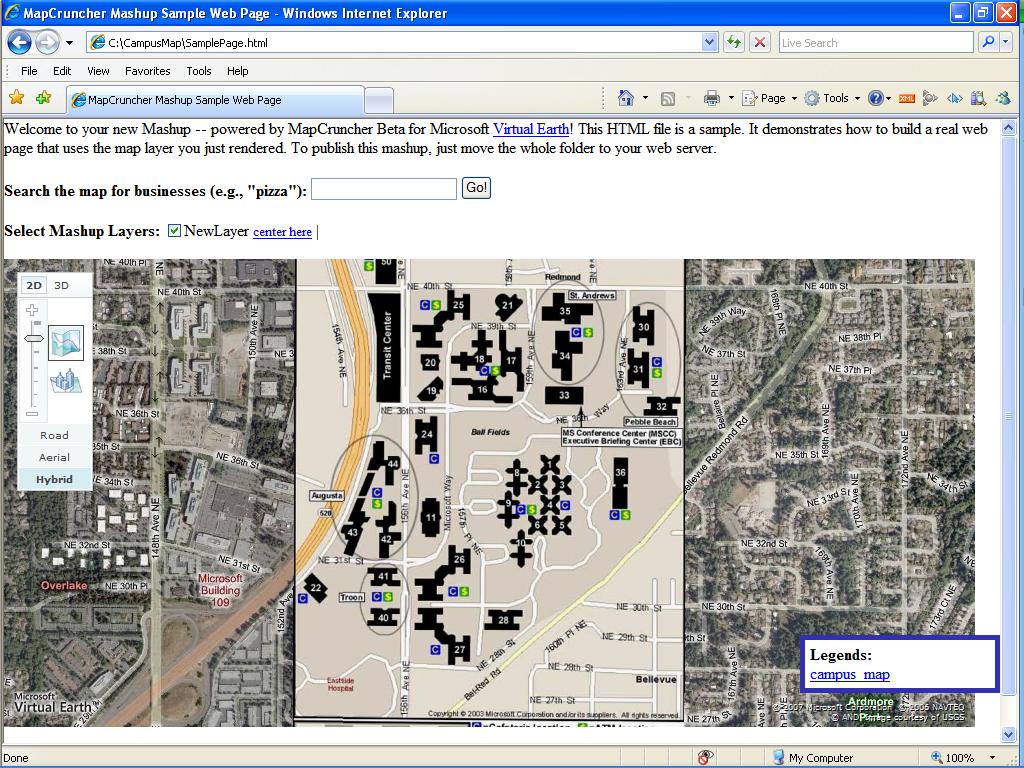
Figure 16. Viewing SamplePage.html
- You can use the SamplePage.html file as a basis to create your own customized page. Be sure to place your customized data outside the folder rendered by MapCruncher, so that if you re-render your maps from MapCruncher, you don't lose your updated data. Your custom HTML page should point to the automatically generated .crunched.xml file; that way, when you re-render your map, the new contents appear automatically in your custom HTML page.
| © 2007 Microsoft Corporation. All rights Reserved. | Send Documentation Feedback |