Query tool

The Query Tool enables you to execute arbitrary SQL commands.
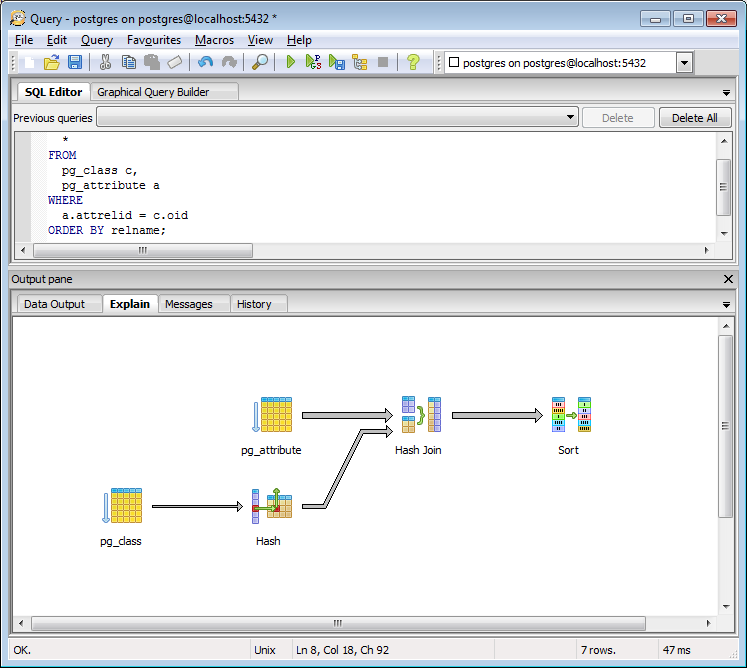
The upper part of the Query Tool contains the SQL Editor where you type your commands. You may read the query from a file, or write it out to a file. When writing a file, the encoding of the file is determined by the file suffix: if it is *.sql, a 8 bit local character set is used. If *.usql is selected, the file will be written in UTF-8, which enables the storage of virtually all characters used throughout the world, according to the coding rules of the Unicode Consortium. If you select *.*, the setting from the read/write unicode option is used.
The edit entry window also contains autocompletion code to help you write queries. To use autocomplete, simply start typing your query and then press Control+Space to see a list of possible object names to insert. For example, type “*SELECT * FROM* ” (without the quotes, but with the trailing space), and then hit Control and Space together to see a popup menu of autocomplete options. The autocomplete system is based on code from psql, the PostgreSQL command line interpreter and will generally be able to offer autocomplete options in the same places that it can in psql. You can optionally enable the Tab key to activate the autocomplete feature as well - the can be done on the options dialog.
The editor also offers a number of features for helping with code formatting:
- The auto-indent feature will automatically indent text to the same depth as the previous line when you press return.
- Block indent text by selecting two or more lines and pressing the Tab key.
- Block outdent text that has been indented using the current tab settings using Shift+Tab.
- Comment out SQL by selecting some text and pressing the Control+K.
- Uncomment SQL by selecting some text starting with a comment and pressing Control+Shift+K.
- Shift the selected text to upper case by pressing Control+Shift+U.
- Shift the selected text to lower case by pressing Control+U.
If you prefer to build your queries graphically, you can use the Graphical Query builder to generate the SQL for you.
To execute a query, select Execute from the Query menu, press the execute toolbar button, or press the F5 function key. The complete contents of the window will be sent to the database server, which executes it. You may also execute just a part of the text, by selecting only the text that you want the server to execute.
Explain from the Query menu, or F7 function key will execute the EXPLAIN command. The database server will analyze the query that’s sent to it, and will return the results.

The result is displayed as text in the Data Output page, and graphically visualized on the Explain page. This enables you to find out how the query is parsed, optimized and executed. You can modify the degree of inspection by changing the Explain options for this in the Query menu. Please note that “EXPLAIN VERBOSE” can not be displayed graphically.
In case the query you sent to the server using the Execute or Explain command takes longer than you expect, and you would like to abort the execution, you can select Cancel from the Query menu, press the Cancel toolbar button or use Alt-Break function key to abort the execution.
You can run pgScript scripts by selecting Execute pgScript from the Query menu instead of Execute, or you press the Execute pgScript toolbar button, or you press the F6 function key. The complete contents of the edit entry window will be sent to the pgScript engine, which interprets it. pgScript scripts are composed of regular SQL commands but add some enhancements:
- Control-of-flow language (IF and WHILE structures)
- Local variables (SET @VARIABLE = 5)
- Random data generators (INTEGER(10, 20) or REFERENCE(table, column))
For more information on the pgScript language, please look at the pgScript scripting language reference.
If you want to have help about a SQL command you want to execute, you can mark a SQL keyword and select SQL Help from the Help menu, the SQL Help toolbar button or simply press the F1 key. pgAdmin III will try to locate the appropriate information in the PostgreSQL documentation for you.
The result of the database server execution will be displayed in the lower part of the Query Tool. If the last command in the chain of SQL command sent to the server was as command returning a result set, this will be shown on the Data Output page. All rowsets from previous commands will be discarded.
To save the data in the Data Output page to a file, you can use the Export dialog.
Information about all commands just executed will go to the Messages page. The History page will remember all commands executed and the results from this, until you use Clear History from the Query menu to clear the window. If you want to retain the history for later inspection, you can save the contents of the History page to a file using the Save history option from the Query menu.
The status line will show how long the last query took to complete. If a dataset was returned, not only the elapsed time for server execution is displayed, but also the time to retrieve the data about your current selection.
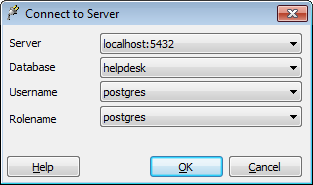
In the toolbar combobox you can quickly change your database connection from one database to another, without launching another instance of the query tool. Initially, only one database will be available, but by selecting <new connection> from the combobox, you can add another connection to it.

In the options dialog, you can specify a default limit for the rowset size to retrieve. By default, this value will be 100. If the number of rows to retrieve from the server exceeds this value, a message box will appear asking what to do to prevent retrieval of an unexpected high amount of data. You may decide to retrieve just the first rows, as configured with the max rows setting, or retrieving the complete rowset regardless of the setting, or abort the query, effectively retrieving zero rows.
If you have queries that you execute often, you can add these to the favourites menu, and have them automatically put in the buffer when you select them from the menu. The Manage Favourites menu option may be used to organise your favourites. Alternatively, you can store them as Query Tool Macros.
The Query Tool also includes a powerful Find and Replace tool. In addition to offering the normal options found in most tools, a Regular Expression search mode is included which allows you to perform extremely powerful search (and replace) operations. Unless your copy of pgAdmin was built against a non-standard build of wxWidgets, a built in version of Henry Spencer’s regular expression library is used based on the 1003.2 spec and some (not quite all) of the Perl5 extensions.
For more details of the regular expression syntax offered, please see the wxWidgets documentation.
Contents: