Edit Data
The Edit Grid tool allows you to view the data that’s stored in a table or view, and to edit the content if technically possible.
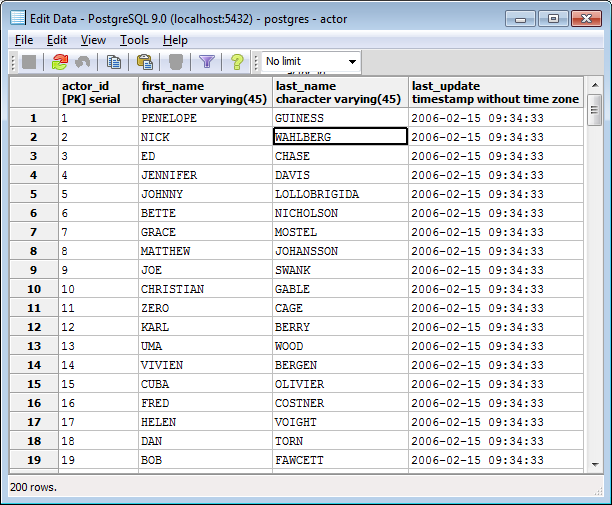
The header of the grid will show the name of each column, together with the data type. A column that’s part of the primary key will additionally be marked with [PK].
Important: In order to edit the data, each row in the table must be uniquely identifiable. This can be done using the OID, or a primary key. If none of them exist, the table is read only. Note that views can’t be edited and are read only by design; updatable views (using rules) are not supported at this time.
To change the value of a field, you select that field and enter the new text. The Store toolbar button allows the data to be written back to the server. The row will be written automatically, if you select a different row.
To enter a new row into the table, you enter the data into the last row that has a row number marked with an asterisk. As soon as you store the data, the row will get a row number, and a fresh empty asterisk line is created.
If an SQL NULL is to be written to the table, simply leave the field empty. If you store a new row, this will let the server fill in the default value for that column. If you store a change to an existing row, the value NULL will explicitly be written.
To enter a newline into a field, press Ctrl-Enter.
If you want pgAdmin III to write an empty string to the table, you enter the special string ‘’ (two single quotes) in the field. If you want to write a string containing solely two single quotes to the table, you need to escape these quotes, by typing ‘’
To delete a row, press the Delete toolbar button.
The Refresh toolbar button allows to reread the contents of the table, refreshing the display.
You can select one or more rows, and copy them with Ctrl-C or the Copy toolbar button to the clipboard.
The Sort/Filter toolbar button will open the View Data Options dialog.
The context menu can also be used to quick-sort or quick-filter the data set. When a cell in the grid is right-clicked, the following options allow the user to selectively view the data:
- Filter by Selection: When selected, refreshes the data set and displays only those rows whose column value matches the value in the cell currently selected.
- Exclude by Selection: When selected, refreshes the data set and excludes those rows whose column value matches the value in the cell currently selected.
- Remove Filter: When selected, removes all selection / exclusion filter conditions.
- Sort Ascending: When selected, refreshes the data set and displays the currently selected rows in the ascending order of the selected column values. If a sorting preference is already present for this data set, this sorting preference is appended to the current sort order.
- Sort Descending: When selected, refreshes the data set and displays the currently selected rows in the descending order of the selected column values. If a sorting preference is already present for this data set, this sorting preference is appended to the current sort order.
- Remove Sorting: When selected, removes all sorting preferences for this data set.
Note: If a column is already selected for sorting, it’s position in the sort list will remain the same, only the direction will be changed.
Contents: