Installing URA
From Universal Reader Assistant
Starting URA
Navigation Path: Starting URA
Universal Reader Assitant Connection Wizard
Upon starting up URA, you will see the Connection Wizard as shown in Figure 1a. Connection Wizard is a three step proedure which helps users to connect to their correspoding module.
The three steps are:-
- Select Reader
- Connection Settings
- Connect/Read
In Select Reader Wizard page, user will be prompted to select a reader type and reader name. User needs to select one of the three reader types i.e Serail Reader, Network Reader (Fixed Reader) or Custom Transport Reader. Once the user selects the reader types, the user will have to select the specific Reader Name. If the reader name is not visible in the list, user can manually type in the reader name. Once the reader selects the reader, Next button will be enabled and on clicking Next Button, user will be taken to next step.
Once user selects a specific reader, a Connection Settings Wizard page will come up. User will need to select basic settings which are required to connect to module. These settings are Reader region, Antenna connected to the reader and tag protocol which user wants to reads. Once the reader selects the reader settomgs, Next button will be enabled and on clicking Next Button, user will be taken to next step.
In Connec/Read Wizard page, user will have the option to either connect to reader or directly start reading. On this page, user can also see the details of the selected and the reader settings.
At any moment if the user wishes to change the reader or change any of the reader settings, Back button will help the user to go back and make changes. Back Button is available on every page of Connection Wizard.
If the user wants to directly move to Main Window of Universal Reader Assitant, click on Cancel Button.
Main Window
After Connection Wizard, user will be navigated to the main Tag Results screen as shown in Figure 1d.
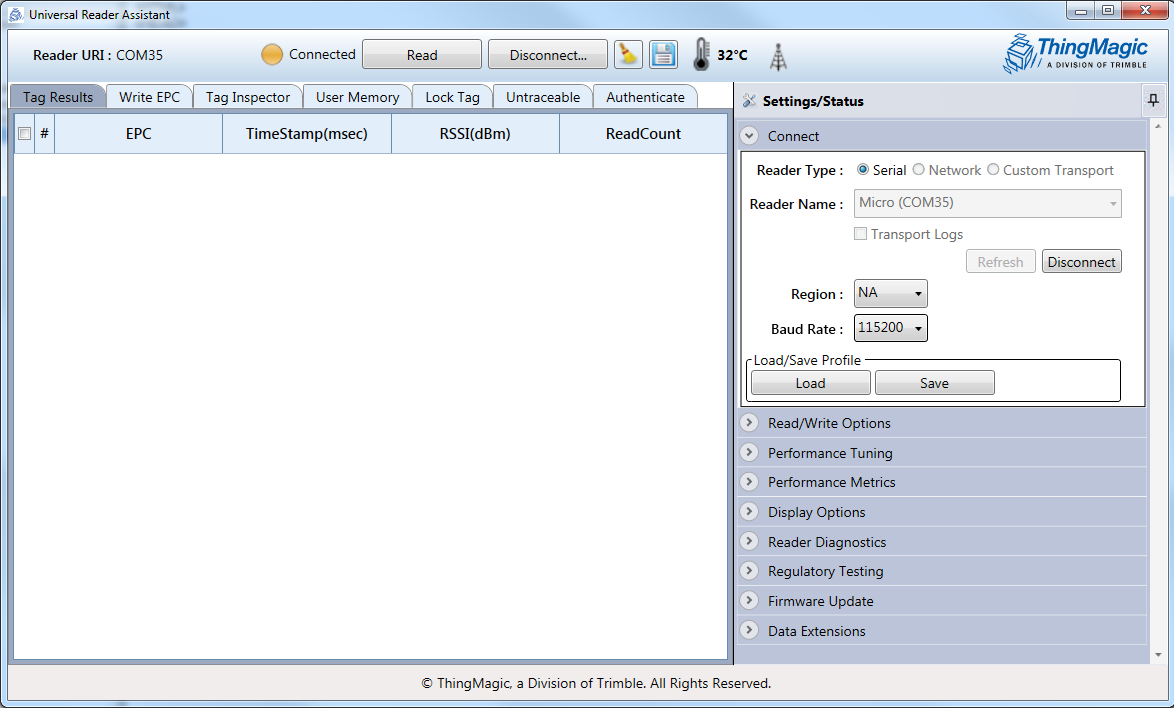
This screen contains the basic controls for reading, viewing and handling the Tag Results.
Across the top of the window are the following controls and status:
- Connect button - when clicked this will open the settings panel to the connect section. Once in the connect section the reader to connect to, including Networked Readers and Serial Readers can be specified and connected.
- Reader URI - Once connected this will display the URI of the active connection.
- LED and Status Message - show the status of the reader connection:
- RED - no connection to any readers
- YELLOW - Connection established to [Reader URI] and reader idle
- GREEN - [Reader URI] actively reading
- [Read] - Once connected a Read button will appear.
- Broom Icon - Clears the Tag Results display
- Disk Icon - Saves the tags shown in the Tag Results displayed to a file. Ifspecific tags are checked it will only save those tags.
- Antenna Icon - Indicates when tag information is being streamed to a server
- Thermometer Icon - Indicates the temperature when a M6e, Micro, Nano, or USBPro reader is continuously reading (AsyncOffTime=0)