Getting Started Tutorial
SilverDox DocumentViewer Tutorial
Creating a Silverlight Application
Adding a SilverDox DocumentViewer
Loading a Document into DocumentViewer
Loading a Document from an HTTP Server
Loading a Document from the Local File System
Creating external controls to communicate with DocumentViewer
Binding To Dependency Properties in XAML
Changing DocumentViewer Properties in Code-Behind
 Introduction
The SilverDox DocumentViewer is a full-featured control used to display Silverlight XPS documents (i.e. ‘.xod’ files) published using SilverDox Publisher. This tutorial will show you how to use some of the basic features of the toolkit such as loading a remote or local document and displaying the document in the viewer.
If you are interested to immediately use a high-level document viewer you can use ReaderControl located in the ‘Samples’ folder. The use of this control is showcased in ‘Samples\ReaderControlSample’ sample. The sample viewer control can be directly embedded into a Silverlight application and it offers out-of-the-box functionality for a thubmanail and Bookmark navigation, text search, document printing, and full screen mode.
In case you have very specific requirements and modifications to ReaderControl or DocumentViewer do not meet your needs, you may extend DocumentViewer or create a new custom viewer to display a Silverlight document (PDFTron.SilverDox.Document).
The tutorial assumes use of VisualStudio 2010. A finished tutorial project is located at SilverDoxSdk\Samples\SilverDoxTutorial
Creating a Silverlight Application
1. Create a new Silverlight Application project in Visual Studio 2010.
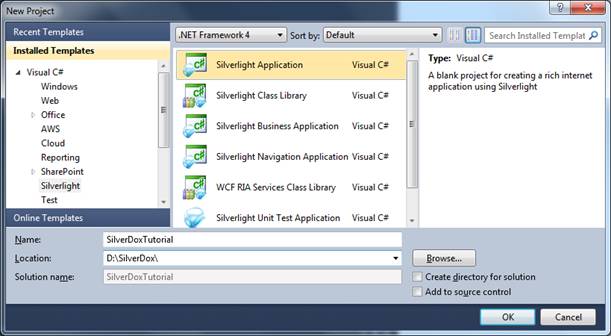
Figure 1: New Project Dialog
2. In the dialog box that follows, accept the defaults while making sure that you are using at least Silverlight 4.
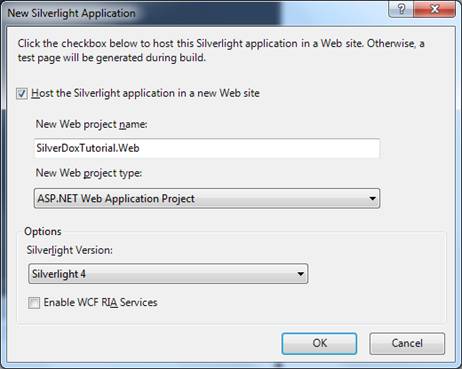
Figure 2: Silverlight Application Options
Adding a SilverDox DocumentViewer
3. Next, add the SilverDox library from the SDK as a Reference in your project. Right click on References in the solution explorer. Select Add References... to bring up the Add Refereces dialog. The SilverDox library can be added to the project by browsing to the dll under the Browse tab. The library is located in SilverDoxSdk\Bin\SilverDox.dll
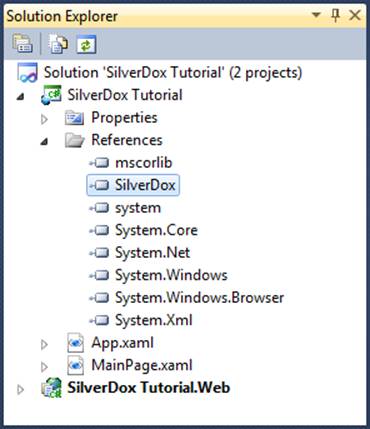
Figure 3: Solution After Adding the SilverDox dll
4. Now, add the DocumentViewer control in xaml by first adding the SilverDox controls namespace. Double click on MainPage.xaml file to edit the xaml file.
xmlns:sdox="clr-namespace:PDFTron.SilverDox.Controls;assembly=SilverDox"
5. Next, add the DocumentViewer control just as one would for any other control. You can also set the viewer’s visual properties such as margins and background color. Replace the default Grid with the following:
<Grid x:Name="LayoutRoot" Background="White"><sdox:DocumentViewer x:Name="MyDocumentViewer" Margin="5" Background="LightGray"/> </Grid>
If you run the project now, you will see a blank document viewer. We will now add code to load a document into the viewer from an HTTP server.
Loading a Document into DocumentViewer
All documents are loaded into a DocumentViewer via its LoadAsync function. LoadAsync has two parameters: an object which implements the IPartRetriever interface and a callback. The IPartRetriever object is used to load a document, and the callback function is called when the document loading has begun.
There are two IPartRetriever classes defined in the namespace PDFTron.SilverDox.IO: HttpPartRetriever and LocalPartRetriever. As their names suggest, HttpPartRetriever fetches documents from a HTTP server, and LocalPartRetriever fetches documents from the local file system.
Loading a Document from an HTTP Server
6. Right click on MainPage.xaml in Solution Explorer and select View Code to edit MainPage.xaml.cs. Add the following using statements:
using PDFTron.SilverDox.IO;using PDFTron.SilverDox.Controls;
7. and change the MainPage class to look as follows:
public partial class MainPage : UserControl{ public MainPage() { InitializeComponent(); LoadDocument(); } public void LoadDocument() { Uri documentUri = new Uri("http://www.pdftron.com/silverdox/samples/ClientBin/PDFTron_PDF2XPS_User_Manual.xod"); HttpPartRetriever myHttpPartRetriever = new HttpPartRetriever(documentUri); this.MyDocumentViewer.LoadAsync(myHttpPartRetriever, OnLoadAsyncCallback); } public void OnLoadAsyncCallback(Exception ex) { if (ex != null) { //An error has occurred System.Diagnostics.Debug.WriteLine(ex.StackTrace); MessageBox.Show("Error loading document: " + ex.Message); } MyDocumentViewer.SetFitMode(DocumentViewer.FitModes.Panel, DocumentViewer.FitModes.None); } }
If you now run the project, you will see the DocumentViewer display a document. You will be able to scroll through the document as well as right-click to access a contextual menu to select and copy text, zoom in and out, and set fit to page/width.
Loading a Document from the Local File System
Due to Silverlight’s security restrictions, a FileStream from an arbitrarily located file must be obtained via an OpenFileDialog. While loading a local file is not directly included in this tutorial, the following code snippet shows how to use an OpenFileDialog and LocalPartRetriever to load a document. Note that the method LoadLocalDocument must be user-initiated (i.e. LoadLocalDocument must be called as the result of a user action such as clicking a button), or a security exception will be thrown.
private LocalPartRetriever MyRetriever;public void LoadLocalDocument() { OpenFileDialog dlg = new OpenFileDialog(); dlg.Multiselect = false; dlg.Filter = "XOD Files (*.xod)|*.xod"; // open dialog bool ok = (bool)dlg.ShowDialog(); if (ok) { if (MyRetriever as LocalPartRetriever != null) ((LocalPartRetriever) MyRetriever).Dispose(); FileStream fileStream = dlg.File.OpenRead(); MyRetriever = new LocalPartRetriever(fileStream); MyDocumentViewer.LoadAsync(MyRetriever, OnLoadAsyncCallback); } }
Creating external controls to communicate with DocumentViewer
Now that we have a basic DocumentViewer, we can add controls to access and change the state of the DocumentViewer. There are two ways controls communicate with the DocumentViewer: by binding to DocumentViewer ‘s dependency properties in the XAML (or code-behind), or by calling functions and changing properties of the DocumentViewer object in the code-behind.
Binding To Dependency Properties in XAML
DocumentViewer has dependency properties such as zoom, current page number, and tool mode. A one-way binding allows us to get information from the DocumentViewer, e.g. getting the total number of pages in the current document, while a two-way binding allows getting and setting information from the DocumentViewer, e.g. getting or setting the currently displayed page number.
8. Edit the main part of the XAML file as follows, which adds text below the viewer to indicate how many pages are currently in the document, and which is currently displayed.
<Grid x:Name="LayoutRoot" Background="White"><StackPanel> <sdox:DocumentViewer x:Name="MyDocumentViewer" Margin="5" Background="LightGray" Height="500" Width="500"/> <StackPanel Orientation="Horizontal" HorizontalAlignment="Center"> <TextBox x:Name="CurrentPageNumberTextBox" VerticalAlignment="Center" HorizontalAlignment="Left" Width="30" Text="{Binding CurrentPageNumber, ElementName=MyDocumentViewer,Mode=TwoWay}"/> <TextBlock Text="of " VerticalAlignment="Center"/> <TextBlock x:Name="PageCountTextBox" VerticalAlignment="Center" HorizontalAlignment="Left" Width="30" Text="{Binding PageCount, ElementName=MyDocumentViewer}"/> </StackPanel> </StackPanel> </Grid>
Note that the currently displayed page is bound with a two-way binding, so that changing the text of the currently displayed page text box (and then clicking on the viewer so that the text box loses focus) will cause the viewer to scroll to that page.
Changing DocumentViewer Properties in Code-Behind
DocumentViewer properties may also be changed by directly altering them in code.
9. Edit the XAML as shown below to include two buttons for changing the current page.
<Grid x:Name="LayoutRoot" Background="White"><StackPanel> <sdox:DocumentViewer x:Name="MyDocumentViewer" Margin="5" Background="LightGray" Height="500" Width="500"/> <StackPanel Orientation="Horizontal" HorizontalAlignment="Center"> <TextBlock x:Name="CurrentPageNumberTextBox" VerticalAlignment="Center" HorizontalAlignment="Left" Width="30" Text="{Binding CurrentPageNumber, ElementName=MyDocumentViewer,Mode=TwoWay}"/> <TextBlock Text="of " VerticalAlignment="Center"/> <TextBlock x:Name="PageCountTextBox" VerticalAlignment="Center" HorizontalAlignment="Left" Width="30" Text="{Binding PageCount, ElementName=MyDocumentViewer}"/> </StackPanel> <StackPanel Orientation="Horizontal" HorizontalAlignment="Center"> <Button x:Name="PreviousPageButton" Content="Previous Page" Width="100" Click="PreviousPageButton_Click"/> <Button x:Name="NextPageButton" Content="Next Page" Width="100" Click="NextPageButton_Click"/> </StackPanel> </StackPanel> </Grid>
Each button has its click event attached to a method in the code-behind that changes the CurrentPageNumber property.
10. Add the following two methods to MainPage.xaml.cs that define the functionality of the previous and next page buttons.
private void PreviousPageButton_Click(object sender, RoutedEventArgs e){ MyDocumentViewer.CurrentPageNumber -= 1; } private void NextPageButton_Click(object sender, RoutedEventArgs e) { MyDocumentViewer.CurrentPageNumber += 1; }
If you run the project, the viewer should resemble what is shown below in Figure 4.
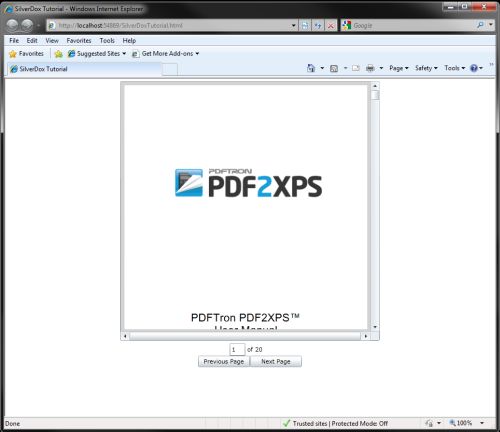
Figure 4: DocumentViewer with External Controls.
Send comments on this topic to info@pdftron.com
© 2010-2012 PDFTron Systems, Inc. All Rights Reserved.