

The HTML Table Checkpoint extension does not provide special operations for creating HTML Table checkpoints. So, to use the checkpoint functionality in your keyword test, use the keyword test operations that will call the HTMLTableCheckpoint.Compare scripting method from the test. For instance, you can use the Run Code Snippet or Call Object Method operation to call this method. You cannot insert these operations during test recording, so you can insert HTML Table checkpoints into your keyword tests only at design time. Here is a possible scenario.
First, we need to generate the comparison code. To do this:
-
Select
 HTML Table Checkpoint from the Tools toolbar (if this toolbar is hidden, right-click somewhere in the toolbar area and select Tools from the ensuing context menu):
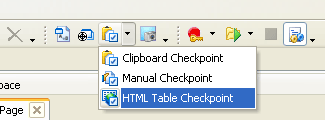
This will invoke the Create HTML Table Checkpoint dialog.
-
In the dialog, specify the tested HTML table and the element of the Stores | XML collection that will store the baseline copy of the table’s data. Press OK to close the dialog and to create the checkpoint.
-
After you close the dialog, the Copy Text to Clipboard dialog with generated script code in it will appear. Close this dialog.
Now we may add keyword test operations that will use this code to perform the comparison:
-
Open your keyword test for editing.
-
Add the Call Object Method operation to your test.
After you dragged the operation from the Operations list to your test in the KeywordTest Editor, TestComplete will display the Operation Parameters wizard.
-
On the first page of the wizard, you specify the object whose method will be called. Enter HTML Table Checkpoint into the edit box:
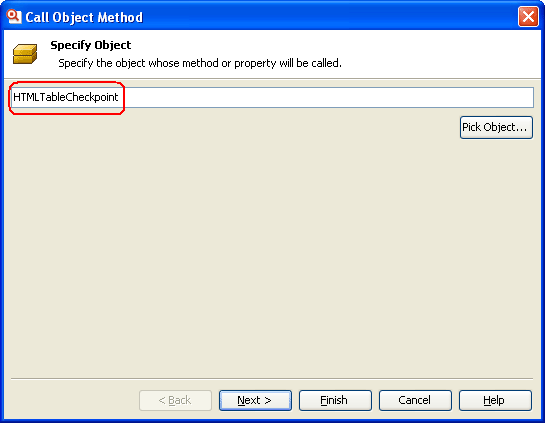
Click Next to continue.
-
On the next page of the Operation Parameters wizard you can choose the method to be called. In our case, the list contains only one item -
Compare.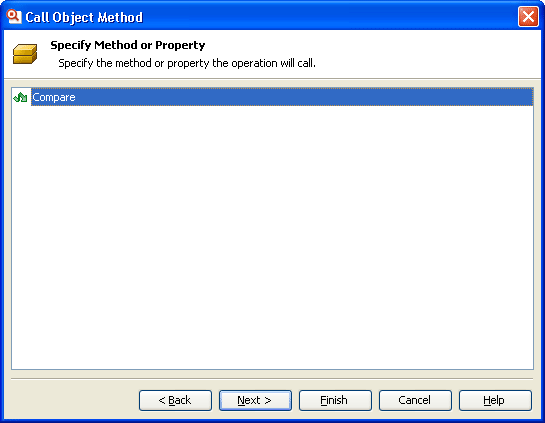
Select it and click Next to continue.
-
On the next page of the Operation Parameters wizard you can specify the parameters of the method.
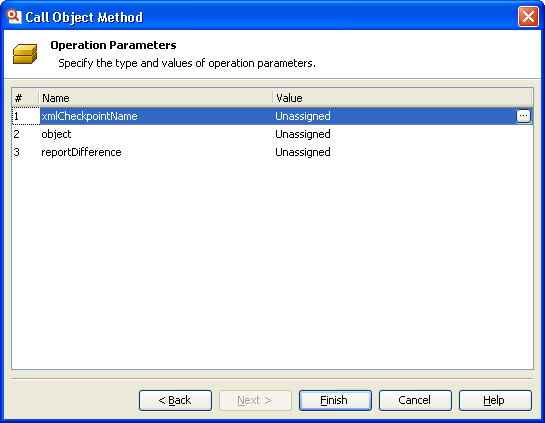
-
The xmlCheckpointName parameter specifies the name of the Stores | XML collection’s element that contains the baseline copy. Type the same name that you specified in the Create HTML Table Checkpoint dialog when creating the checkpoint.
-
The object parameter specifies the name of the HTML table to be verified. To enter it:
-
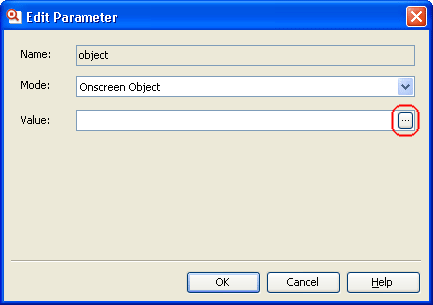
Click the ellipsis button of the Value cell. This will invoke the Edit Parameter dialog.
-
In the dialog, choose Onscreen Object from the Mode drop-down list and then click the ellipsis button of the Value edit box:
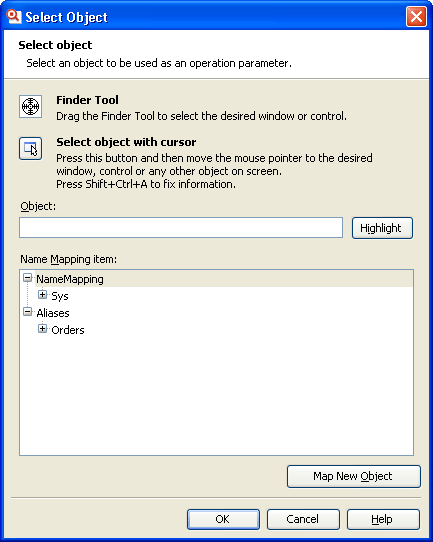
This will invoke the Select Object dialog:
-
In this Select Object dialog, drag the Finder tool (
 ) to the table to choose it.
Note: When dragging, TestComplete displays the red frame around the objects that are under the mouse cursor. If you move the cursor over a table’s cell, TestComplete will only highlight this cell, not the table. To choose the table, place the cursor on the table’s border until TestComplete draws the red frame around the table. -
Close the Select Object dialog with the OK button. You will return to the Edit Parameter dialog.
-
Close the Edit Parameter dialog with the OK button. You will return back to the Operation Parameters wizard.
The name of the select HTML table will be shown as the value of the object parameter
-
-
-
The reportDifference parameter specifies whether the checkpoint will log messages about the differences to the test log. If this parameter is
true, the checkpoint will post messages to the log. If the parameter isfalse, the differences will not be reported automatically. -
Click Finish to close the wizard and to add the operation to the test.
| See also |
| HTML Table Checkpoints | Creating HTML Table Checkpoints in Scripts |
