Creating Static Decals
From Decal Framework
|
Creating Static Decals
|
|
Creating Static Decals
1. Open your project. If you don't imported yet Decal Framework in you project do it using page Installation.
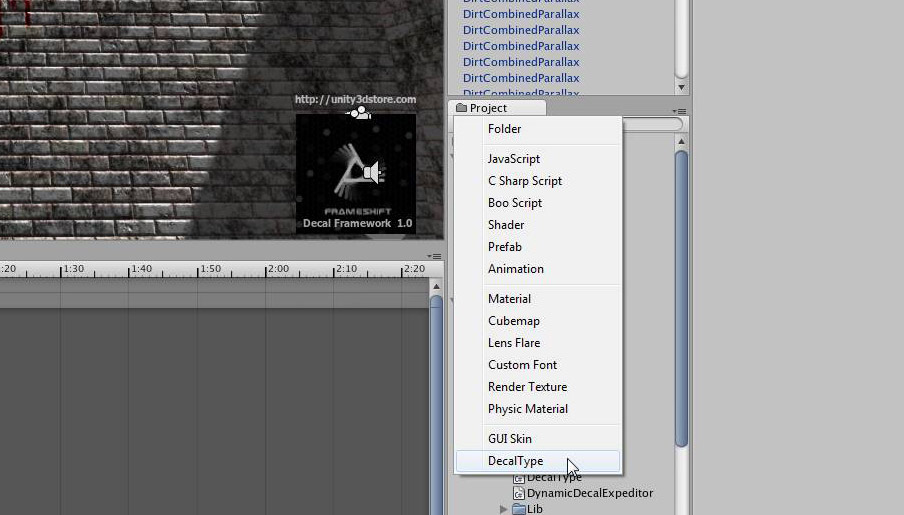
2. Create decal as prefab using menu item Project -> Create -> DecalType .
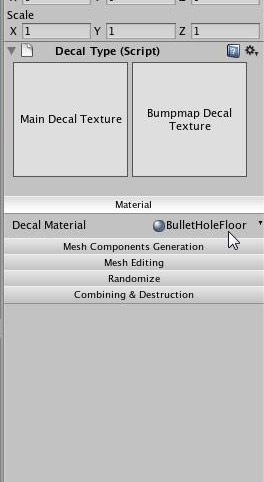
3. Select material for decal.
4. In top of Inspector will be shown textures that belong to decal material. This works only with _MainTex и _BumpMap textures.
5. Decal parameters grouped it categories click on button to expand.
6. Instanse decal prefab into scene.
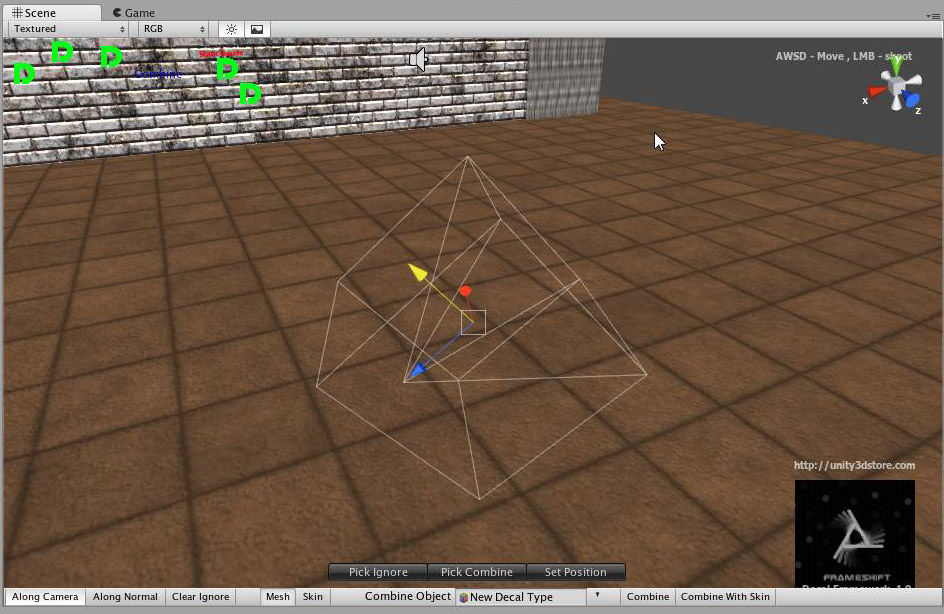
7. Set position and orientation of decal using one click position system or standart unity tools. For enter in one click position press Set Pisition. Then click onto collider. You can also use hotkeys. Hold down "D" , then click onto collider.
8. Using standart unity scale handle setup size of decal.
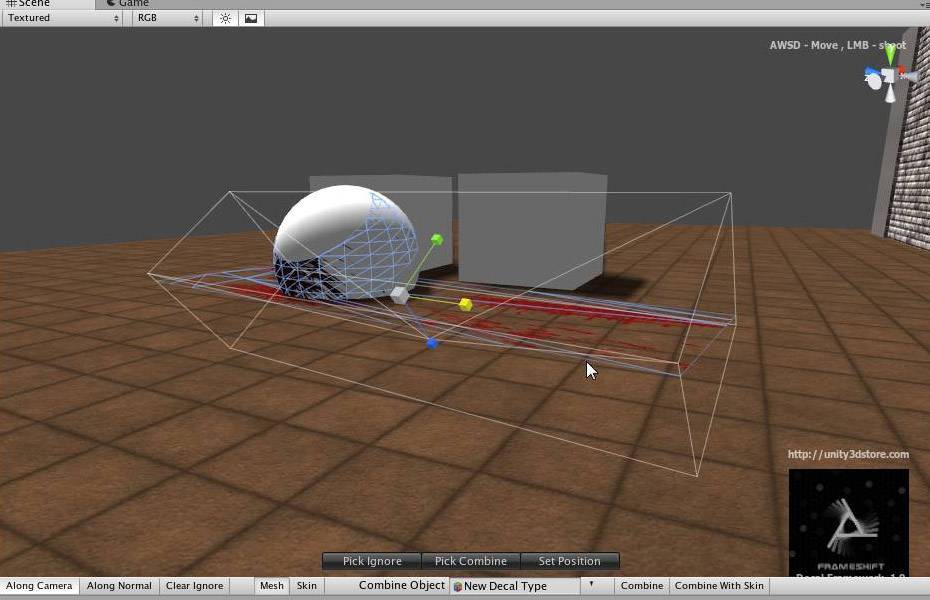
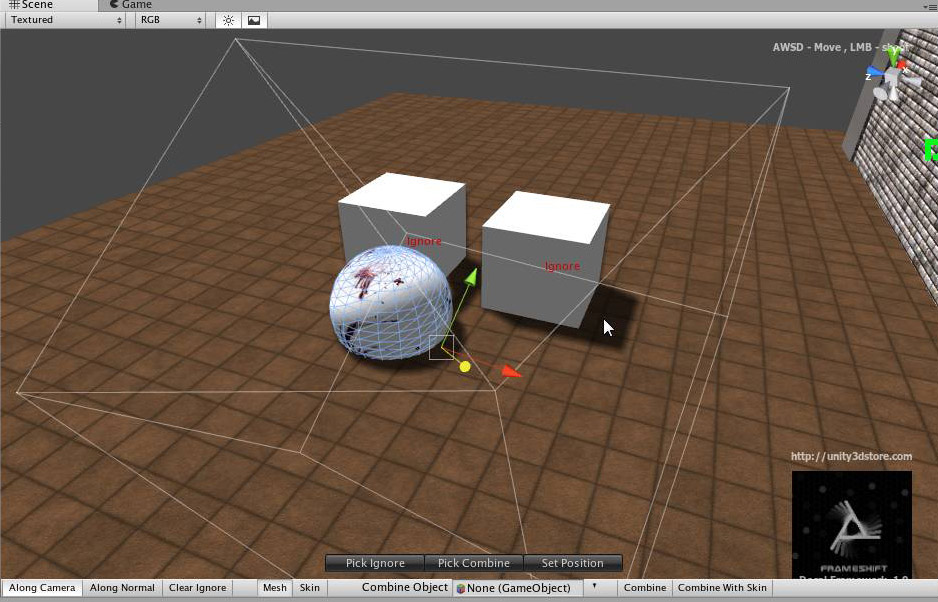
9. Select ignore objects. Enter to ignore mode press Pick Ignore. Select objects that should not be taken into acount. You can also use hotkeys. Hold down "D+C" , then select objects. Click once more in object if you want to remove it from ignore list. Ignored objects marked "Ignore".
10. Create another decals.

11. Now time to combine decals. Enter to select combine object mode press Pick Combine. Click onto object,the object will be marked "Combine" . Click once more if you want to discard selection. You also can use hotkeys. Hold down "D+S" and selec object.
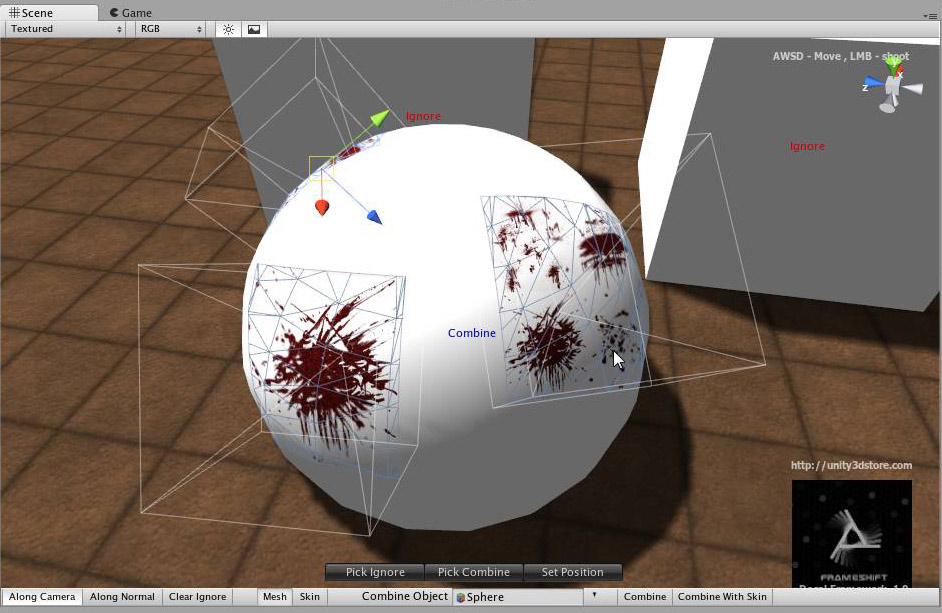
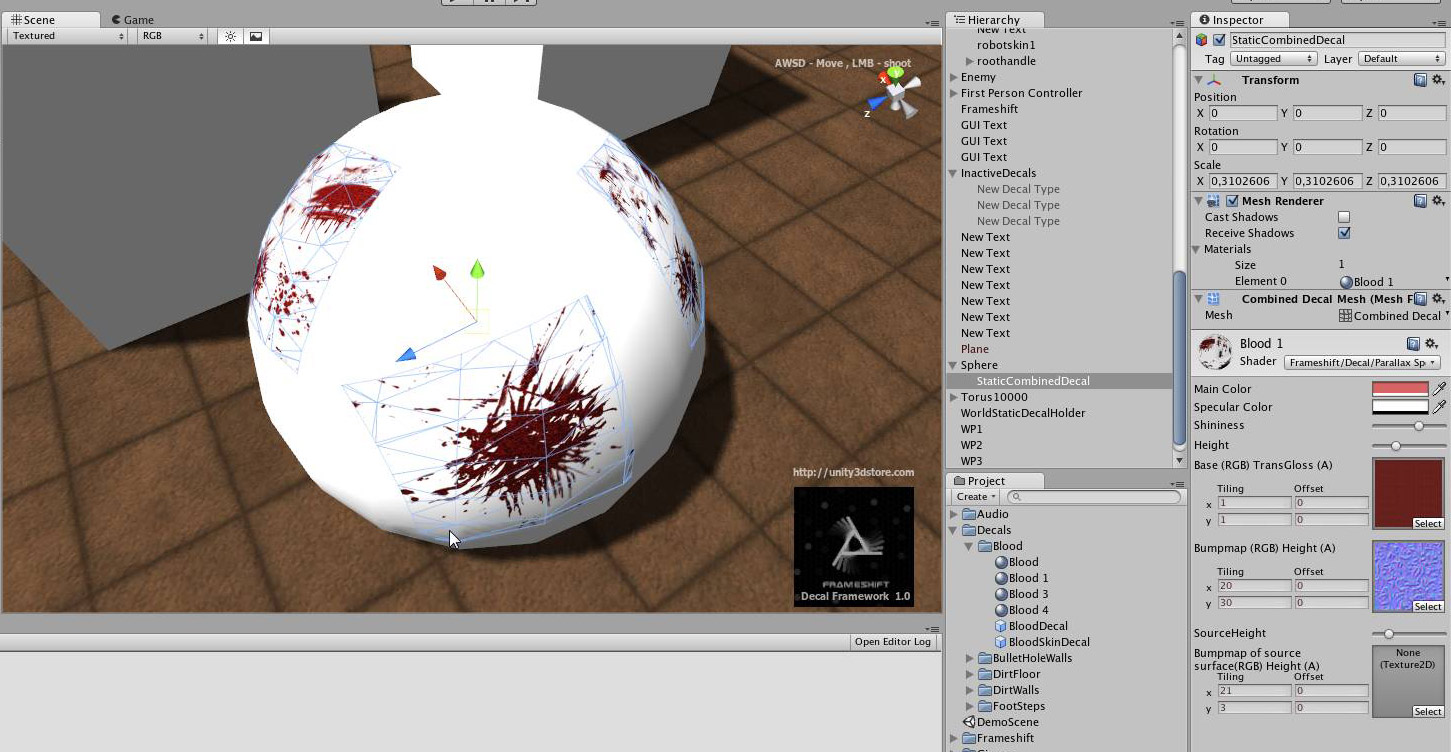
12. For combine decals press Combine. Chose will be decals destroyed or not. If you chose "NO" than decals will be enable = false and send to group InactiveDecals. After combining hierarhy of object will be as shown
Copyright 2010 Frameshift